
How to Replace 6601ER1006G Water Level Pressure Switch on LG Washers — Step-by-Step
Always unplug the washer before accessing internal components. The pressure switch area is near live electrical connections.
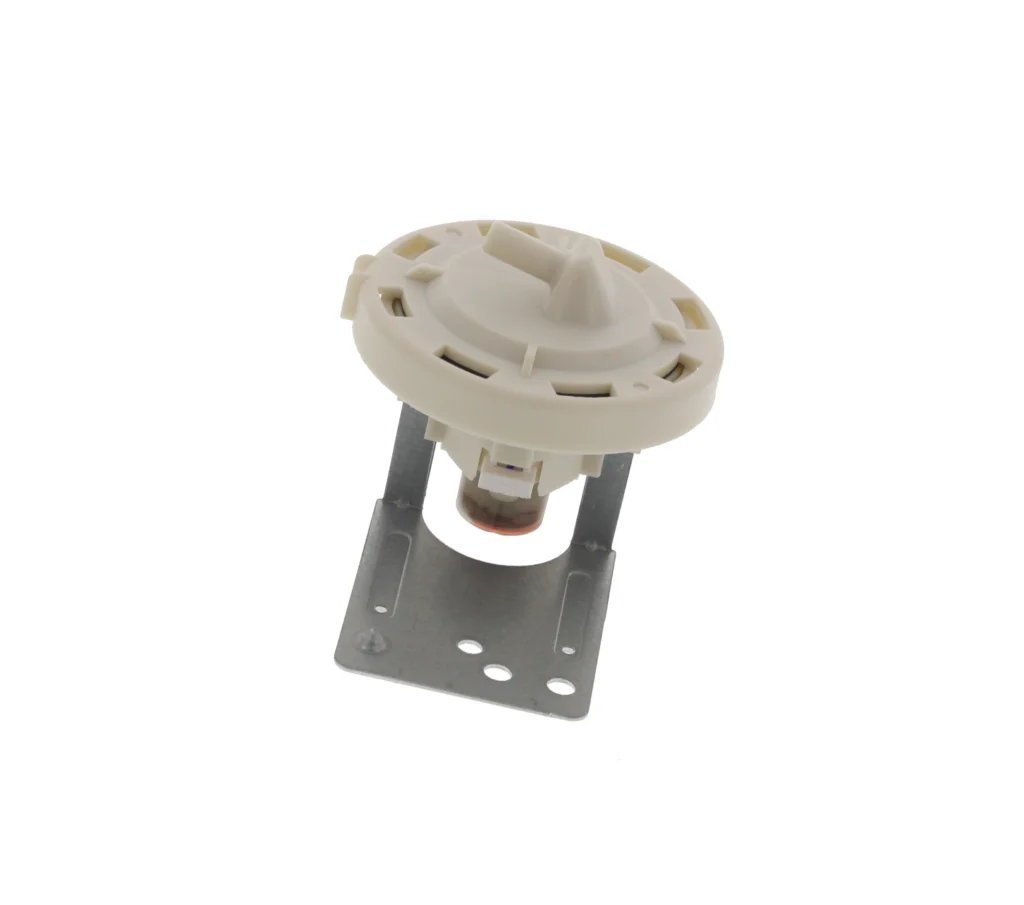
Your LG washer just flooded your laundry room floor — again. The drum's so full it won't even start the spin cycle. Or maybe it's the opposite problem: the washer fills for two seconds then stops, leaving you with barely-damp clothes. Both issues point to the same culprit: a failed water level pressure switch (part 6601ER1006G). This small sensor tells your washer when it's got enough water, and when it fails, all hell breaks loose.
The pressure switch monitors water levels through an air pressure tube connected to the tub. When water fills the drum, air pressure increases in the tube, signaling the switch to stop the fill cycle. After 5-8 years of use, the diaphragm inside wears out or calcium deposits gum up the mechanism. Good news: this is one of the easiest washer repairs you'll tackle.
What You Need Before Starting
- Phillips screwdriver
- Flathead screwdriver (for wire harness clip)
- Needle-nose pliers
- Towel (for residual water)
- Replacement 6601ER1006G switch
Time Required: 20-30 minutes
Difficulty: EASY
This repair works on dozens of LG front-loaders including WM2077CW, WM2450HRA, WM2688HNM, WM3470HVA, and WM3988HWA. Check your model number against the compatibility list on the product page.
Safety First
Unplug the washer completely before starting. The pressure switch sits near live electrical connections on the control board area. Even though you're not working directly with high-voltage components, water and electricity don't mix. Also, turn off the water supply valves behind the machine — you won't disconnect the fill hoses, but it's smart practice anytime you're working on washer internals.
Step 1: Access the Top Panel
Remove the detergent dispenser by pulling it straight out until it stops, then pressing the release tab in the center. Set it aside. Now locate the two Phillips screws at the back edge of the top panel (you'll see them once the dispenser's out). Remove these screws, then slide the entire top panel toward the back of the machine about an inch. Lift the front edge up and off. The pressure switch is mounted on the right side of the control panel area — you'll see a small white or gray box with wires and a clear air tube attached.
Step 2: Disconnect the Air Pressure Tube
The clear plastic tube running from the tub to the switch just pulls off — grip it close to the switch connection and pull straight off with a slight twisting motion. Sometimes these tubes get brittle and crack. Inspect yours carefully. If you see any cracks or the tube feels stiff, replace it (it's cheap and prevents future headaches). A pinhole leak in this tube causes the exact same symptoms as a bad switch.
Step 3: Remove Wire Harness and Mounting
The wire harness has a locking clip — press the tab with your thumb while pulling the connector straight off. Don't yank on the wires themselves. The switch is held in place by a single mounting bracket or clip. On most models, you'll twist the switch counterclockwise about a quarter-turn, then pull it out of the mounting bracket. Some versions use a simple snap-fit clip you squeeze to release.
Step 4: Install the New 6601ER1006G Switch
Position the new switch in the mounting bracket and twist clockwise to lock (or press until it clicks, depending on your bracket style). Push the wire harness connector on firmly until you hear it click — this is critical. A loose connection here causes intermittent problems that'll drive you crazy. Finally, push the air pressure tube onto the barb fitting on the switch. Push it on at least 3/4 inch — it should feel secure, not loose.
Step 5: Reassemble and Test
Slide the top panel back into position (front edge first, then slide forward). Reinstall the two back screws and snap the detergent dispenser back in. Plug the washer back in and turn on the water supply. Run a small load or a rinse cycle and watch the initial fill. The washer should fill to the normal level and stop on its own — no overflowing, no stopping too early. If it still overfills slightly, the air tube might have water in it. Unplug, remove the tube, blow it clear, and reconnect.
Testing After Installation
Start with an empty test cycle so you can observe the fill behavior. Normal fill time is 4-6 minutes depending on your water pressure. The washer should stop filling well before water reaches the door seal — you shouldn't see water near the glass. If the machine underfills, check that the air tube is pushed fully onto both ends (tub and switch). An air leak anywhere in that system throws off the pressure reading.
Frequently Asked Questions
How do I know if the pressure switch is bad or it's the air tube?
Disconnect the air tube from the switch and blow into it — you should feel slight resistance but air should pass through. If it's completely blocked, the tube or tub connection is clogged with detergent residue. If the tube's clear but you're still having fill issues, the switch itself is faulty. You can also test the old switch with a multimeter, but honestly, for $20-30, just replace it if you're already this far into the repair.
Can I use 6601ER1006E instead of 6601ER1006G?
Yes, they're functionally identical. LG updated the part number but the switches are interchangeable. The 6601ER1006G also replaces older numbers like 6600FA1704X. Same mounting, same connections, same pressure calibration. The replacement part from Heima works across all these variations.
My washer overfilled once but now seems fine — should I still replace the switch?
Pressure switches don't heal themselves. If it failed once, it'll fail again, probably at the worst possible time (like when you're not home). The diaphragm inside develops micro-tears that get worse with each cycle. Replace it now while you're thinking about it — waiting just means you'll be dealing with another flood later, possibly with water damage to your floors or the washer's electronics.
Inspect the air pressure tube carefully — a cracked or kinked tube causes the same symptoms as a bad switch. Replace it if it's brittle or damaged.
Need the part for this repair?
6601ER1006G · In Stock · Ships next business day