
How to Replace 6600JB3001C Dispenser Micro Switch on LG Kenmore Refrigerators — Step-by-Step
Disconnect the dispenser wire harness before removing the switch to prevent accidental activation during the repair.
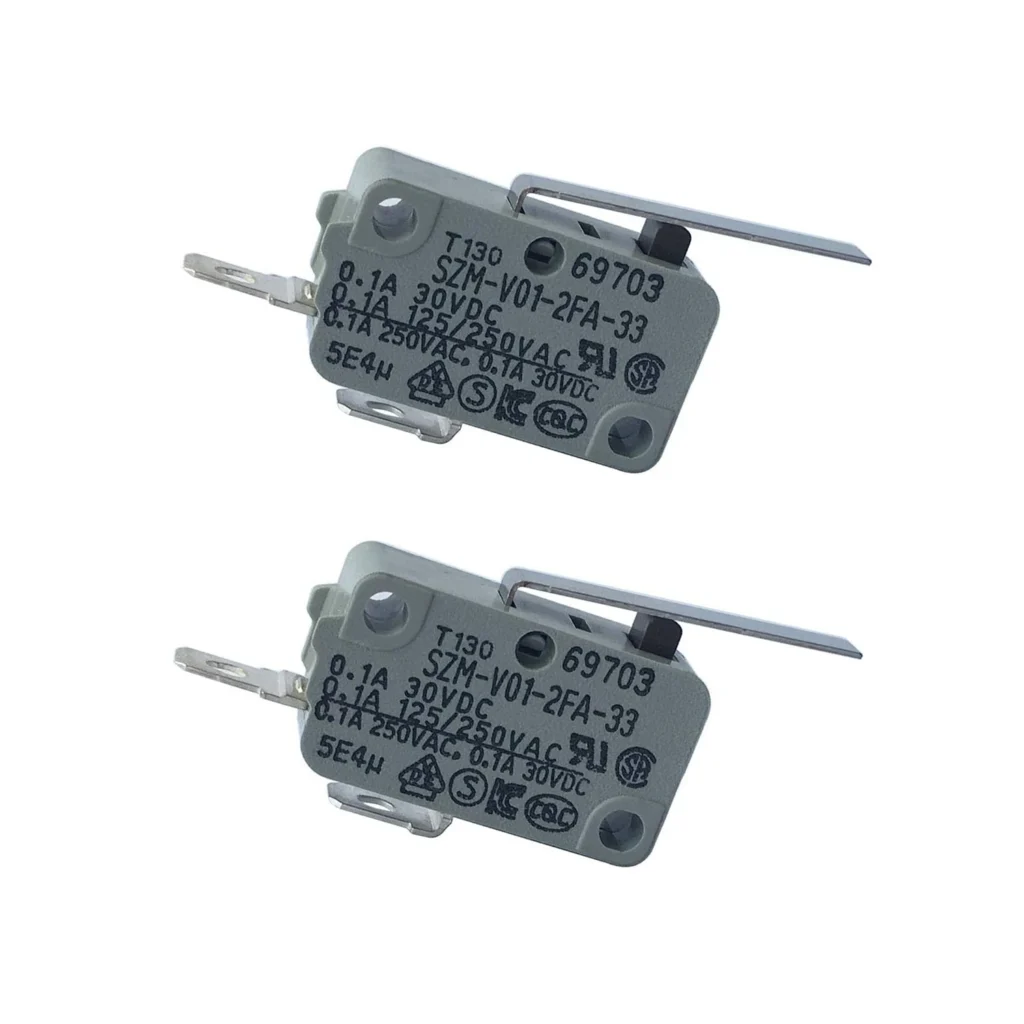
You press the ice lever and nothing happens. Or worse — you barely touch it and ice keeps dumping into your glass until you're scrambling to pull it away. On LG and Kenmore french door refrigerators like the LMXS28626S or LFXS30796S, these symptoms point to a worn-out dispenser micro switch. This tiny switch — part number 6600JB3001C — tells your fridge when to start and stop dispensing ice or water. When it fails, you're stuck with either no response or continuous dispensing.
What You Need Before Starting
This repair takes about 20-30 minutes and doesn't require pulling the refrigerator out from the wall. You'll need:
- Phillips head screwdriver
- Flathead screwdriver (for prying trim panels)
- Flashlight or headlamp
- Work gloves (optional, for grip on tight panels)
Difficulty: Moderate — You'll need to remove the dispenser panel, but no electrical expertise required.
Estimated Time: 20-30 minutes
Safety First
You don't need to unplug the refrigerator for this repair since you're not working near high-voltage components, but I always disconnect the ice maker's wire harness before removing the old switch. This prevents any accidental activation while your hands are inside the dispenser housing. Keep a towel handy — there's usually a small amount of water in the dispenser tubing that may drip when you remove panels.
Step 1: Remove the Dispenser Control Panel
Open the left refrigerator door fully. Look for two small Phillips screws at the top of the dispenser control panel — they're usually hidden under the top edge or behind small decorative caps. Remove these screws and set them aside. Gently pull the panel forward from the top, then lift up to unhook the bottom tabs. The panel should come away, still connected by a wire harness at the back.
Step 2: Disconnect the Wire Harness
Behind the control panel, you'll see a white or gray wire harness connector. Press the tab on the connector and pull it straight out. Now you can set the control panel completely aside. You'll see the micro switch assembly mounted to the left side of the dispenser housing — it's the small plastic component with metal contact points.
Step 3: Remove the Old Micro Switch
The 6600JB3001C switch is held in place by a single Phillips screw and two plastic tabs. Remove the mounting screw first. Then carefully pry the switch housing away from the mounting bracket — you may need to wiggle it side-to-side while pulling forward. The actuator arm (the part the ice lever presses against) should slide out of its slot. If it's stuck, check for ice buildup or debris and clean the area before proceeding.
Step 4: Install the New 6600JB3001C Switch
Position your new switch so the actuator arm slides into the slot where the ice lever will make contact. You'll feel it click into place when properly aligned. Press the switch housing back against the mounting bracket until the plastic tabs engage, then reinstall the Phillips screw. Don't overtighten — the plastic housing can crack. Give the actuator arm a few test presses with your finger to confirm it clicks smoothly and returns to position.
Step 5: Reassemble the Dispenser Panel
Reconnect the wire harness to the back of the control panel — you'll hear a distinct click when it's fully seated. Position the panel so the bottom tabs align with their slots, then tilt the panel back into place. Reinstall the two top Phillips screws. Press around the edges of the panel to ensure it's flush with the door surface.
Testing After Installation
Close the refrigerator door and test both ice and water dispensing. Press the ice lever gently — it should start dispensing immediately and stop cleanly when you release. Try the water dispenser the same way. If ice or water continues flowing after you release the lever, the switch may not be fully clicked into its mounting bracket. Remove the panel again and check that the actuator arm moves freely and the mounting tabs are fully engaged.
Frequently Asked Questions
Will this switch work if my dispenser won't give me water either?
Yes. The 6600JB3001C controls both ice and water dispensing on LG french door models. If neither function works when you press the lever, this switch is likely your problem. However, if only water fails while ice works fine, check your water line and filter first.
Do I need to reset the refrigerator after replacing the switch?
No reset is needed. The switch is a simple mechanical component — once installed, it works immediately. If dispensing still doesn't work after replacement, verify the wire harness connection is fully seated and check that the ice maker itself is turned on.
My ice dispenser was overfilling glasses — will this fix it?
Absolutely. When the micro switch contacts wear out, they can stick in the "on" position, causing continuous dispensing even after you release the lever. A new switch restores the clean on/off operation. If overfilling continues after replacement, inspect the actuator arm area for ice buildup that might be keeping the switch pressed.
Test the actuator arm movement with your finger before reassembling — it should click smoothly and spring back to position every time.
Need the part for this repair?
6600JB3001C · In Stock · Ships next business day