
How to Replace 62-23543-01 Flame Sensor on Rheem Ruud Furnace — Step-by-Step
Turn off both power and gas supply before servicing. Wait 5 minutes after turning off gas before opening burner compartment to allow any residual gas to dissipate.
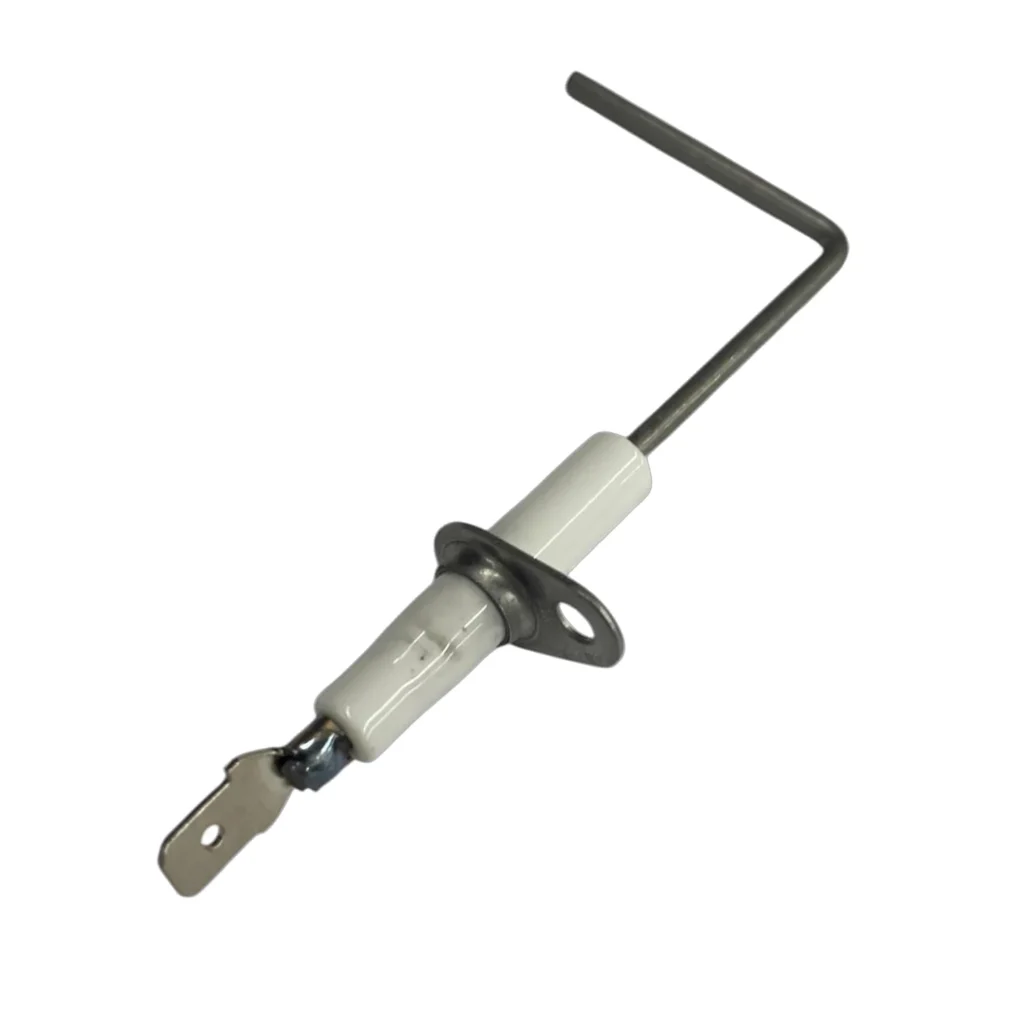
Your Rheem furnace fires up for three seconds, then shuts down. The blower keeps running but there's no heat. You reset it once, twice, three times — same thing. This is the textbook symptom of a failed flame sensor, and the 62-23543-01 is one of the most common culprits in Rheem, Ruud, and WeatherKing gas furnaces.
The flame sensor is a thin metal rod that sits in the burner assembly. Over time, it builds up a coating of carbon and oxidation that prevents it from detecting the flame properly. When the control board doesn't get the signal that there's a flame, it shuts everything down as a safety measure. You'll burn through igniters trying to relight a furnace that actually has a perfectly good flame — the sensor just can't see it anymore.
What You Need Before Starting
Tools required:
- 1/4" nut driver or socket
- Small flat-head screwdriver
- Wire brush or fine-grit sandpaper (for cleaning the old sensor first, if you're troubleshooting)
Repair time: 15-20 minutes
Difficulty: EASY
Safety First
Turn off the power to your furnace at the breaker or disconnect switch. Turn off the gas supply valve on the gas line leading to the furnace — this is usually a yellow or red handled valve. Wait five minutes before opening the burner compartment to let any residual gas dissipate. You're working around the burners and gas valve, so don't skip this step.
Step 1: Access the Burner Assembly
Remove the lower access panel from your furnace. Most Rheem models have a panel that either slides up and out or is held by two screws at the bottom. You'll see the burner assembly with blue flames when the furnace is running. The flame sensor is a thin metal rod (usually 1/8" diameter) positioned right in the path of the flame, mounted on a bracket near the burners.
Step 2: Disconnect the Flame Sensor Wire
Locate the single wire connected to the flame sensor. It's typically a white or blue wire with a spade connector. Pull the connector straight off — don't yank on the wire itself. If it's stuck from corrosion, wiggle it gently side to side while pulling. Note which side the connector faces for reassembly.
Step 3: Remove the Mounting Screw
The 62-23543-01 sensor is held in place by a single 1/4" hex-head screw through a mounting bracket. Use your nut driver to remove this screw completely. Keep track of the screw — they're easy to drop into the burner compartment. The sensor will slide out of the bracket once the screw is removed. If it's been in there for years, you might need to wiggle it slightly to break it free from corrosion.
Step 4: Install the New 62-23543-01 Sensor
Slide the new sensor into the mounting bracket, positioning it so the sensing rod extends into the flame path exactly where the old one was. The rod should be roughly 1/2" to 3/4" into the burner flame area. Thread the mounting screw back in and tighten it snugly — don't over-torque it or you'll crack the ceramic insulator on the sensor. Reconnect the wire connector, making sure it clicks or seats fully.
Step 5: Test the System
Replace the burner access panel. Turn the gas valve back on. Restore power to the furnace at the breaker. Set your thermostat to call for heat, at least 5 degrees above room temperature. Watch through the burner viewing window (if your model has one) or listen for the sequence: blower starts, igniter glows, gas valve clicks, burners light. The furnace should fire up and stay running. If it shuts down after a few seconds, double-check that the wire connector is fully seated and the sensor rod is positioned in the flame.
Testing After Installation
Let the furnace run through a complete cycle — at least 10 minutes. It should ignite, heat your home, and shut off normally when the thermostat is satisfied. Check that the sensor wire hasn't fallen off during operation. If you're still getting short cycling (starts then stops), verify you've got the correct replacement part. The 62-23543-01 replaces 62-23543-02, 62-23543-03, and 62-23543-04, so it's backward compatible with multiple Rheem model series including RGDG, RGFD, RGLG, RGPH, RGPJ, and dozens of others.
Frequently Asked Questions
How often should I replace the flame sensor on my Rheem furnace?
Flame sensors don't have a set replacement interval — they fail when the sensing rod gets too corroded or coated with carbon deposits to work properly. Most last 5-10 years. However, you can extend their life by cleaning the rod annually with fine-grit sandpaper or a wire brush during your furnace maintenance. If cleaning doesn't fix a short-cycling issue, it's time to replace it.
Can I use 62-23543-01 if my furnace originally had 62-23543-02 or 62-23543-03?
Yes. The 62-23543-01 is the current replacement part that supersedes 62-23543-02, 62-23543-03, and 62-23543-04. They're electrically identical and mechanically interchangeable. Rheem consolidated the part numbers, but the sensor works exactly the same across all those part revisions.
Why does my furnace still short-cycle after replacing the flame sensor?
If you've confirmed the new sensor is properly positioned in the flame and the wire connection is solid, check the grounding. The flame sensor works by conducting microamps of current through the flame to ground — if there's a grounding issue in your furnace, it won't sense properly. Also verify your burners are clean and producing a proper blue flame. A weak yellow flame won't conduct enough current. Finally, check that your igniter is working correctly — if the flame is intermittent, the sensor will do its job and shut the system down.
When positioning the new sensor, make sure the sensing rod extends into the flame path exactly where the old one was positioned — typically 1/2" to 3/4" into the burner area. Too far in or too far out will cause detection problems.
Need the part for this repair?
62-23543-01 · In Stock · Ships next business day