
How to Replace 5301EL1001J Heating Element Assembly on LG Dryer — Step-by-Step
Disconnect power completely before starting. Wait 10 minutes after unplugging to allow capacitors to discharge. 240V dryers carry lethal voltage.
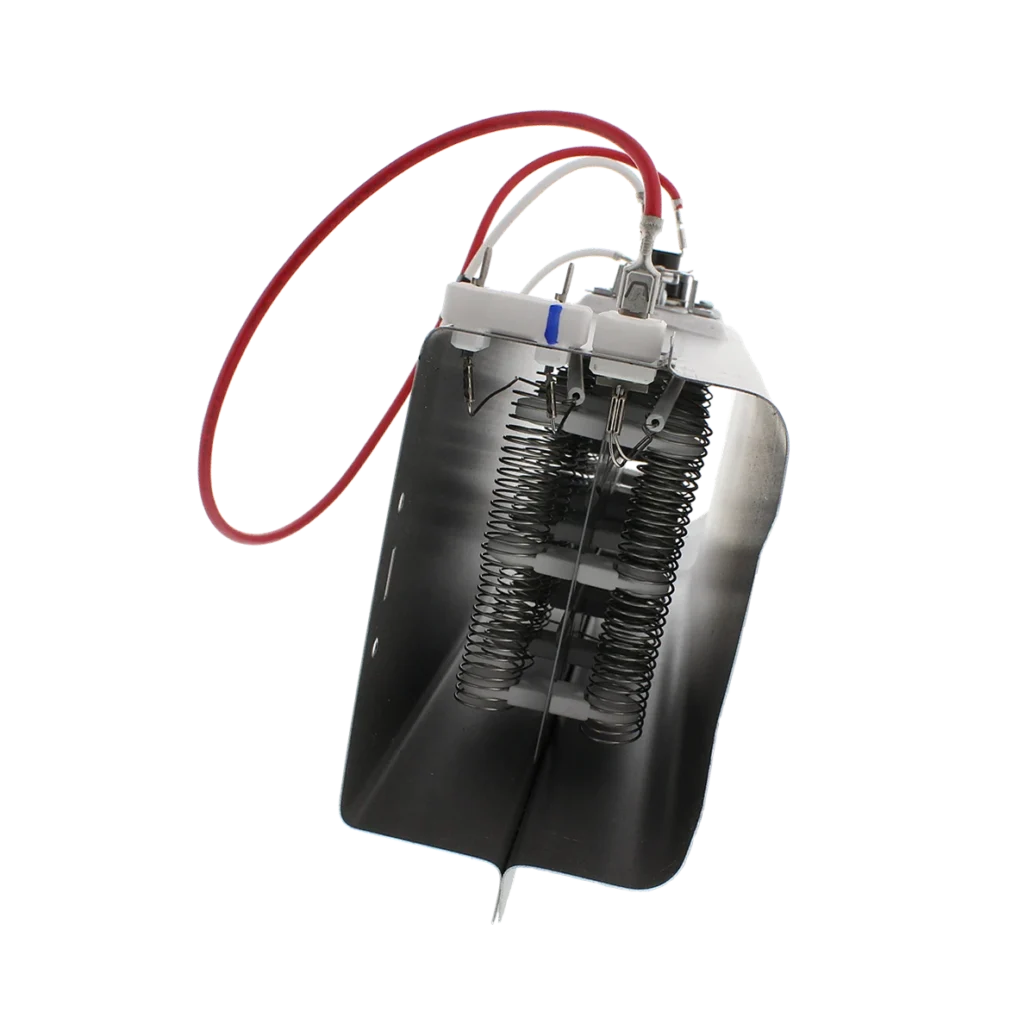
Your DLEX3875W keeps tripping the breaker, or maybe your DLE2050W is running way too hot and scorching clothes. Pop open that rear panel and you'll probably see the same thing: a heating element with visible burn marks or breaks in the coil. One homeowner put it perfectly: "Replaced obviously burnt element with element assembly. Works beautifully now." That's exactly what we're doing today with the 5301EL1001J heating element assembly.
What You Need Before Starting
This is one of the easier dryer repairs you'll tackle. Here's your shopping list:
- Phillips screwdriver
- Flat-head screwdriver
- Needle-nose pliers
- Work gloves (those sheet metal edges are sharp)
- Your new 5301EL1001J heating element assembly
Time commitment: 15-30 minutes
Difficulty: Easy — perfect first repair
Safety First
Unplug the dryer completely. Not just the control panel — yank that power cord from the wall outlet. If you've got a 240V dryer (most are), you're dealing with serious voltage that'll knock you flat. Wait 10 minutes after unplugging to let any capacitors discharge. Also, if you smell gas near your dryer, stop immediately and call a professional — some LG models are dual-fuel and you don't want to mess with gas connections.
Step 1: Access the Heating Element Housing
Move your dryer away from the wall so you can work comfortably. The heating element lives in a metal housing on the lower right rear panel. Remove the screws holding that rear access panel — usually 4-6 Phillips screws around the edges. Set the panel aside. You'll see a rectangular metal box with wires attached — that's your heating element housing.
Step 2: Disconnect and Remove the Old Element
Take a photo of the wire connections before you touch anything. The heating element on models like the DLE2301W and DLEX2501V has two wire connectors and a grounding wire. Pull the connectors straight off — don't yank on the wires themselves. Use your pliers if they're stuck. Now unscrew or unclip the housing (depends on your exact model, but it's typically two screws or spring clips). Slide the entire heating element assembly out. If it's burnt, you'll see it immediately.
Step 3: Install the New 5301EL1001J Element
Slide your new element assembly into the housing where the old one came out. Make sure the coil isn't touching the metal housing walls anywhere — that causes shorts and tripped breakers. The element should sit centered in its supports. Secure the housing with those screws or clips you removed earlier. Don't overtighten; you're just holding it in place, not crushing it.
Step 4: Reconnect Everything
Push those wire connectors back onto the terminals firmly until you hear a click. Check your photo to make sure you've got the right wires on the right terminals. Reattach the grounding wire. Give each connection a gentle tug — if it slides off, it wasn't seated properly. Replace the rear access panel and secure all the screws.
Step 5: Test Your Repair
Plug the dryer back in and push it into position. Run it empty on high heat for 5 minutes. It should heat up within 2-3 minutes. Open the door and feel the air — it should be hot but not scorching. If you had the "too hot" problem before, the new element with proper thermal limits should fix that. If it's working right, throw in a load of damp towels and run a full cycle to verify.
Testing After Installation
Watch for these signs everything's working correctly: Your dryer heats up within 2-3 minutes of starting, the exhaust air is hot (not just warm), clothes dry in a normal timeframe (40-60 minutes for a typical load), and most importantly, the breaker doesn't trip. If you're still tripping breakers, you might have a wiring issue beyond just the element. But in most cases, swapping this part solves it immediately.
Frequently Asked Questions
Will this element work on my Kenmore dryer?
Yes, if your Kenmore dryer was made by LG (most 796 series models). The 5301EL1001J replaces AP4439759, PS3527791, and several other part numbers. Check the compatible models list — it covers dozens of LG and LG-made Kenmore dryers including the DLE5955W, DLEX3001W, and DLE3777W series.
Why does my dryer keep tripping the breaker?
A heating element that's touching the metal housing or has internal shorts draws excessive current and trips the breaker. That's actually your electrical panel protecting you from a fire hazard. Replacing the element with a new 5301EL1001J assembly eliminates those shorts and stops the tripping.
Can I test the old element to confirm it's bad?
Absolutely. Set your multimeter to ohms and test across the element terminals. You should get 10-50 ohms of resistance. Infinite resistance means it's open (broken coil). Zero resistance or very low readings mean it's shorted. Either way, time for a new element. But honestly, if you've got visible burns or breaks in the coil, testing's not really necessary — it's toast.
Take a photo of wire connections before disconnecting anything. Makes reassembly foolproof.
Need the part for this repair?
5301EL1001J · In Stock · Ships next business day