
How to Replace 5301EL1001A Dryer Heater Assembly on LG Kenmore — Step-by-Step
Unplug dryer completely before repair. Electric dryers use 240V power. Turn off gas supply for gas models.
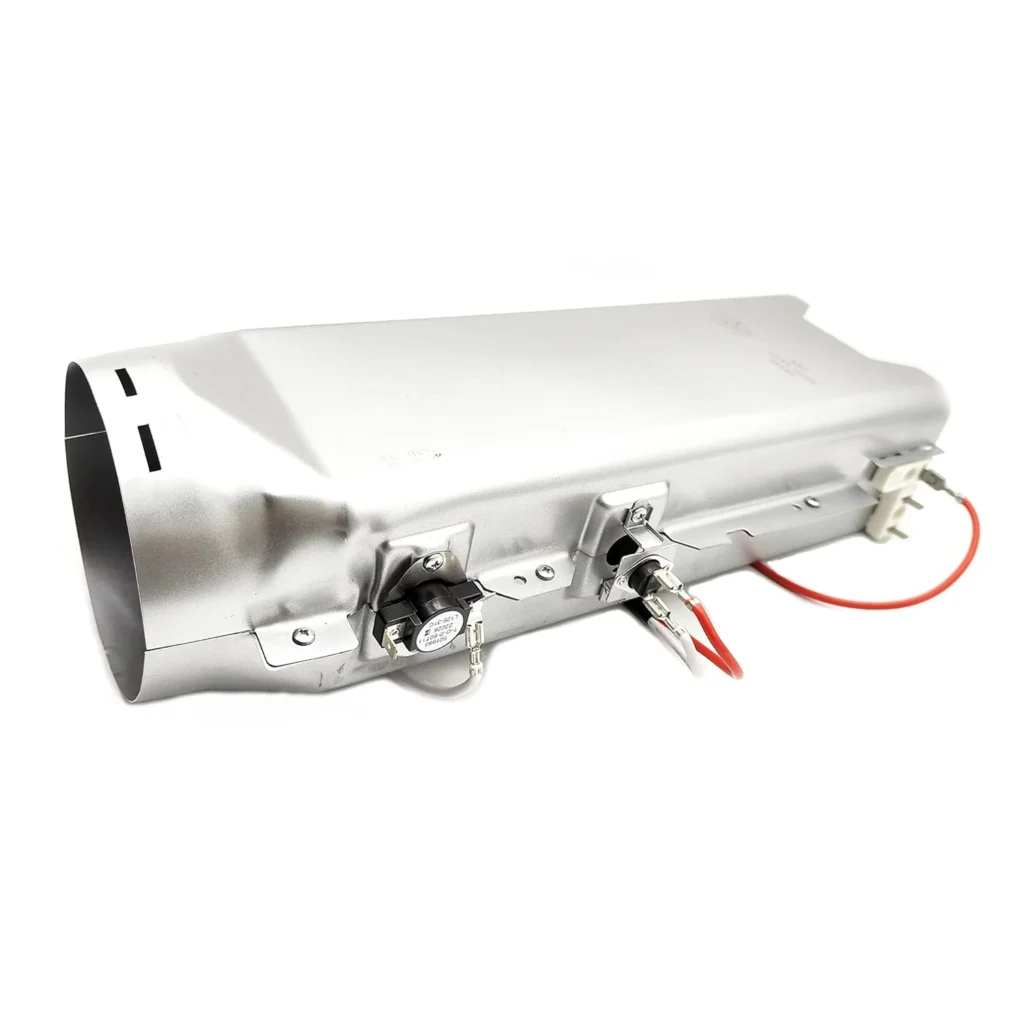
You toss a load of wet towels into your LG dryer, hit start, and return an hour later to find them still damp. The drum's spinning, you hear the motor running, but there's zero heat coming from inside. This is the classic symptom of a failed heater assembly — and on models like the DLE5977W or DLE2512W, the 5301EL1001A heating element is almost always the culprit when your dryer stops producing heat.
The heater assembly in your LG or Kenmore dryer generates the hot air that actually dries your clothes. When it burns out from normal wear and tear, your dryer becomes nothing more than an expensive tumbler. The good news? This repair doesn't require an appliance tech, and you can have your dryer heating again in under an hour.
What You Need Before Starting
Gather these tools before you begin:
- Phillips screwdriver
- Flathead screwdriver
- 1/4-inch nut driver
- Needle-nose pliers
- Work gloves (the metal edges are sharp)
- Flashlight or headlamp
Repair Time: 45-60 minutes
Difficulty Level: Moderate
This repair requires removing the front panel of your dryer and disconnecting wire terminals. If you've never worked inside a dryer before, it'll take the full hour. Second time around? You'll knock it out in 30 minutes.
Safety First
Warning: Unplug your dryer completely before starting this repair. Electric dryers use 240-volt power — you don't want any part of this live while you're working inside. If your dryer is hard-wired, flip the breaker at your electrical panel. For gas dryers, turn off the gas supply valve behind the unit. Even though you're replacing the electric heating element, gas models still use this same heater assembly for supplemental heat.
Step 1: Access the Heater Assembly Housing
The heater assembly sits in the lower front right corner of your dryer cabinet. Start by removing the lint screen, then use your Phillips screwdriver to remove the two screws hiding underneath it. Next, remove the screws along the top edge of the front panel — there's usually two or three holding it in place. Lift the panel up slightly and pull it toward you to disengage the bottom clips. Set the panel aside where it won't get scratched.
Step 2: Disconnect and Remove the Old Heater Assembly
Now you'll see the cylindrical heater housing on the lower right side. It's a metal canister about 10 inches long. Use your phone to snap a photo of the wire connections before disconnecting anything — this'll save you guesswork during reassembly. The heater has three wire terminals: two for the heating coil and one ground. Pull the wire connectors straight off (they're friction-fit, no screws). Remove the two screws or the mounting bracket holding the assembly to the cabinet, then carefully slide the entire housing out.
Step 3: Install the New 5301EL1001A Heater Assembly
Before installing the new assembly, inspect the mounting area for lint buildup — this is a common fire hazard. Vacuum out any accumulated lint and wipe the area clean. Slide your new 5301EL1001A heater assembly into position and secure it with the mounting screws. Make sure it's seated flush against the cabinet. The housing shouldn't move or rattle when properly installed.
Step 4: Reconnect Wiring and Reassemble
Reconnect the three wire terminals to your new heater assembly, matching the positions from your reference photo. The wires should click firmly into place — if they feel loose, they're not fully seated. The ground wire (usually green or bare copper) attaches to the frame of the housing. Once all connections are secure, carefully reattach the front panel by hooking the bottom clips first, then pushing the top into place. Replace all screws, including the ones under the lint trap.
Step 5: Test the Repair
Plug your dryer back in and run a test cycle with a few damp towels. Within the first five minutes, open the door and feel inside — you should feel warm air. If your dryer heats up properly but shuts off after a few minutes, you might also have a clogged vent system causing the high-limit thermostat to trip. That's a separate issue, but one worth checking if your dryer's been taking too long to dry clothes even before it stopped heating entirely.
Testing After Installation
Run a full 30-minute cycle on high heat with a normal load of laundry. Your clothes should come out completely dry. Listen for any unusual sounds — the new heater assembly should operate silently except for the normal airflow noise. Check that the exhaust vent outside your house is blowing hot air. If you're getting heat but clothes still aren't drying efficiently, clean your entire vent duct from the dryer to the exterior vent hood.
Frequently Asked Questions
Will this heater assembly work on both electric and gas LG dryers?
Yes, the 5301EL1001A works on both electric and gas models. Gas dryers still use an electric heating element to supplement the gas burner and maintain consistent temperatures. Models like the DLE7177WM (electric) and DLG7177WM (gas) use the same heater assembly.
My dryer heats for a few minutes then stops — is the heater assembly bad?
Not necessarily. If your dryer heats initially but shuts off repeatedly, you likely have a thermal fuse or high-limit thermostat problem, often caused by restricted airflow from a clogged vent. The heater assembly itself doesn't cycle on and off — it either works or it doesn't. Check your vent system before replacing the heater.
How long should a dryer heater assembly last?
Most heater assemblies last 8-12 years with normal use. If yours failed sooner, it's often due to poor ventilation causing the element to overheat and burn out prematurely. After replacing the heater, make sure your dryer vent is clean and the duct run from the dryer to outside is as short and straight as possible. Those flexible foil ducts? They're lint traps waiting to happen — replace them with rigid metal ductwork.
Take a photo of wire connections before disconnecting anything to ensure correct reassembly.
Need the part for this repair?
5301EL1001A · In Stock · Ships next business day