
How to Replace 5221EA1009C Water Inlet Valve on LG Washer — Step-by-Step
Always unplug the washer and shut off water supply valves before beginning this repair. Residual water in hoses will spill during disconnection.
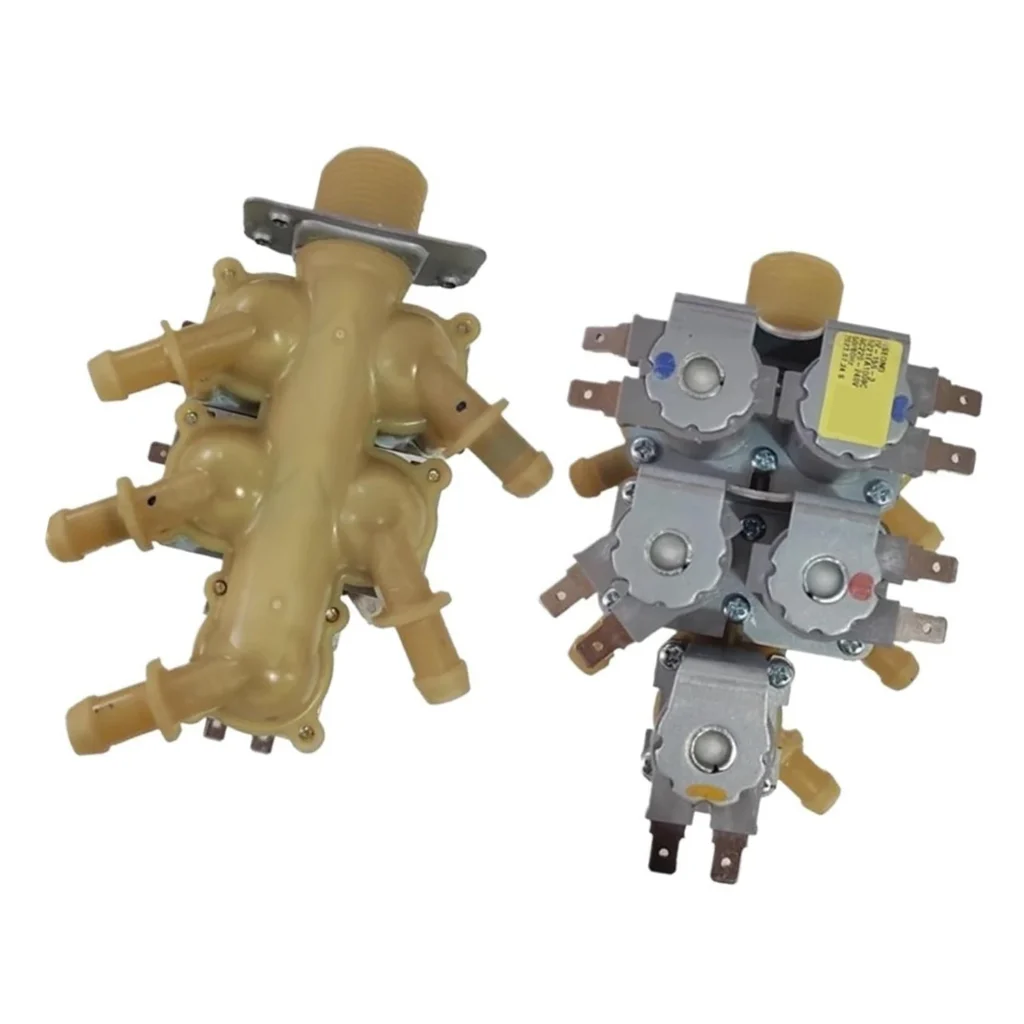
Your LG washer starts its cycle, but water trickles in slower than molasses — or doesn't come in at all. You've checked the hoses, confirmed the faucets are open, but the washer just sits there humming with an empty drum. Nine times out of ten, you're looking at a failed water inlet valve. The 5221EA1009C valve assembly controls water flow into your washer, and when those internal solenoids burn out or the screens clog beyond cleaning, replacement is your only option.
What You Need Before Starting
This repair is straightforward if you're comfortable working with basic hand tools and water connections. Here's what you'll need:
- Flathead screwdriver
- Phillips screwdriver
- Quarter-inch nut driver or socket wrench
- Adjustable pliers
- Towels or small bucket (for residual water)
- Work gloves (optional but recommended)
Repair Time: 30-45 minutes
Difficulty: MODERATE
Safety First
Unplug your washer completely before starting this repair. Turn off both hot and cold water supply valves behind the machine — you'll be disconnecting hoses, and you don't want unexpected water flow. Pull the washer away from the wall to give yourself working room. Keep towels handy because even with valves closed, you'll have residual water in the hoses and valve assembly.
Step 1: Access the Water Inlet Valve
The inlet valve sits at the back of your LG washer where the water hoses connect. You don't need to remove any panels for this repair. Disconnect both water supply hoses from the valve — expect some water to spill out, so position your towels. Use adjustable pliers if the connections are tight, but be careful not to strip the threads. Once the hoses are off, inspect the valve screens for debris. If they're completely clogged with sediment, that confirms your diagnosis.
Step 2: Disconnect Internal Hoses and Wiring
Open your washer's top or service panel to access the valve from inside. You'll see two or three internal hoses connected to the valve outlet ports — these feed water into the tub. Use your flathead screwdriver to release the hose clamps, then carefully pull the hoses off the valve ports. Water will drip out, so keep that bucket handy. Next, disconnect the wire harness from the valve solenoids. There's usually a locking tab — press it while pulling the connector straight off.
Step 3: Remove the Mounting Screws
The valve assembly is held to the washer's back panel with two or three quarter-inch screws. Use your nut driver to remove these mounting screws completely. Support the valve with your other hand so it doesn't drop when the last screw comes out. The valve should now be free from the washer. Take a moment to compare your old valve with the new 5221EA1009C — the mounting holes and port configuration should match exactly.
Step 4: Install the New 5221EA1009C Valve
Position your new valve assembly against the back panel, aligning the mounting holes. Thread the screws back in and tighten them snugly — don't overtighten, as you could crack the valve body. Reconnect the wire harness to the solenoids until you hear it click. Then reattach those internal hoses to the valve outlet ports and secure them with the clamps. Make sure each hose is pushed fully onto its port before tightening the clamp, or you'll have leaks on your first fill cycle.
Step 5: Reconnect Water Supply and Test
Thread your hot and cold supply hoses back onto the valve inlet ports. Hand-tighten first, then give them another quarter turn with pliers — just snug, not gorilla-tight. Turn the water supply valves back on and watch for leaks at the connections. Once you've confirmed no drips, plug your washer back in and run a quick rinse cycle. Water should flow into the drum at normal pressure. Listen for the valve solenoids clicking as they open — that's the sound of a properly functioning valve.
Testing After Installation
Run both hot and cold fill cycles to verify the valve is working correctly. Check all your connections — both external supply hoses and internal drain hoses — for any signs of moisture. The valve should fill the drum at the same rate it did when the washer was new. If you notice slow filling on just the hot or cold side, you might have a partially closed supply valve or a kinked hose. Make sure your washer is level; an unbalanced machine can stress water connections over time.
Frequently Asked Questions
Will this valve work on my specific LG washer model?
The 5221EA1009C is compatible with dozens of LG front-load and combo washer models, including F1103RDP, WD11VBS6, WD12VCS6, F1403RD, WM3499HVA, and many others. It directly replaces part number 5221EA1009R. Check your washer's model number (usually on a sticker inside the door or on the back panel) against the compatibility list on the product page to confirm fitment.
How do I know if my inlet valve has actually failed?
Common symptoms include no water entering the drum, extremely slow fill times (more than 10 minutes for a normal load), water continuing to flow even when the washer is off, or only hot or cold water working. You might also see error codes like OE (drainage error, sometimes misdiagnosed) or IE (water inlet error). If your water pressure is good and hoses aren't kinked, the valve's the culprit.
Can I clean the old valve instead of replacing it?
You can clean the inlet screens if they're clogged with sediment — just remove them carefully and rinse under running water. But if the solenoids themselves have failed (they burn out over time from mineral buildup), cleaning won't help. If the valve leaks from the body or doesn't open when powered, replacement is your only option. At around 30-45 minutes of work, swapping the valve is faster than troubleshooting a marginal one.
Before installing the new valve, check the inlet screens for debris and clean your supply hose filters. This prevents premature failure of your new valve.
Need the part for this repair?
5221EA1009C · In Stock · Ships next business day