
How to Replace 4387503 Bimetal Defrost Thermostat on Whirlpool Refrigerator — Step-by-Step
Unplug refrigerator before starting repair. Allow ice buildup to thaw before removing thermostat to avoid damaging evaporator coils.
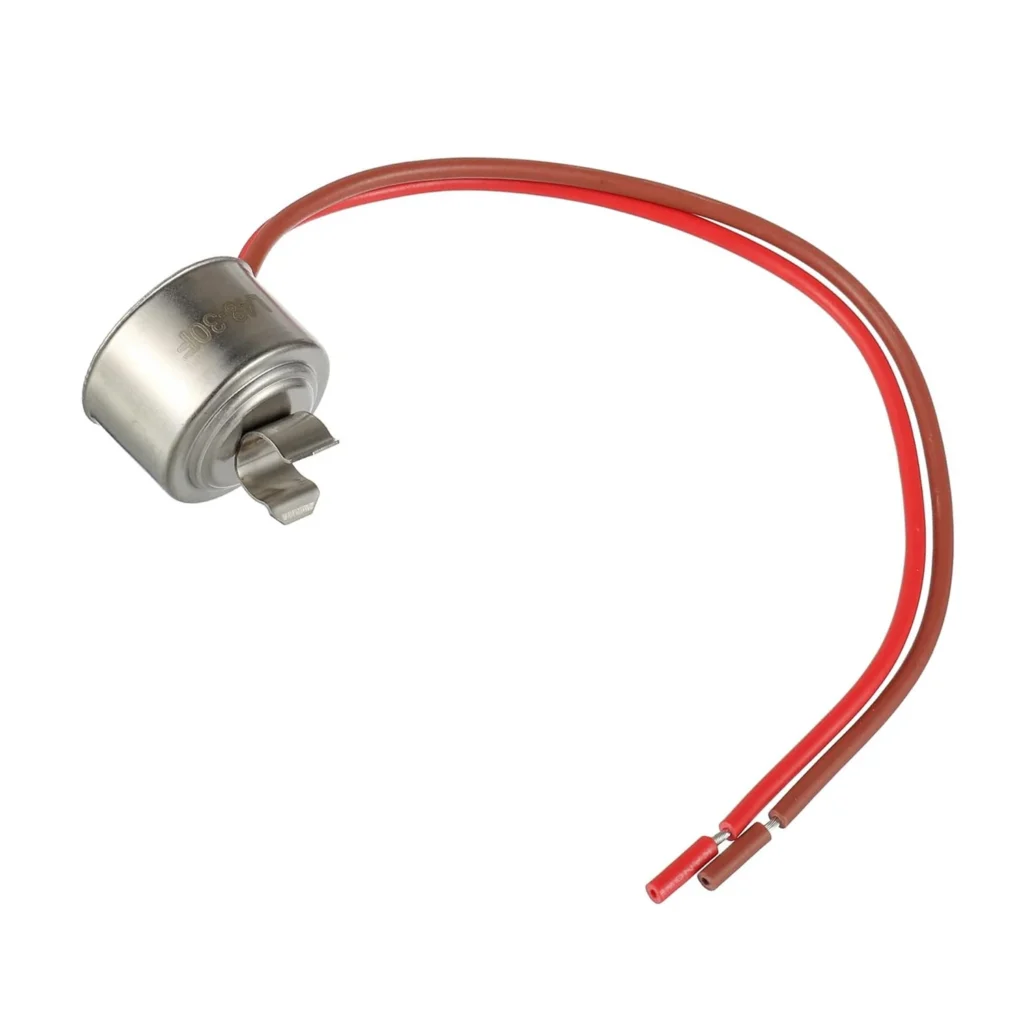
You open your Whirlpool refrigerator to find ice buildup on the back wall, or worse—your freezer's turned into a mini ice cave while your fridge section isn't cold enough. That's your defrost thermostat calling it quits. The 4387503 bimetal defrost thermostat is a small component that tells your refrigerator when to stop defrosting, and when it fails, you'll know it fast.
This repair works on dozens of Whirlpool, Kenmore, KitchenAid, and Maytag refrigerators including models like ET18NKXAW02, ET20DKXAB01, ET22DMXDN00, and 3VET19ZKBW00. If your model number starts with ET, 3ET, 3VET, or 4ET, there's a good chance this is your part.
What You Need Before Starting
- 1/4-inch nut driver or socket wrench
- Flathead screwdriver
- Needle-nose pliers
- Towels (for ice melt)
- Bucket or container
- Work gloves
Time Required: 45-60 minutes
Difficulty: Moderate
You'll need to access the freezer evaporator coils, which means removing the interior freezer panel. Not hard, just plan for some melting ice.
Safety First
Unplug your refrigerator before you touch anything. You're working near electrical components and potentially sharp metal edges. Water and electricity don't mix, so make sure you've got a good grip on that plug. If your fridge is built-in and unplugging isn't realistic, flip the breaker. Also, have towels ready—once you remove that freezer panel, any accumulated ice will start melting immediately.
Step 1: Empty the Freezer and Remove Interior Panel
Take everything out of your freezer. You'll need clear access to the back wall. Remove any shelves or drawers that are in the way. Look for screws along the edges of the interior back panel—usually 4 to 6 screws holding it in place. Use your 1/4-inch nut driver to remove them. Some models have plastic clips at the bottom; gently pry them loose with your flathead screwdriver. Once the screws are out, carefully pull the panel forward and set it aside.
Step 2: Locate the Defrost Thermostat
Now you're looking at the evaporator coils—the metal fins where frost builds up. The defrost thermostat is a small cylindrical component clipped or mounted directly to one of these coils, usually on the left side. It'll have two wire connectors attached. The 4387503 is about the size of a tube of lipstick with a metal probe that touches the coil. If there's heavy ice buildup, you might need to let things thaw for 20-30 minutes before you can access it properly.
Step 3: Disconnect and Remove the Old Thermostat
Pull the wire connectors straight off the thermostat terminals. They're friction-fit, so wiggle them gently if they're stubborn—don't yank the wires themselves. The thermostat body is held by a metal clip or bracket. Slide it out from the clip or remove the mounting screw if there is one. Keep track of exactly how it was positioned because the new one needs to make solid contact with the evaporator coil to sense temperature accurately.
Step 4: Install the New 4387503 Thermostat
Position your new thermostat exactly where the old one sat, with the metal sensing tube making firm contact against the evaporator coil. Snap it into the retaining clip or secure it with the mounting screw. Push the wire connectors onto the terminals until they click into place. Give each wire a gentle tug to confirm they're seated—loose connections here mean your defrost cycle won't work right, and you'll be back in here next month.
Step 5: Reassemble and Test
Line up the interior freezer panel and push it back into position. Replace all the screws you removed earlier, working from top to bottom. Don't overtighten—you're threading into plastic, and stripped holes mean a wobbly panel. Put your shelves and food back in. Plug the refrigerator back in and let it run for 24 hours. You should hear the compressor cycle normally, and more importantly, you shouldn't see ice buildup returning to the back wall.
Testing After Installation
After 24 hours, check the back wall of your freezer. It should be slightly frosty but not covered in thick ice. Your fridge compartment should maintain temperature between 37-40°F. If you've got a multimeter, you can test the thermostat before installation—it should show continuity when cold and open when it reaches about 20-25°F. But honestly, if you're seeing defrost problems and the old thermostat looks corroded or the wire terminals are burned, just replace it.
Frequently Asked Questions
How do I know if my defrost thermostat is bad or if it's the defrost heater?
If you've got heavy ice buildup on the evaporator coils and your freezer is too warm, it's likely the thermostat. If the ice is only on one section of the coils or you see a visibly broken heater element behind the panel, that's your heater. The thermostat is cheaper and easier to replace, so start there. You can test it with a multimeter—freeze it in ice water and check for continuity. No continuity when frozen? It's toast.
Will this work on my Kenmore refrigerator?
Yes, if your Kenmore model uses Whirlpool-manufactured parts. Most Kenmore refrigerators in the 253, 596, and 795 series use this exact thermostat. Check your model number against the compatibility list, or look up your current part number—if it's WP4387503, 2149641, or 4343917, this is your replacement.
Do I really need to unplug the fridge, or can I just work carefully?
Unplug it. Period. You're disconnecting electrical components while potentially surrounded by melting ice and metal surfaces. One slip with a screwdriver into a live wire terminal and you're having a very bad day. The 30 seconds it takes to unplug isn't worth the risk. Your food will be fine for an hour.
How often do these thermostats fail?
Typically 8-12 years, depending on how hard your fridge works. If you live somewhere humid or keep your freezer packed tight with minimal airflow, they can fail sooner. Once they go, they don't gradually fail—they just stop working, and your defrost cycle stops happening. That's when the ice buildup starts.
The metal sensing tube must make solid contact with the evaporator coil. If it's loose or positioned incorrectly, your defrost cycle won't work properly.
Need the part for this repair?
4387503 · In Stock · Ships next business day