
How to Replace 4036ER2003A Washer Tub Seal on LG and Kenmore Front-Load Washers — Step-by-Step
Unplug washer completely and shut off water supply before starting. Tub assembly is heavy — use caution when lifting.
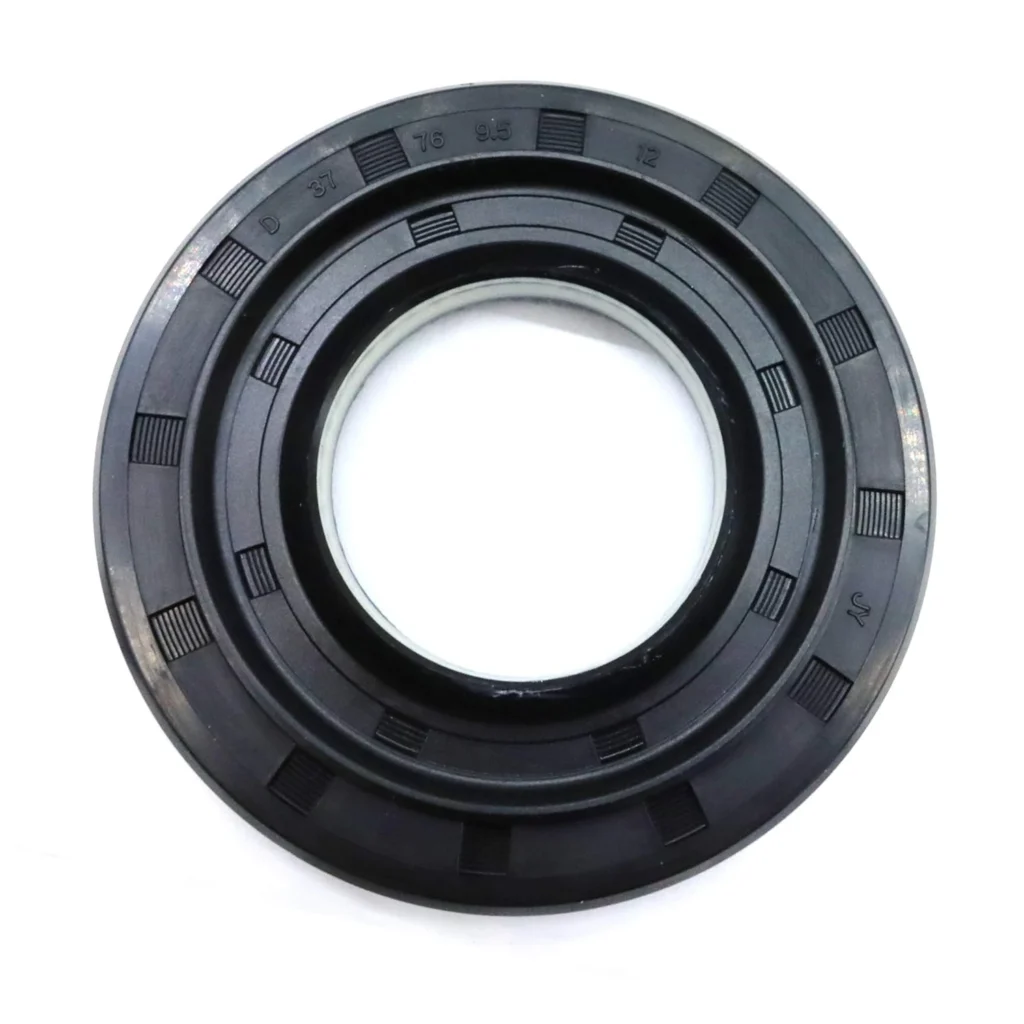
Water pooling under your LG front-load washer isn't normal. If you're noticing puddles after every cycle — or worse, catching a burning rubber smell during spin — your tub seal has likely failed. The 4036ER2003A sits between the outer tub and the bearing housing, and when it goes bad, water starts leaking into the bearings. That's when you get the smell, the noise, and eventually a dead washer if you ignore it.
This repair isn't quick, but it's doable if you're methodical. You'll need to disassemble the washer nearly completely to access the seal. Budget a Saturday morning and clear some workspace — you'll have parts spread out.
What You Need Before Starting
- Socket set (8mm, 10mm, 12mm sockets)
- Phillips and flathead screwdrivers
- Rubber mallet
- Spanner wrench or large channel locks
- Small pry tool or plastic putty knife
- Towels (you'll deal with residual water)
- Work gloves
Repair Time: 2-3 hours
Difficulty: Advanced
Safety First
Unplug the washer completely — don't just turn it off. You'll be working near the motor and electrical connections. Shut off both hot and cold water supply valves, then disconnect the hoses. Keep towels handy because water will drain out when you tip the machine. If your washer is still under warranty, check with LG before proceeding — this level of disassembly might void coverage.
Step 1: Remove the Top and Front Panels
Start at the back. Remove the two screws securing the top panel (usually 10mm), then slide it back about an inch and lift off. Next, pop open the detergent dispenser and remove the screws inside that compartment. You'll find two more screws hidden behind the dispenser tray. Remove the lower kick plate at the bottom front — it usually just snaps off. Open the door and locate the screws around the door boot clamp. You'll need to release this clamp (either a spring clamp or screw-type) to pull the boot seal back into the drum.
Step 2: Disconnect and Remove the Front Panel
Before pulling the front panel completely off, disconnect the door lock harness and any other wiring clips. Support the panel as you remove the final screws along the top edge. Set it aside carefully — you don't want to crack the plastic. Now you can see the outer tub assembly and drum. Take a photo of the wire routing with your phone. You'll thank yourself during reassembly.
Step 3: Access the Tub Assembly
Disconnect the drain pump hose, pressure switch hose, and any wiring connected to the outer tub. Remove the counterweights (heavy concrete blocks on top and sometimes front of the tub — they're bolted on). Disconnect the shock absorbers at the bottom of the tub. You'll need to remove the drive motor and belt. Once everything's disconnected, carefully lift the entire tub assembly out of the cabinet. It's awkward and heavy — get help if you need it.
Step 4: Split the Tub and Replace the Seal
Place the tub on a workbench. Remove the bolts around the tub's mating surface (they circle the entire perimeter). Gently pry the two halves apart using a flathead screwdriver or plastic tool — work your way around slowly. The old 4036ER2003A seal sits in a groove around the bearing housing. Pry it out carefully with a flat tool. Clean the groove completely — any old rubber or gunk will cause the new seal to leak. Press the new seal into place evenly. It should sit flush in the groove all the way around. Check that it's not twisted or pinched anywhere.
Step 5: Reassemble Everything in Reverse
Bolt the tub halves back together, following a star pattern to ensure even pressure. Don't overtighten — you'll crack the plastic. Reinstall the tub assembly into the cabinet, reconnect the shocks, counterweights, motor, belt, and all hoses. Route wiring exactly as it was (check your photos). Reattach the front panel, door boot, and secure all screws. Reinstall the top panel last.
Testing After Installation
Reconnect water supply and power. Run a rinse-and-spin cycle with no clothes. Watch underneath the washer for any leaks around the tub area during the spin cycle. Listen for unusual noises — if the bearing was damaged before you replaced the seal, you might still hear grinding. Check again after a full wash cycle with a load. If water appears, you may need to reseat the seal or check that the tub halves are bolted correctly.
Frequently Asked Questions
Will replacing just the seal fix my leaking washer?
If you caught it early, yes. But if water's been leaking past the seal for weeks, the bearing behind it is probably rusted and damaged. You'll hear a loud grinding or roaring during spin if that's the case. At that point, you need both the seal and bearing replaced. If your LG or Kenmore washer is making noise along with leaking, order a bearing kit along with the 4036ER2003A seal.
Can I reuse the old tub bolts when I reassemble?
Technically yes, but inspect them carefully. If any bolt threads are stripped or the heads are rounded, replace them. Some techs recommend replacing all tub bolts during this repair since you're already this deep into the machine. They're inexpensive and eliminate one potential failure point. Tighten them in a crisscross pattern to avoid warping the tub.
How do I know if this seal fits my specific washer model?
The 4036ER2003A is the correct seal for most LG and Kenmore front-load washers made between 2005-2015, including the WM2010CW, WM3431HS, WD10580BD, and dozens of others. Check your model number against the compatibility list on the product page. This seal replaces the older part numbers AP4437693, PS3522854, and EA3522854. If you have an LG model starting with "WM" or a Kenmore 796-series front-loader, you're almost certainly looking at the right part.
Take photos of wire routing and hose connections before disassembly. Clean the seal groove thoroughly before installing the new seal to prevent future leaks.
Need the part for this repair?
4036ER2003A · In Stock · Ships next business day