
How to Replace 316233902 Oven Temperature Sensor Probe on Frigidaire Range — Step-by-Step
Disconnect power completely at breaker or unplug unit. Oven wiring carries 240V even when oven is off.
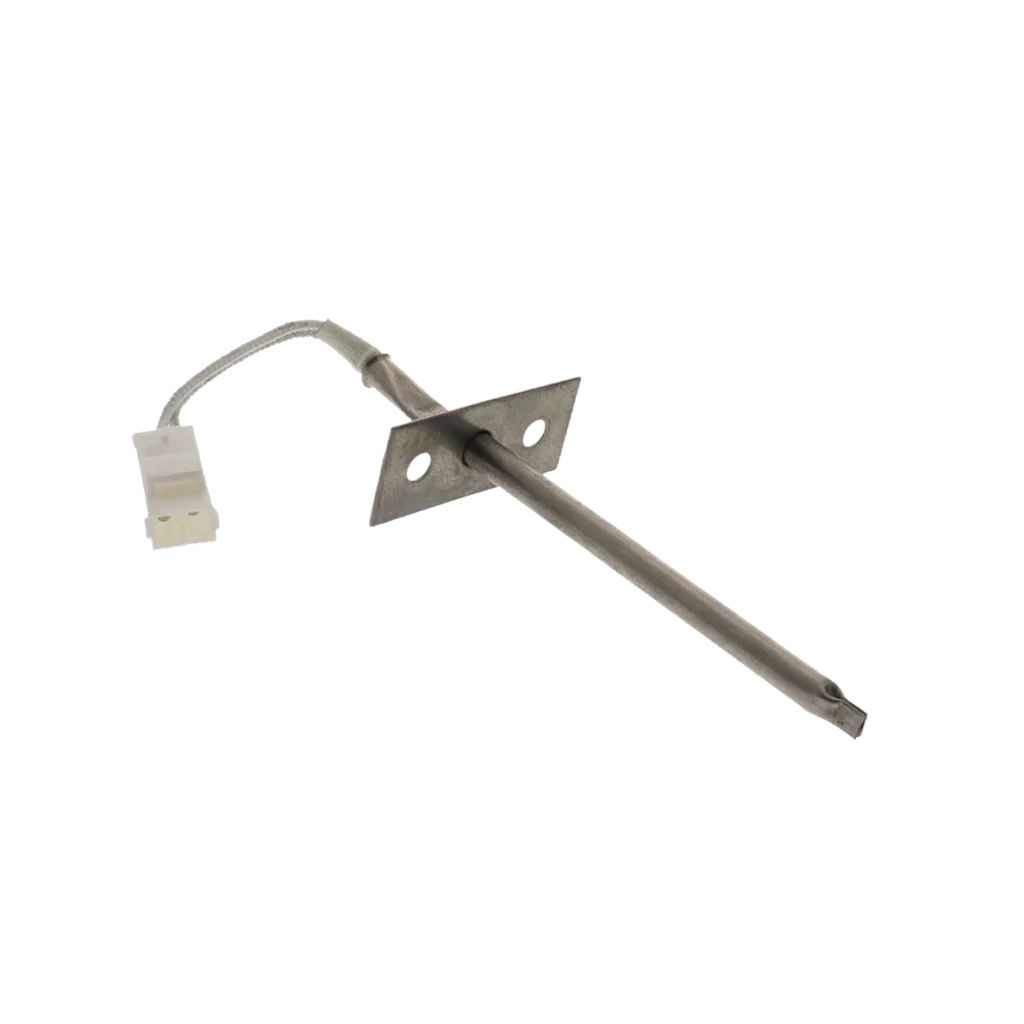
Your Frigidaire oven's running 75 degrees hotter than the dial says, turning your chocolate chip cookies into charcoal briquettes. Or maybe it's the opposite — you set it to 350°F and twenty minutes later the chicken's still raw. Nine times out of ten, that's your temperature sensor probe giving up the ghost. The 316233902 is the sensor that tells your oven's control board what's actually happening inside the cavity, and when it fails, your oven's basically guessing at temperatures.
This repair works for dozens of Frigidaire, Kenmore, and Electrolux ranges including the FFEF3052TSG, FFEF3052TBD, FFEF3011LBJ, CFEF3052TWD, and CFGF337ESE. The sensor's that long metal probe poking into the back of your oven cavity — it's held in place by a couple of screws and plugs into a connector behind the back panel.
What You Need Before Starting
- 1/4" nut driver or socket wrench
- Phillips head screwdriver
- Flathead screwdriver (for prying connector clips)
- Porcelain wire nuts (if connectors don't match — see note below)
- Wire strippers (potentially needed)
Time Required: 20-30 minutes
Difficulty: Easy — this is one of the simplest oven repairs you can do
Safety First
Unplug your range completely or flip the breaker at your electrical panel. Even with the oven off, the wiring behind that back panel is live and carries 240 volts on electric ranges. If you've got a gas range, turn off the gas supply valve behind the unit. Let the oven cool for at least an hour if you've used it recently — you'll be working right where the heating elements are.
Step 1: Access the Back Panel
Open your oven door and locate the screws around the perimeter of the back panel inside the oven cavity. Most Frigidaire models have 4-6 screws holding this panel in place. Remove these screws with your 1/4" nut driver — they're typically hex head screws. The panel might be tight against the insulation, so gently pull it forward once all screws are out. Set the panel and screws aside where they won't get stepped on.
Step 2: Locate and Disconnect the Old Sensor
The sensor probe is that thin metal tube poking through the back wall, usually on the upper left side. Follow the wire from the probe back to where it connects — you'll see a white connector plug. Press the release tab and pull the connector apart. On some models, you'll need to use a flathead screwdriver to carefully pry the locking tab. Now remove the two screws holding the sensor bracket to the oven wall. The whole sensor assembly should pull straight out toward you.
Step 3: Important Connector Check
Here's where you need to pay attention. As one customer noted: "The part was great unfortunately it didn't work it has a different connection than what I have on my stove." Frigidaire changed connector styles over the years. If your new 316233902 sensor has a different connector than the one you just removed, don't panic — this is normal. You'll need to cut the wires about 3 inches from the old connector and splice them to the new sensor wires using porcelain wire nuts (these are rated for high-heat environments). Strip about 1/2" of insulation from each wire, twist them together firmly, and screw on the porcelain wire nuts. Make sure the connections are tight.
Step 4: Install the New Sensor
Feed the new sensor probe through the mounting hole in the oven wall. The probe should extend about 2-3 inches into the oven cavity — not touching the back wall, not touching any heating elements. Secure the mounting bracket with the two screws you removed earlier. If you didn't need to splice wires, simply plug the connector back together until it clicks. If you did splice, tuck the porcelain wire nut connections up into the space behind the back panel where they won't contact any metal surfaces.
Step 5: Reassemble and Test
Position the back panel against the oven wall and replace all the screws around the perimeter. Make sure the panel sits flush — if it's bulging, you've got wiring pinched behind it. Restore power to your range. Set your oven to 350°F and let it preheat. Use an oven thermometer placed in the center of the middle rack to verify the actual temperature matches what you set. It should stabilize within 25 degrees of your setting.
Testing After Installation
Give your oven a full workout over the next few days. Check if it's heating evenly, if the preheat time is normal (usually 12-15 minutes to 350°F), and if baked goods come out properly done. If you're still seeing temperature swings of more than 50 degrees or if the oven won't heat at all, you might have a failing control board or relay — but replacing the sensor solves the problem in about 85% of cases where you're seeing temperature issues.
Frequently Asked Questions
Why does my oven overheat even after replacing the sensor?
If your new sensor is installed correctly but the oven's still running hot, the problem's likely in the control board or a stuck relay. The sensor measures temperature, but the board decides what to do with that information. A failing board can ignore accurate sensor readings and keep elements powered longer than they should be. You'll need to test the board's relay with a multimeter or replace it.
Can I use this sensor on a gas range?
Absolutely. The 316233902 works identically on gas and electric ranges. On gas models, it tells the control when to shut off the gas valve. If you've got a gas range where the igniter glows but won't light, that's usually an igniter problem, not the sensor — but if it lights and then overheats the oven, that's definitely sensor territory.
How do I know if the sensor's actually bad or if it's a wiring problem?
Use a multimeter to test the sensor's resistance at room temperature — it should read between 1,080 and 1,120 ohms at 75°F. If it reads infinite ohms (open circuit) or zero ohms (short), the sensor's toast. If the reading's correct but your oven still misbehaves, check the wiring harness for breaks or the connector for corrosion. Sometimes it's not the sensor itself but a corroded connection causing intermittent contact.
If connectors don't match your original sensor, cut and splice wires with porcelain wire nuts rated for high-heat environments — regular wire nuts will melt.
Need the part for this repair?
316233902 · In Stock · Ships next business day