
How to Replace 303396 Dryer High Limit Thermostat on Maytag & Whirlpool Dryers — Step-by-Step
Always unplug dryer before servicing. Heating element housing stays hot 15-20 minutes after use. Gas dryer owners must shut off gas supply valve.
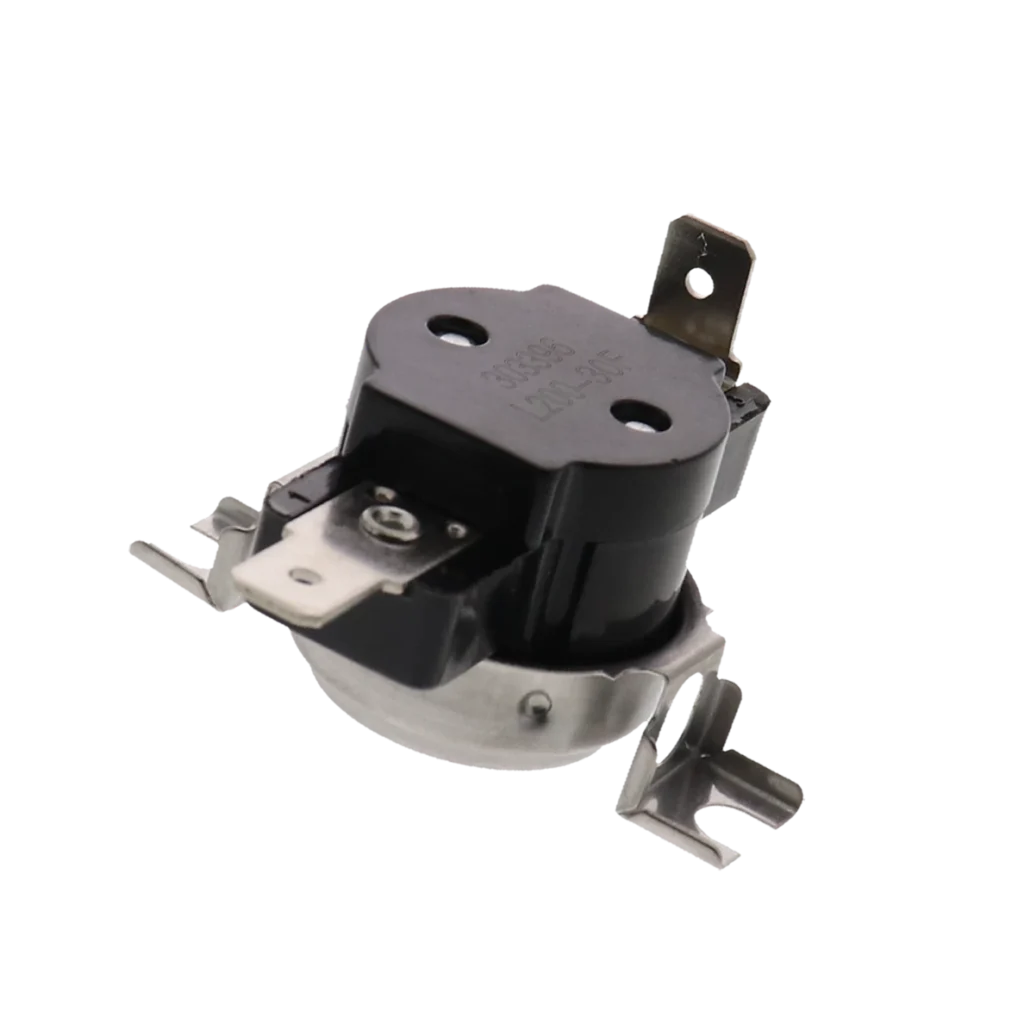
Your Maytag dryer's running so hot it's practically scorching your towels, or maybe it won't heat at all. Either way, there's a good chance your high limit thermostat has failed. The 303396 high limit thermostat is a safety component that cuts power to the heating element when temperatures get dangerously high — and when it fails, you get temperature extremes that ruin clothes or leave them soaking wet.
This thermostat works in dozens of Maytag, Whirlpool, Kenmore, and Admiral dryers including the MDE5500AYW, MDE7400AYW, LDE7304ACE, and LSE7806ACE. It's mounted on the blower housing, usually visible once you remove the lower front panel.
What You Need Before Starting
- 1/4-inch nut driver or socket wrench
- Flat-head screwdriver
- Needle-nose pliers (for wire terminals)
- Work gloves
- Flashlight or headlamp
Repair Time: 20-30 minutes
Difficulty: Easy to Moderate
Safety First
Unplug your dryer completely before you touch anything internal. If it's a gas dryer, shut off the gas supply valve as well. The thermostat itself carries electrical current when the dryer's running, and you don't want to test whether you're grounded properly. Also, avoid touching the heating element housing if the dryer's been running recently — it stays hot for 15-20 minutes after shutdown.
Step 1: Access the Blower Housing
The 303396 thermostat mounts directly on the blower housing, which sits behind the lower front panel on most models. Pull the dryer away from the wall and unplug it. Remove the screws along the bottom edge of the lower access panel — usually two or three 1/4-inch hex screws. The panel either lifts off or tilts forward depending on your model. Once it's off, you'll see the blower wheel and the thermostat mounted on the housing with two wire terminals sticking out.
Step 2: Disconnect the Old Thermostat
The thermostat has two push-on wire terminals. Use needle-nose pliers to grip each terminal connector and pull straight off — don't yank the wires themselves or you'll damage the connections. Take a photo with your phone before disconnecting if you're worried about forgetting which wire goes where, though it doesn't matter electrically since the thermostat is just a switch. Once the wires are off, remove the single mounting screw holding the thermostat to the housing.
Step 3: Install the New 303396 Thermostat
Position the new thermostat exactly where the old one sat — the metal sensor tip needs direct contact with the blower housing metal for accurate temperature sensing. Thread in the mounting screw and tighten it snug, but don't overtighten or you'll crack the thermostat body. Push the wire terminals onto the new thermostat's tabs until they click into place. Give each wire a gentle tug to confirm it's seated properly.
Step 4: Reassemble and Test
Reattach the lower front panel with its mounting screws. Plug the dryer back in (and turn the gas valve back on if applicable). Run a test cycle on high heat with a load of damp towels. The dryer should heat normally without getting excessively hot. If you had the "too hot" symptom before, your clothes should come out dry but not scorched. If you had the "not heating" problem, the element should kick on within the first 2-3 minutes of the cycle.
Testing After Installation
Run a full cycle and check the exhaust air temperature by holding your hand near the vent outside. It should feel warm but not painfully hot. If the dryer's overheating, you may have a secondary issue like a clogged vent restricting airflow — the high limit thermostat can only do its job if air flows freely through the system. Also check that the dryer shuts off automatically when clothes are dry. A failed high limit thermostat sometimes causes the dryer to run indefinitely.
Frequently Asked Questions
How do I know if my high limit thermostat is bad?
Test it with a multimeter set to continuity mode. At room temperature, it should show continuity (closed circuit). If there's no continuity, or if your dryer's been overheating or not heating at all, the thermostat's failed. The two most common failure modes are staying open (no heat) or staying closed (overheating).
What's the difference between the high limit thermostat and the cycling thermostat?
The high limit thermostat is a safety cutoff that only opens at extreme temperatures (usually 250-280°F). The cycling thermostat regulates normal heat during operation by turning the element on and off to maintain target temperature. They look similar but serve different functions. The 303396 is specifically the high limit version.
Will a bad high limit thermostat blow the thermal fuse?
Yes, frequently. If the high limit thermostat fails in the closed position, temperatures keep climbing until the thermal fuse blows as a last-resort safety measure. If you're replacing a blown thermal fuse, replace the high limit thermostat at the same time or you'll blow another fuse within a few cycles. They often fail together on dryers with restricted airflow.
Take a photo of wire connections before removing them. Replace the thermal fuse at the same time if it's blown — failed high limit thermostats often take the fuse with them.
Need the part for this repair?
303396 · In Stock · Ships next business day