
How to Replace 2198597 Ice Maker Assembly on Whirlpool, KitchenAid & Kenmore Refrigerators — Step-by-Step
Ensure ice maker power switch is OFF before disconnecting wiring harness. Water and electrical connections should be kept dry during installation.
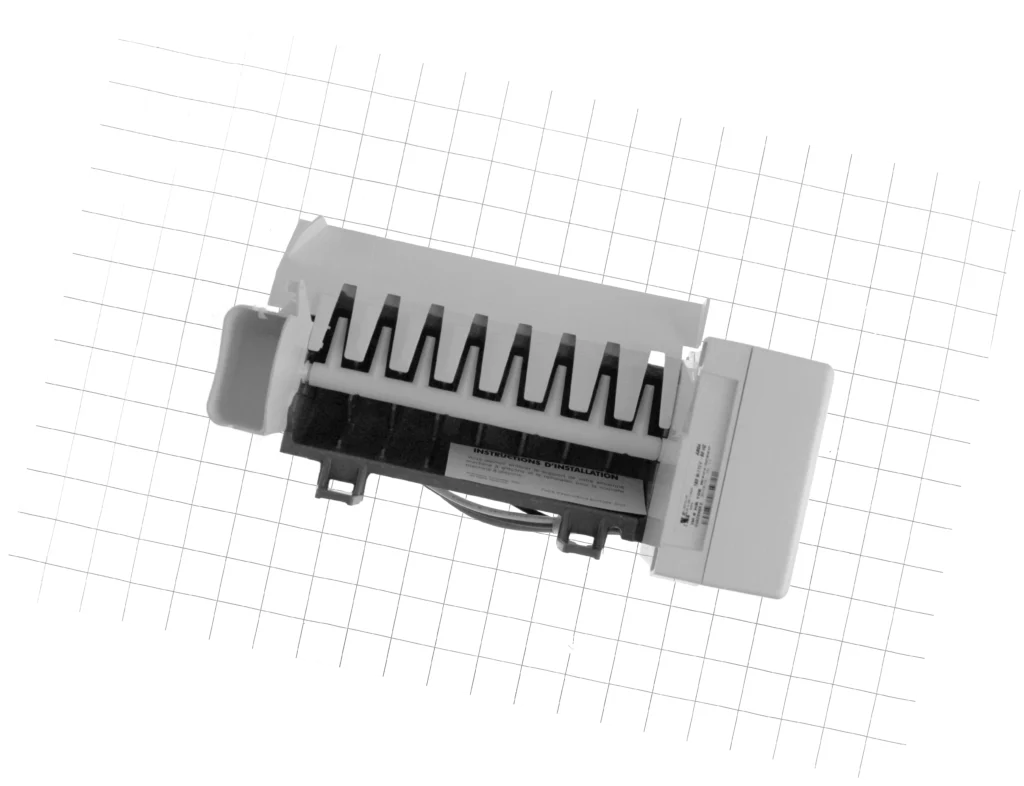
Your Whirlpool refrigerator suddenly stopped making ice, or maybe it's only producing a few pathetic cubes per day. You've waited 24 hours, checked the water line, and still nothing. The ice maker assembly itself has probably failed — a common issue on models like the KSRX25FNST01, GS5SHAXNB01, and dozens of Kenmore 106-series fridges. The good news? This is one of the easiest refrigerator repairs you'll ever do. Most people finish in under 30 minutes with just a screwdriver.
What You Need Before Starting
This repair is straightforward, but gather everything first so you're not making trips to the garage mid-repair:
- Phillips screwdriver — for the mounting screws
- Flathead screwdriver — helpful for releasing wire harness clips
- Nutdriver — occasionally needed depending on your model
- Towel — to catch any residual water or ice
Repair Time: 15-30 minutes
Difficulty: Easy — Perfect for first-time DIYers
Important: You'll reuse the bottom mounting bracket from your old ice maker. Don't throw away the old unit until you've transferred this bracket to the new 2198597 assembly.
Safety First
Turn off the ice maker's power switch, usually located on the side of the unit or the control arm. Some techs unplug the entire refrigerator, but that's overkill unless you're uncomfortable working near live electrical connections. You won't be touching any high-voltage components — the ice maker runs on low-voltage signals from the main board. Still, water and electricity don't mix, so keep things dry.
Step 1: Access the Ice Maker in Your Freezer
Open your freezer and locate the ice maker mounted to the left wall. Remove any ice bins or storage shelves blocking your access. You'll see the white ice maker module with a wire harness coming out the back. On KitchenAid models like the KSRT25CRBL01, there's sometimes a cover plate — just pop it off with your fingers.
Step 2: Remove the Mounting Screws
Look for three or four screws holding the ice maker to the freezer wall. As one user described it: "Removed 4 screws and unplugged connection... then replaced." These are typically Phillips-head screws at the top and bottom of the mounting plate. Keep them in your pocket — you'll reuse them. On some Maytag models like the MSD2658KES02, one screw hides behind the ice bucket area, so check carefully.
Step 3: Disconnect the Wiring Harness
Once the screws are out, gently pull the ice maker forward. You'll see a plastic wire harness connector on the back. Press the release tab and pull straight out — don't yank on the wires themselves. If it's stubborn, wiggle it side to side while pulling. One installer noted: "Disconnected wiring harness, removed heater cover, installed heater cover on new unit." The heater cover is the small metal shield on the underside — this sometimes needs to be transferred to your new unit depending on what came in the box.
Step 4: Transfer the Mounting Bracket
Here's the critical step most people miss: the bottom mounting bracket on your old ice maker must be moved to the new 2198597 assembly. It's held by one or two small screws. Remove them from the old unit and attach the bracket to the new one in the exact same position. This bracket aligns with slots in your freezer wall — without it, the new ice maker won't mount properly.
Step 5: Install the New Ice Maker Assembly
Installation is the reverse of removal. Plug the wire harness into the back of the new 2198597 unit — you'll hear a solid click when it seats properly. Position the ice maker against the freezer wall, aligning the mounting holes with the bracket slots. Thread in your screws and tighten them snugly, but don't overtighten or you'll crack the plastic mounting ears. As one DIYer put it: "Installed icemaker, turned on icemaker power" — simple as that.
Testing After Installation
Turn the ice maker's power switch to the ON position (or lower the wire control arm). You should hear the unit start its initial cycle within a few minutes — a brief hum and the sound of the ejector blades rotating. Don't expect ice immediately. The first batch typically takes 6-12 hours because the water line needs to refill and freeze. Check back after 24 hours — you should have a full bin of ice cubes.
If nothing happens, verify the wire harness connection is fully seated and check that your freezer is at 0°F or below. Ice makers won't cycle if the freezer temperature is too warm.
Frequently Asked Questions
Will this 2198597 ice maker work on my Kenmore Elite refrigerator?
Yes, if your model number matches the compatibility list. This assembly replaces dozens of Kenmore models including 10657026603, 10651554103, and the entire 106.536 series. Cross-reference your model number on the freezer door or inside the fresh food compartment to be sure. It also replaces older part numbers W10190960, W10122502, and 2198678.
Do I need to remove the refrigerator's water supply line?
No. The water supply connects directly to the freezer's fill tube, not to the ice maker itself. You're only dealing with the electrical connection and mounting screws. The new ice maker will use the existing water supply without any modifications.
How long before I get ice after installing the new assembly?
Expect 6-24 hours for the first batch. The ice maker needs to go through its initial fill cycle, freeze the water (which takes several hours at 0°F), and then harvest the cubes. If you still have no ice after 24 hours, check your water supply valve and freezer temperature. The most common issue is the water line being frozen or kinked, not the ice maker itself.
Reuse the bottom mounting bracket from your original ice maker — it's essential for proper alignment and the new unit may not include a replacement bracket.
Need the part for this repair?
2198597 · In Stock · Ships next business day