
How to Replace 137114000 Heating Element Assembly on Frigidaire Dryer — Step-by-Step
Always unplug dryer before servicing — 240V can be lethal
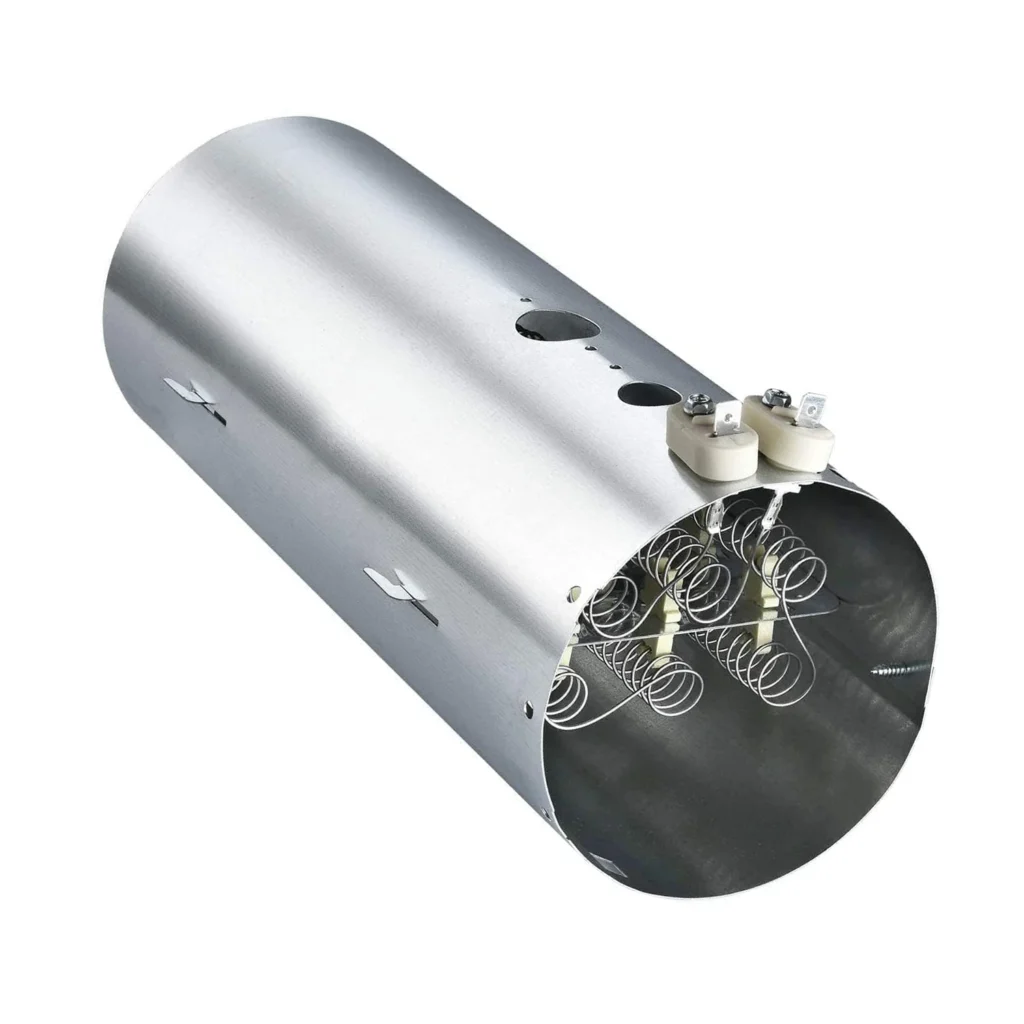
You toss a wet load into your Frigidaire dryer, hit start, and come back 60 minutes later to damp clothes. The drum's spinning just fine, but there's zero heat coming out. If you've got a FAQE7011KR0, GLQE4777FS0, or any of the dozens of compatible Frigidaire, Electrolux, and Kenmore models, there's a 90% chance your heating element has burned out. The good news? Replacing the 137114000 heating element assembly is one of the most straightforward dryer repairs you can do at home.
What You Need Before Starting
This repair doesn't require any specialized tools, and you can complete it in about 45 minutes even if you've never opened up a dryer before. Here's what to gather:
- Phillips head screwdriver
- 1/4" nut driver or socket wrench
- Flathead screwdriver (for prying panels)
- Work gloves (the metal housing has sharp edges)
- Multimeter (optional, for testing the old element)
Repair Time: 30-45 minutes
Difficulty: Easy
Safety First
Unplug your dryer completely before touching anything inside. If it's hardwired, flip the breaker. Electric dryers run on 240 volts, which can kill you instantly. Even after unplugging, wait five minutes for any residual charge to dissipate. Also, pull the dryer away from the wall so you can access the back panel comfortably. These machines are heavy, so get help if you need it.
Step 1: Access the Heating Element Housing
On most Frigidaire dryers, the heating element sits in a metal housing on the lower right side of the back panel. Remove the screws holding the back panel (usually 8-10 Phillips head screws around the perimeter). Set the panel aside. You'll immediately see a rectangular metal box about 10 inches long — that's your heating element housing. It'll have wires connected to it and possibly a thermal fuse nearby.
Step 2: Disconnect the Wiring and Remove the Housing
Take a photo of the wire connections with your phone before disconnecting anything. You'll see two or three wire terminals on the heating element housing. Pull them off by hand — they're just slip-on connectors, no screws. Now remove the two mounting screws (one at each end of the housing) using your nut driver. The entire housing assembly will slide right out. Be careful — it's lightweight but awkward to handle.
Step 3: Remove the Old Heating Element
The heating element is inside that metal housing. Look for a screw or clip securing the element to the housing — some models use a single screw on the side, others have a metal retaining clip. Remove it, then carefully slide the coil element out. Inspect the old element closely. You'll likely see a break in the coil wire or burn marks where it failed. This is why your dryer stopped heating.
Step 4: Install the New 137114000 Heating Element
Slide the new heating element coil into the housing exactly how the old one came out. Make sure the coil isn't touching the metal sides of the housing — there should be small ceramic insulating supports keeping it centered. Secure it with the screw or retaining clip. Double-check that nothing's loose or rattling inside the housing before moving on.
Step 5: Reinstall the Housing and Reconnect Everything
Slide the heating element housing back into position on the dryer frame. Thread in the two mounting screws and tighten them snugly — you don't want the housing vibrating loose during operation. Reconnect the wire terminals exactly as shown in your reference photo. The wires should snap on firmly. If they feel loose, the terminals might be corroded and should be cleaned with sandpaper. Replace the back panel, drive in all the screws, and push the dryer back into position.
Testing After Installation
Plug the dryer back in and run it empty on high heat for five minutes. Open the door and feel the air — it should be noticeably hot. Check around the back panel for any burning smells or unusual sounds. If everything's working correctly, run a small load of damp towels to verify it's drying normally. Your dryer should now heat up properly and dry clothes in the expected time.
Frequently Asked Questions
Why did my heating element burn out?
Restricted airflow is the number one cause. When lint builds up in the vent duct or the blower wheel, the element overheats and eventually breaks. Always clean your lint trap after every load and inspect the outdoor vent hood annually. Running the dryer with wet, heavy loads constantly can also stress the element over time.
Will this element work if I have a Kenmore dryer?
Yes, if your Kenmore model number starts with 110 or 417 and was manufactured by Frigidaire. The 137114000 element replaces several part numbers including AP4456656 and PS2367792, which were used across Frigidaire, Electrolux, Crosley, and Kenmore brands. Check your dryer's model tag (usually inside the door frame) and cross-reference it with the compatibility list.
How do I know if the element is bad or if it's the thermal fuse?
Use a multimeter set to continuity mode. Touch the probes to each end of the heating element coil — you should get a reading between 10-50 ohms. No reading means the element's broken. The thermal fuse is a separate component (usually a small white or silver oval near the housing) that should show continuity when tested. If the fuse is blown, it'll read infinite resistance. Replace both if you're unsure — the thermal fuse is cheap insurance.
Take photos of wire connections before disconnecting anything to ensure proper reassembly
Need the part for this repair?
137114000 · In Stock · Ships next business day