
How to Replace 134959340 Water Inlet Valve on Frigidaire Washer — Step-by-Step
Always unplug washer and turn off water supply valves before starting repair. Residual water pressure will cause spillage when hoses are disconnected.
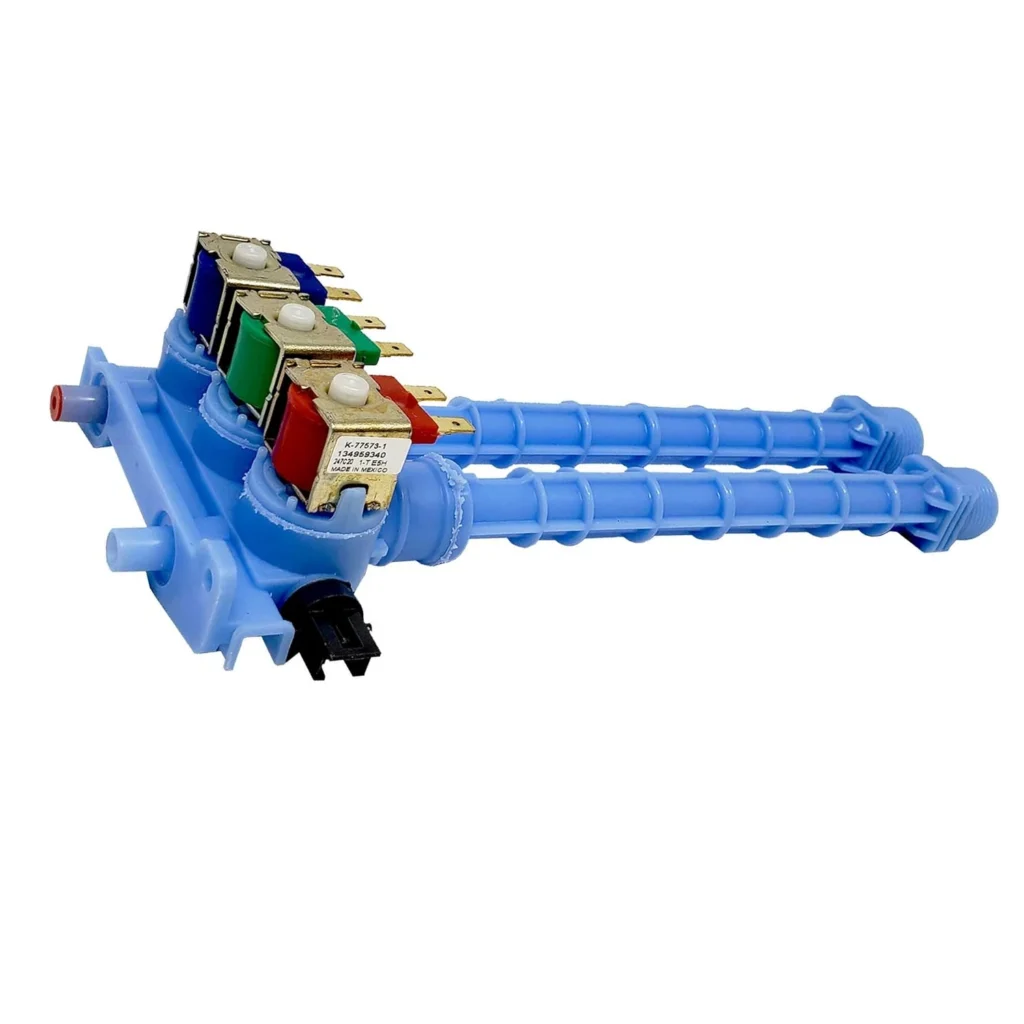
You walk into your laundry room and there's a puddle spreading across the floor behind your Frigidaire washer. When you investigate, water's dripping from the back where the fill hoses connect. Or maybe your washer won't fill at all, leaving you with a drum full of dry clothes and detergent. Nine times out of ten, you're looking at a failed water inlet valve — the part that controls water flow into your machine.
The 134959340 inlet valve is one of those parts that works flawlessly for years until suddenly it doesn't. Mineral deposits build up inside the solenoids, the rubber seals harden and crack, or the screens get clogged with sediment. When it fails, you'll see leaking or experience filling problems. The good news? This replacement takes about 30 minutes and doesn't require special skills.
What You Need Before Starting
Here's what you'll need for this repair:
- Quarter-inch nut driver or socket wrench
- Phillips head screwdriver
- Flat-head screwdriver
- Needle-nose pliers
- Towels or shallow pan (for water spillage)
- Replacement 134959340 water inlet valve
Repair Time: 25-35 minutes
Difficulty: Easy
This repair works for dozens of Frigidaire, Electrolux, and Kenmore models including FAFW4011LB0, CFW4700LW0, FFFW5000QW0, and CFWH7300RW0. Check your model number against the compatibility list to confirm fitment.
Safety First
Water and electricity don't mix. Unplug your washer completely before starting — don't just turn it off. Turn off both hot and cold water supply valves behind the machine. Even after shutting off water, residual pressure remains in the lines, so have towels ready when you disconnect the hoses. Water will drain out.
Step 1: Access the Back Panel
Pull your washer away from the wall to give yourself working room. You need about three feet of clearance. Unplug the power cord from the wall outlet. Turn off the hot and cold water valves — they're usually behind the washer where the fill hoses connect. Use pliers if they're stiff from not being turned in years.
Step 2: Disconnect the Fill Hoses
Place a towel or shallow pan under the hose connections. Unscrew both fill hoses from the back of the inlet valve using pliers or by hand if they're not overtightened. Water will spill out — this is normal. Let the hoses drain into your pan. Now remove the drain hose from its standpipe so you can move the washer more freely if needed.
Step 3: Remove the Old Inlet Valve
The inlet valve sits at the top back of the machine, right where the hoses connect. You'll see two or three screws holding it to the frame — remove these with your nut driver. Inside the cabinet, the valve connects to internal hoses with spring clamps or wire clamps. Use needle-nose pliers to squeeze the clamp ears and slide them down the hoses. Pull the hoses off the valve ports — more water will drain out. Disconnect the wire harness by pressing the locking tab and pulling straight off. Now lift the old valve out.
Step 4: Install the New 134959340 Valve
Position your new valve in the same orientation as the old one — the threaded ports face outward through the back panel. Push the internal hoses onto the valve ports firmly until they seat completely. Slide the spring clamps back up over the hose connections. Connect the wire harness until you hear it click into place. Secure the valve to the frame with the mounting screws you removed earlier. Don't overtighten — snug is enough.
Step 5: Reconnect Water Supply
Thread the hot and cold fill hoses onto the new valve ports. Hand-tighten first, then give them another quarter turn with pliers — don't crank them down or you'll damage the plastic threads. Plug the washer back in. Turn on the water supply valves slowly and watch for leaks around the connections. If you see dripping, tighten slightly more.
Testing After Installation
Run a quick rinse cycle without clothes. Watch the valve area during filling — you shouldn't see any leaks. Listen for the valve solenoids clicking when the washer calls for water. The machine should fill normally at the proper rate. Check underneath and behind the washer one more time for any moisture. If everything's dry and the washer fills correctly, you're done.
Frequently Asked Questions
Why is my washer leaking from the inlet valve area?
Leaking happens when the internal rubber seals harden and fail, or when mineral deposits prevent the valve from closing completely. Sometimes the plastic housing itself cracks from age or overtightened hoses. If you see water dripping from where the hoses connect or from the valve body itself, replacement is the only fix — these valves can't be rebuilt.
Can I replace just one solenoid instead of the whole valve?
The 134959340 is a sealed assembly. You can't buy individual solenoids or rebuild internal parts. When one solenoid fails or the valve develops leaks, you need to replace the entire unit. The part includes both hot and cold solenoids, the housing, internal screens, and all seals as a complete assembly.
How do I know if my inlet valve is clogged versus failed?
Remove the fill hoses and look at the small mesh screens inside the valve ports. If they're packed with sediment or mineral scale, that's your problem. You can try cleaning the screens carefully with a small brush, but if the washer still won't fill or fills slowly after cleaning, the internal passages are likely blocked and the valve needs replacement. Leaking always means replacement — cleaning won't fix compromised seals.
Check the small filter screens inside the valve ports before installation — clean them if they show sediment buildup to prevent future flow issues.
Need the part for this repair?
134959340 · In Stock · Ships next business day