
How to Replace 11036056 Ice Maker Assembly on Bosch Refrigerators — Step-by-Step
Unplug refrigerator completely before starting repair. Ice maker assembly is heavier than it appears — secure your grip before removing mounting screws.
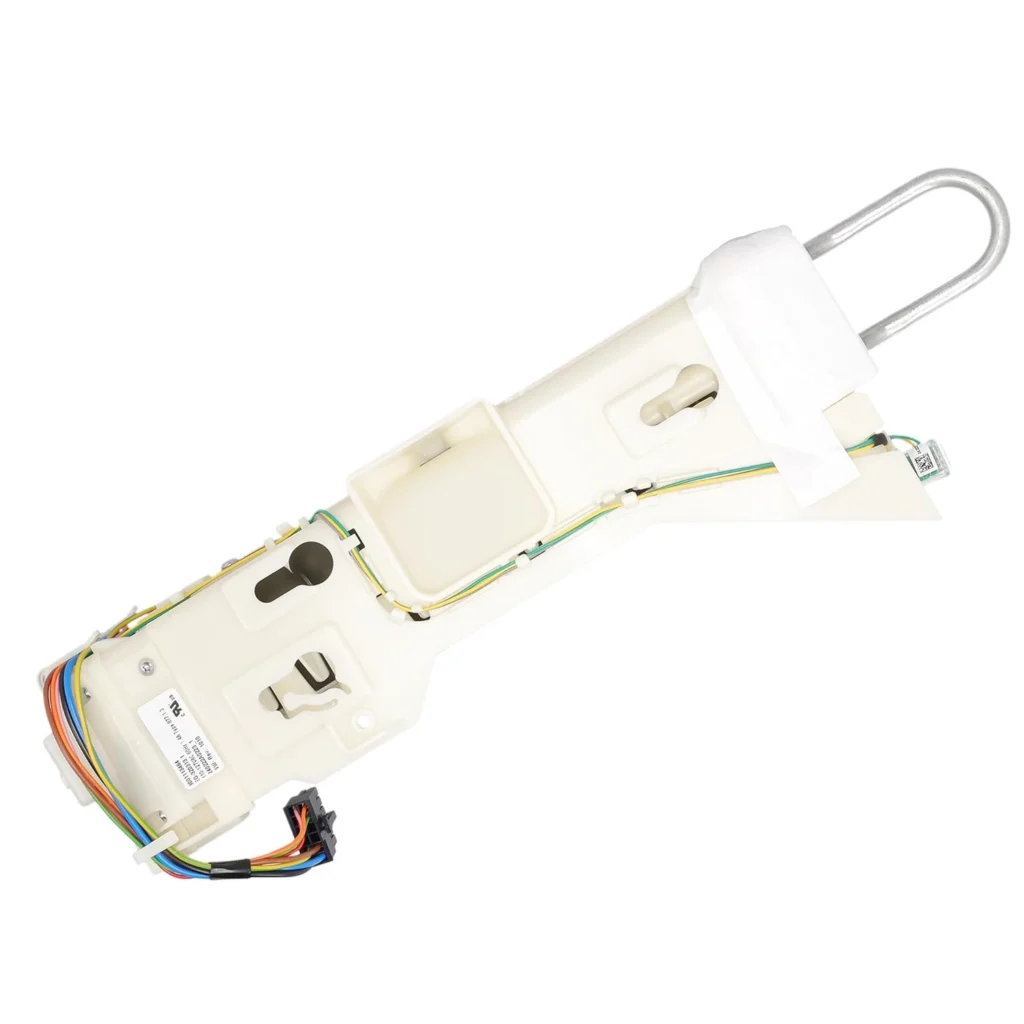
Your Bosch B36CD50SNS stopped making ice three days before your kid's birthday party. You've tried everything — checked the water line, adjusted the temperature, even unplugged it overnight. Nothing. The ice maker assembly itself has failed, and replacement is your only option. The good news? This is a straightforward swap that'll have you back to making ice in under an hour.
What You Need Before Starting
This repair requires minimal tools and falls into the moderate difficulty range. Most homeowners complete it in 45-60 minutes once they have the freezer emptied.
- Phillips head screwdriver
- Flathead screwdriver
- Towel or blanket to protect floor
- Container for ice maker screws
- Work gloves (metal edges can be sharp)
Repair Time: 45-60 minutes
Difficulty: Moderate — requires careful wire harness handling
Safety First
Unplug your Bosch refrigerator completely before starting this repair. If you can't access the plug, flip the breaker. Water lines remain pressurized even when the unit is off, so have towels ready. Remove everything from your freezer and either use a cooler or coordinate this repair when your freezer is nearly empty. Ice maker assemblies are heavier than they look — about 4-5 pounds — so get a firm grip before disconnecting mounting screws.
Step 1: Remove the Ice Bin and Access the Ice Maker
Pull out the ice storage bin by lifting the front edge slightly and sliding it forward. Set it aside. You'll now see the ice maker assembly mounted to the left freezer wall on most B36CD50SNS models. There's typically a wire shutoff arm hanging down — this is what tells the unit when the bin is full.
Step 2: Disconnect the Wire Harness
Locate the wire harness connector on the left side of the ice maker housing. It's usually a white or gray rectangular plug. Press the release tab and gently pull straight out — don't yank or twist it. If it's been in place for years, it might be snug. A gentle wiggle while pulling usually does the trick. Take a quick photo with your phone so you remember the orientation.
Step 3: Remove the Mounting Screws
You'll find three Phillips head screws securing the ice maker to the freezer wall. Two are typically at the top, one at the bottom. Support the ice maker with one hand while removing the final screw — it'll want to drop once that last screw comes out. Keep track of these screws in your container. They're specific to this application and you'll need them for the new unit.
Step 4: Remove the Old Ice Maker Assembly
With screws removed and harness disconnected, carefully lift the old ice maker straight up and out. There's usually a mounting bracket with slots — lift up to disengage, then pull forward. Watch for any ice buildup behind the unit that might have frozen it in place. If it's stuck, don't force it. Let the freezer warm up for 10 minutes and try again.
Step 5: Install the New 11036056 Ice Maker
Position the new ice maker assembly into the mounting bracket slots. Align it so the screw holes match up with the freezer wall holes. Start all three screws by hand before tightening any of them — this ensures proper alignment. Tighten them snugly but don't overtighten; you're screwing into plastic housing. Reconnect the wire harness until you hear or feel it click into place. The connector only fits one way, so if it's not going in easily, rotate it 180 degrees.
Testing After Installation
Plug your refrigerator back in and wait for the ice maker to initialize. Most Bosch models run through a quick self-test cycle within the first hour. You should hear the water fill valve activate within 2-3 hours. The first batch of ice typically drops in 4-6 hours depending on your freezer temperature. Don't panic if nothing happens immediately — the ice maker assembly has a built-in delay to allow the freezer to reach proper temperature. Check that the wire shutoff arm moves freely and isn't obstructed by the ice bin.
Frequently Asked Questions
Will this 11036056 ice maker work in my Thermador or Gaggenau refrigerator?
Yes, this assembly is used across Bosch, Thermador, and Gaggenau models built on the same platform. It replaces AP6991261, PS16221894, and EAP16221894. Check your model number against the compatibility list — it fits dozens of B36CD50SNS variations and equivalent Thermador models.
Do I need to turn off the water supply line?
Not necessary for this repair. The ice maker assembly includes the water valve, but you're not disconnecting any water lines during the replacement. The water connection stays intact on the freezer wall. Just unplug the unit and disconnect the electrical harness.
Why is my new ice maker cycling but not filling with water?
Three common causes: the water line to your refrigerator is kinked or frozen, the household water valve is partially closed, or there's an inline filter that's completely clogged. Check water pressure at the refrigerator connection point. You should have at least 20 PSI. Also verify the wire harness is fully seated — a partial connection can cause erratic behavior.
Take a photo of the wire harness connection before disconnecting it. This saves time during reinstallation and ensures proper orientation.
Need the part for this repair?
11036056 · In Stock · Ships next business day