
How to Replace 37001042 Drum Support Roller on Maytag, Amana & Whirlpool Dryers — Step-by-Step
Unplug dryer completely before starting. For gas dryers, turn off gas supply valve and disconnect gas line. Drum edges are sharp — wear gloves.
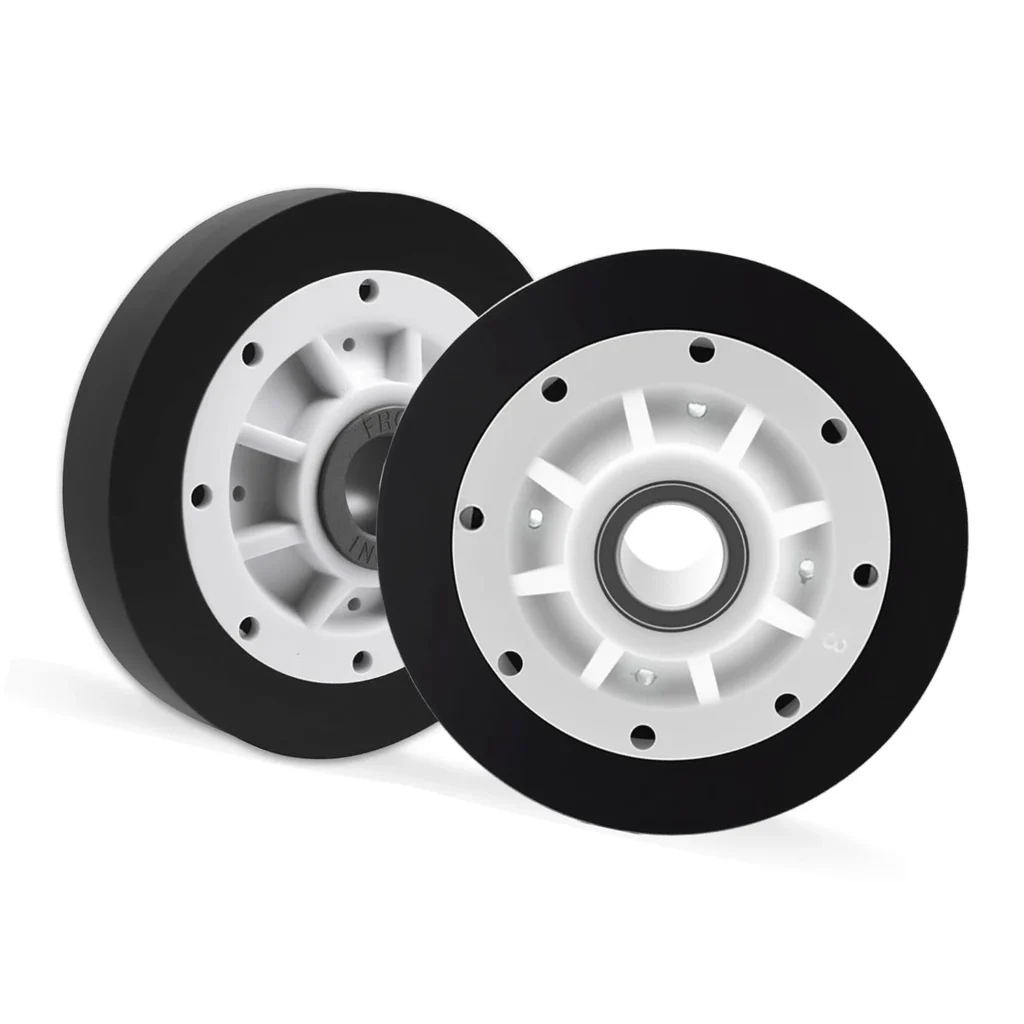
Your Maytag MDE5806AZK started making a grinding noise three weeks ago. You ignored it. Now it sounds like a rock tumbler every time you dry a load. That's your drum support roller — part 37001042 — and it's shot. The good news? You can swap it yourself in about 45 minutes and save $200 on a service call.
What You Need Before Starting
Grab these tools from your garage before you start taking anything apart:
- Quarter-inch nut driver or socket set
- Flathead screwdriver
- Phillips screwdriver
- Putty knife
- Work gloves (those drum edges are sharp)
- Flashlight or headlamp
Repair Time: 45-60 minutes
Difficulty: Moderate
You'll be lifting the dryer drum out, which isn't heavy but requires some maneuvering. If you've ever changed your own oil, you can handle this.
Safety First
Warning: Unplug the dryer completely before starting. If it's gas, turn off the gas supply valve and disconnect the gas line — this isn't optional. One spark near a gas leak and you're having a very bad day. Give yourself room to work by pulling the dryer at least three feet from the wall.
Step 1: Remove the Lint Filter and Front Panel
Pull out the lint filter. You'll see two screws at the bottom of the lint filter housing — remove them. Now grab your putty knife and slide it between the top panel and the cabinet about three inches from the corner. Push in to release the spring clips, then lift the top up and lean it back against the wall. With the top open, remove the screws holding the front panel (usually two at the top corners). Disconnect the door switch wire harness, then lift the front panel off.
Step 2: Release the Drum Belt and Remove the Drum
Look at the bottom front of the drum — you'll see the belt looped around it. Reach underneath and push the idler pulley toward the motor to release belt tension. Slip the belt off the motor pulley, then off the drum. Now lift the front of the drum up and pull it toward you. It'll resist at first because it's sitting on those support rollers in the back, but it'll come free. Set it aside on a blanket so you don't scratch your floor.
Step 3: Locate and Remove the Failed Roller
Shine your flashlight into the back of the cabinet. You'll see two drum support rollers mounted on a bracket — one on each side. They look like small wheels. The bad one probably has a flat spot, wobbles, or doesn't spin freely. Remove the tri-wing or Phillips screw holding the roller shaft in place (Maytag uses different fasteners depending on the model year). Slide the old roller off the shaft. If it's really seized, you might need to tap it with a screwdriver handle.
Step 4: Install the New 37001042 Roller
Slide your new 37001042 roller onto the shaft. It should spin freely with just your finger — that's what you're paying $10.99 for. Secure it with the mounting screw. While you're in there, spin the other roller. If it's rough or wobbly, replace it too. They usually fail within six months of each other, and you've already got the dryer torn apart.
Step 5: Reinstall the Drum and Belt
Lift the drum back into the cabinet, setting the rear edge onto the support rollers you just fixed. The front rim rests on the felt seal around the front opening. Now for the belt: loop it around the drum with the grooved side against the drum. Reach underneath, pull the belt around the motor pulley and the idler pulley (spring-loaded tensioner). This takes some finger gymnastics, but you'll feel it seat into place. Rotate the drum by hand a few times to make sure the belt's tracking properly.
Step 6: Reassemble and Test
Reconnect the door switch wire harness. Set the front panel back on and secure it with the screws you removed. Close the top panel until it clicks. Replace the lint filter housing screws. Plug the dryer back in (or reconnect the gas line). Toss in some old towels and run it on air fluff for five minutes. Listen. No grinding? No thumping? That's the sound of success.
Testing After Installation
Run the dryer empty on a timed cycle for ten minutes. Walk around it and listen from different angles. The drum should rotate smoothly without any grinding, squealing, or rhythmic thumping. Open the door mid-cycle and spin the drum by hand — it should coast smoothly to a stop. If you hear any noise, you either didn't seat the belt correctly or there's another worn component (like the idler pulley) that needs attention.
Frequently Asked Questions
Should I replace both drum support rollers even if only one is bad?
Yes, and here's why: they wear at the same rate. If one failed, the other is probably 80% of the way there. You'll save yourself another teardown in a few months by spending an extra $11 now. It's like replacing brake pads — you do both sides even if only one is squealing.
Will this roller work on my Amana NED7200TW dryer?
The 37001042 fits dozens of Maytag, Amana, Admiral, and some Whirlpool models made between 1995 and 2015. Check the compatibility list on the product page, but if your model number starts with MDE, MDG, ALE, AEM, or AGM, you're probably good. When in doubt, pull your old roller and compare the part numbers stamped on it.
Why is my dryer still making noise after replacing the roller?
You've got other worn parts. The most common culprits are the idler pulley (the spring-loaded wheel that keeps belt tension) or the drum glides (felt strips on the front bulkhead). Sometimes it's the blower wheel hitting lint buildup. Run the dryer with the front panel off and listen carefully to pinpoint where the noise is coming from. Dryer noise rarely comes from just one source once they hit the 8-10 year mark.
Replace both drum support rollers at the same time even if only one has failed. They wear at the same rate and you'll save yourself another teardown in a few months.
Need the part for this repair?
37001042 · In Stock · Ships next business day