
How to Replace WH02X10383 Washer Tub Seal on GE Top Load Washer — Step-by-Step
Unplug washer completely before starting. Outer tub weighs 30-40 pounds — get help lifting it. Residual water will drain during disassembly.
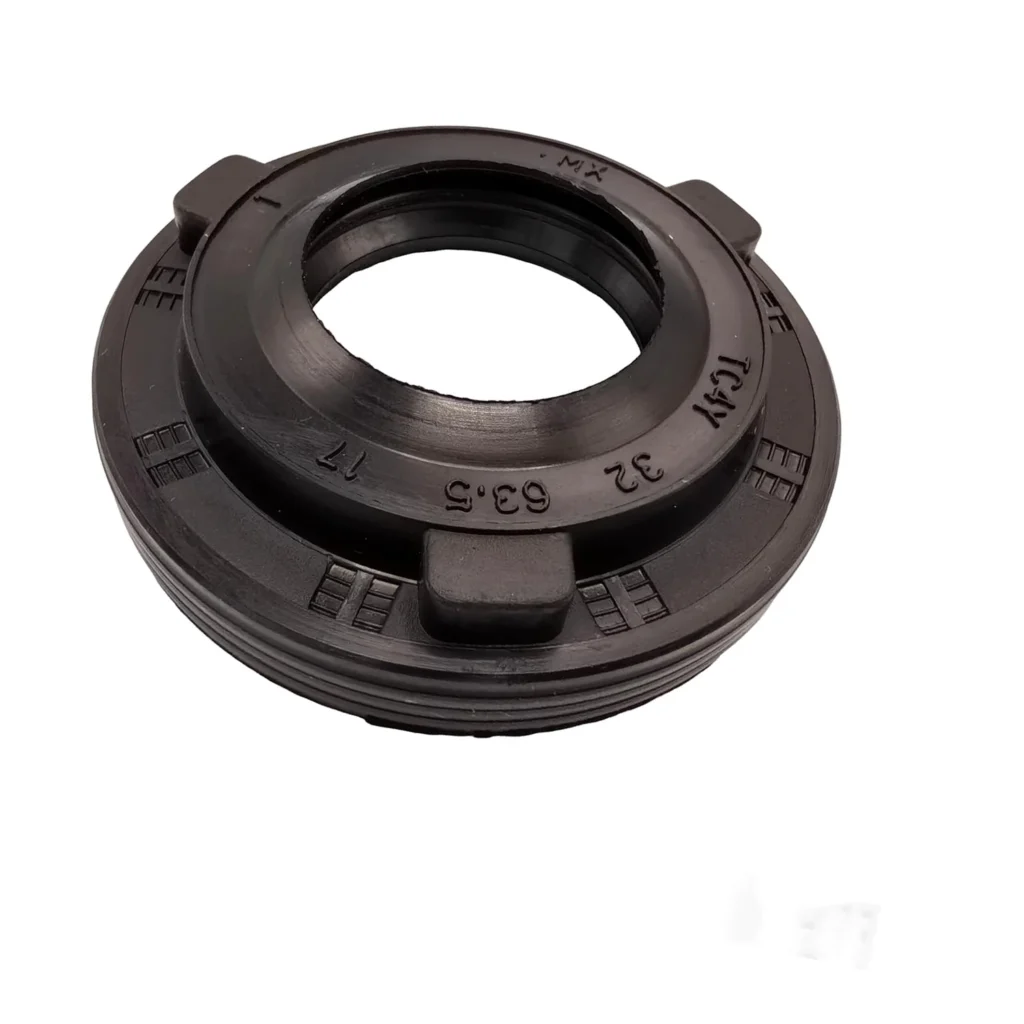
You notice water pooling under your GE washer after every load. You check the hoses — they're fine. You look underneath and spot it: water leaking from around the center shaft where the agitator connects to the transmission. That's your tub seal failing, and ignoring it means water damage to your floor and potential bearing failure down the line.
The WH02X10383 tub seal sits at the bottom of the outer tub where the shaft passes through. It's what keeps wash water from leaking into the transmission area. When it wears out — usually after 8-10 years of normal use — water seeps past it during agitation. This repair requires disassembling the washer cabinet and tub, but it'll save you from buying a new machine.
What You Need Before Starting
This is a moderate difficulty repair that takes about 2-3 hours if you work methodically. You'll need:
- Socket wrench set (3/8" and 7/16" sockets)
- Needle-nose pliers
- Flathead screwdriver
- Spanner wrench or tub wrench (for tub nut removal)
- Towels for water cleanup
- Container to catch residual water
Difficulty: Moderate — Requires cabinet disassembly and working with heavy components.
Safety First
Unplug the washer completely before starting. These machines are heavy — the tub assembly weighs 30-40 pounds when you lift it out. Get someone to help you, especially when removing and reinstalling the outer tub. There will be residual water in the tub even after draining, so keep towels handy. Never attempt this repair with the washer plugged in — you'll be working directly above the motor and transmission.
Step 1: Remove the Cabinet and Agitator
Pop off the agitator cap at the top of the agitator. You'll find either a bolt underneath or a ratcheting agitator that pulls straight up. For bolt-type agitators, use a 7/16" socket to remove the bolt, then wiggle the agitator while pulling up. Once it's out, remove the two screws at the top corners of the control panel, flip it back, and disconnect the wire harnesses. Remove the cabinet clips around the top perimeter and lift the entire cabinet shell off.
Step 2: Disconnect and Remove the Outer Tub
With the cabinet off, you'll see the outer tub sitting on springs. Disconnect the water inlet hoses at the top and the drain hose at the bottom. Remove the tub ring clips or bolts that secure the top of the tub assembly — these vary by model but are typically three or four clips around the perimeter. Now here's where you need help: lift the outer tub straight up and off. It's heavy and awkward. Set it upside down on a work surface covered with towels.
Step 3: Access and Remove the Old Tub Seal
Turn the tub upside down and you'll see the large tub nut in the center. Use a spanner wrench to loosen it — it threads counterclockwise. Once removed, the seal housing becomes accessible. The old WH02X10383 seal sits inside this housing. Pry it out carefully with a flathead screwdriver, working around the perimeter. Clean the housing thoroughly with a rag — any debris or old seal material left behind will cause the new seal to leak immediately.
Step 4: Install the New WH02X10383 Tub Seal
Take your new WH02X10383 seal and inspect it for any shipping damage. Press it into the seal housing evenly, making sure it seats completely around the entire circumference. Some techs apply a thin bead of waterproof grease around the seal lip to help it seat properly during initial operation. Thread the tub nut back on and tighten it firmly with the spanner wrench — this compresses the seal and secures the assembly. Don't overtighten or you'll crack the plastic housing.
Step 5: Reassemble the Washer
Flip the outer tub right-side up and carefully lower it back onto the transmission shaft and spring mounts. Reconnect the tub ring clips, the drain hose, and the water inlet hoses. Slide the cabinet back over the entire assembly and secure the clips. Reinstall the control panel, reconnect the wire harnesses, and thread the agitator back onto the shaft. Run a small test load immediately to check for leaks — don't wait. Watch underneath during the agitation cycle.
Testing After Installation
Run a small load on the normal cycle and watch for leaks during agitation. The first load might show minor seepage as the new seal breaks in, but you shouldn't see the steady dripping or pooling you had before. Check underneath the washer after the spin cycle completes. If you see water around the center shaft area, you likely didn't seat the seal completely or the tub nut needs additional tightening.
After confirming no leaks, run a cleaning cycle using Affresh washing machine cleaner as recommended in the installation notes. This removes any residue buildup and helps the new seal establish a proper sealing surface.
Frequently Asked Questions
Will this seal fit my GTWN4250D0WS model?
Yes, the WH02X10383 is compatible with the entire GTWN series including GTWN4250D0WS, GTWN5450D0WW, GTWN2800D0WW, and dozens of other GE and Hotpoint top-loaders. It replaces the older WH02X10032 and WH02X1196 seal designs that had similar failure patterns.
Can I replace just the seal without removing the entire tub?
No. The seal sits at the bottom of the outer tub where the center shaft passes through. You must remove the cabinet, disconnect the tub, and flip it over to access the seal housing. There's no shortcut on these GE designs — it's a full disassembly job.
How long should a tub seal last after replacement?
A quality tub seal like the WH02X10383 typically lasts 8-12 years under normal use conditions. Overloading the washer and using excessive detergent accelerates seal wear because it increases mechanical stress and leaves residue that degrades the rubber. Stick to recommended load sizes and use HE detergent in proper amounts.
Apply a thin bead of waterproof grease around the new seal lip before installation to help it seat properly during the first wash cycle.
Need the part for this repair?
WH02X10383 · In Stock · Ships next business day