
How to Replace W10440786 Suspension Rod Kit on Whirlpool Maytag Washer — Step-by-Step
Suspension rods are under spring tension — wear gloves and safety glasses when removing and installing. Washer must be unplugged and requires a helper to tilt safely.
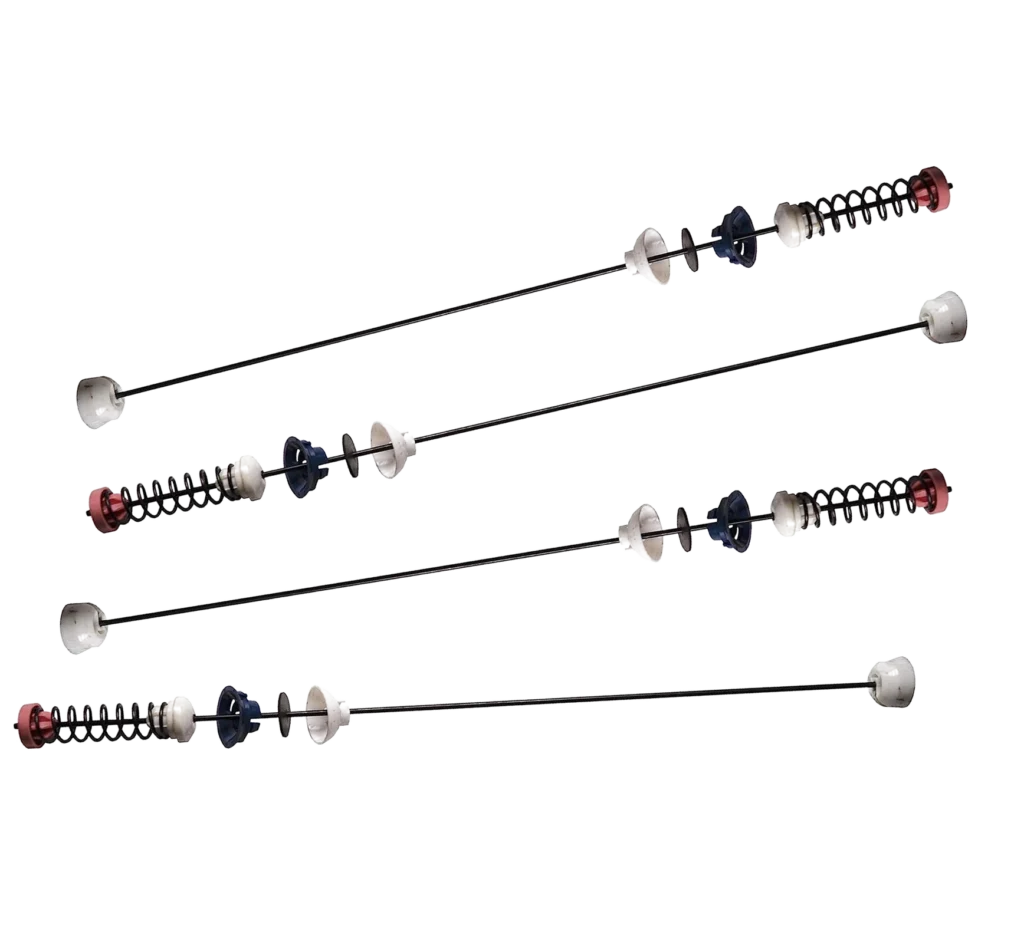
Your Whirlpool washer sounds like it's trying to break free during the spin cycle. The entire machine shakes violently, walks across the laundry room floor, and makes grinding noises that wake up the whole house. If your WTW8500BW0 or similar top-load washer is doing the spin cycle shuffle, there's a good chance one or more of your suspension rods has failed.
The W10440786 suspension rod kit contains four suspension rods that connect your washer's outer tub to the base frame. These rods absorb vibration during the spin cycle and keep everything stable. When they wear out or break, your washer loses its ability to stay put, leading to excessive shaking and movement that can damage other components.
What You Need Before Starting
This repair requires some physical effort since you'll be tilting the washer, but the process itself is straightforward. Here's what you'll need:
- Socket wrench set (7/16" and 1/2" sockets)
- Ratchet with extension
- Flathead screwdriver
- Needle-nose pliers
- Work gloves (those springs have tension)
- Helper (washer needs to be tilted safely)
- Towels or blanket to protect floor
Estimated Time: 45-60 minutes
Difficulty Level: Moderate
Safety First
Unplug your washer completely before starting this repair. You'll be working underneath the machine, and you don't want any surprise cycles starting mid-repair. The suspension rods are under spring tension, so wear gloves and safety glasses. When tilting the washer, make sure you have a helper — these machines are heavy and awkward to maneuver alone. Lay down towels or a blanket to protect your floor from scratches.
Step 1: Access the Underside of the Washer
Pull the washer away from the wall to give yourself working room. With your helper, carefully tilt the washer back against the wall so it's resting at about a 45-degree angle. This gives you access to the bottom where the suspension rods attach to the base frame. Place something soft against the wall to protect both surfaces. You should now be able to see all four suspension rod mounting points on the base.
Step 2: Remove the Old Suspension Rods
Each suspension rod is held in place by a bolt at the bottom that secures it to the base frame. Use your 7/16" socket to remove these mounting bolts. Start with one rod and work your way around. The top ends of the rods attach to the tub with a ball-and-socket connection — once the bottom bolt is removed, you can compress the rod slightly and pop the top ball out of its socket. Be ready for spring tension as you release each rod. Remove all four old rods completely.
Step 3: Install the New Suspension Rods
Take one new suspension rod from the W10440786 kit and compress it slightly. Insert the top ball end into the socket on the tub bracket — you'll feel it click into place. While holding the rod in position, align the bottom mounting hole with the hole in the base frame. Thread the mounting bolt through and tighten it securely with your socket wrench. Don't fully tighten all the way yet — just snug it up. Repeat this process for all four rods, positioning them in the same locations as the old ones.
Step 4: Secure and Final Tightening
Once all four new suspension rods are in place, go back around and fully tighten each mounting bolt. Use a consistent tightening pattern — work in a diagonal pattern (like tightening lug nuts on a tire) to ensure even tension distribution. The rods should be vertical and evenly spaced. Give each top connection a tug to verify it's fully seated in the socket. These rods need to be secure because they're what's keeping your washer from dancing across the floor.
Step 5: Lower the Washer and Test
With your helper, carefully lower the washer back to its normal upright position. Before pushing it back against the wall, plug it in and run a quick spin cycle test with no load. Listen for any unusual noises and watch to see if the shaking has stopped. The washer should spin smoothly without excessive vibration or movement. If it still shakes, double-check that all four rods are properly seated and bolted. Once you're satisfied, push the washer back into position and level it if needed using the adjustable feet.
Testing After Installation
Run a full wash cycle with a normal-sized load to verify the repair. During the spin cycle, the washer should remain stable with minimal vibration — nothing like the wild shaking you experienced before. Stand nearby during the first few cycles to monitor performance. If you notice any unusual movement, stop the cycle and recheck your rod connections. All four suspension rods must be working together to properly stabilize the tub during high-speed spinning.
Frequently Asked Questions
How do I know if my suspension rods are bad or if it's a different problem?
Visible inspection is your best bet. Tilt the washer back and look at the rods — if you see any that are bent, broken, or have damaged springs, they need replacement. If the rods look fine but you still have shaking issues, check your washer's leveling and make sure the load is balanced. However, excessive shaking and walking during spin cycles is the classic sign of failed suspension rods, especially on models like the WTW8500BC0 and WTW8240YW0.
Do I really need to replace all four rods or just the broken one?
Replace all four. If one rod has failed, the others have experienced the same wear and stress over the same time period. Replacing just one rod means the others will likely fail soon, and you'll be doing this job again in a few months. The W10440786 kit comes with all four rods for a reason — it ensures balanced suspension and prevents uneven wear that causes the tub to tilt during spinning.
My washer is still shaking after replacing the suspension rods — what else could it be?
First, verify the washer is level using a bubble level on top of the machine. Adjust the leveling feet if needed. Check that the shipping bolts were removed when the washer was first installed (if it's a newer machine). Make sure you're not overloading the washer or washing extremely unbalanced loads like a single heavy blanket. If the rods are installed correctly and the washer is level, you might have a worn tub bearing or a problem with the suspension springs at the top of the tub.
Replace all four suspension rods at once even if only one appears damaged — this prevents unbalanced suspension and ensures even tub support during spin cycles.
Need the part for this repair?
W10440786 · In Stock · Ships next business day