
How to Replace W10599356 Water Inlet Valve on Whirlpool Washer — Step-by-Step
Always unplug the washer and turn off both water supply valves before starting this repair. Water will drain from hoses during disconnection.
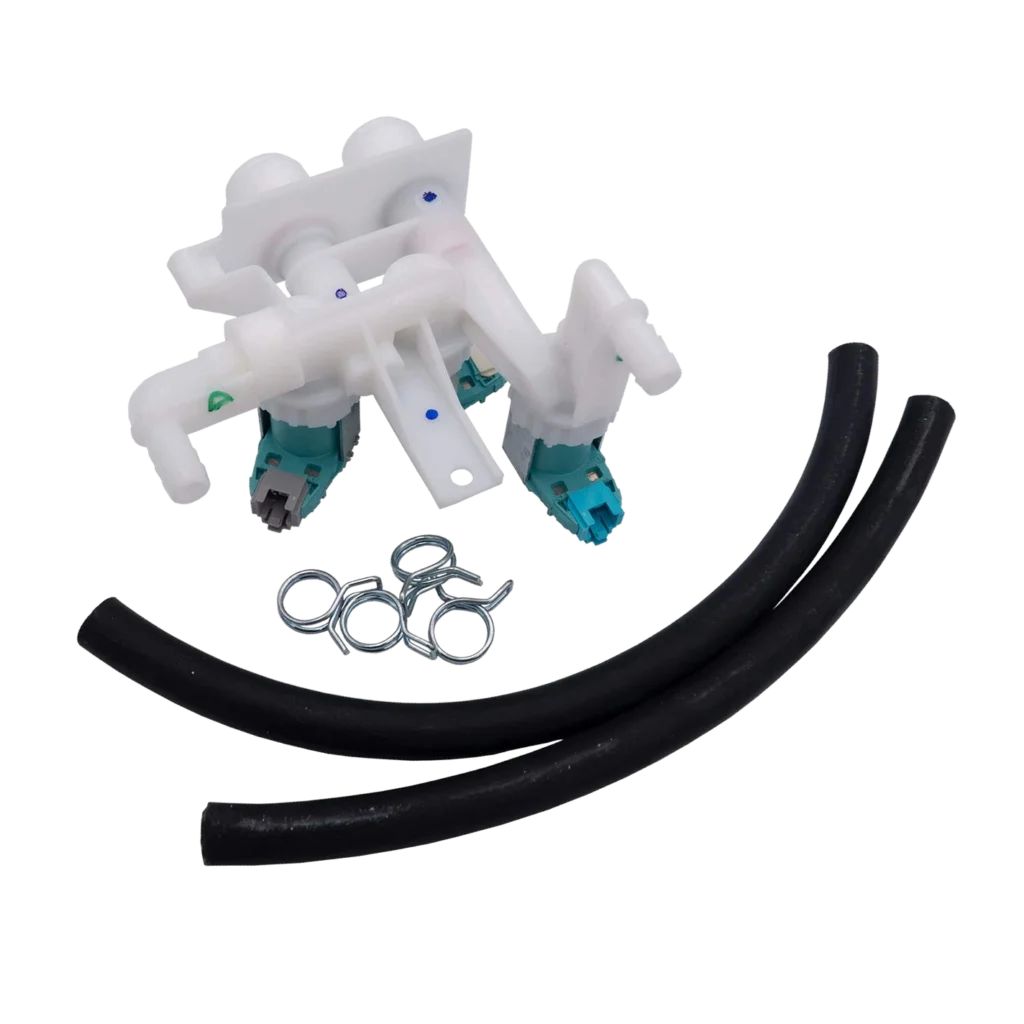
You walk into your laundry room and find water pooled on the floor. Your Whirlpool WFW80HEBW1 won't stop filling, and the F8 E1 error code is flashing on the display. Even stranger — you've noticed water trickling into the tub when the machine is completely off. That's your water inlet valve failing, and it's a problem that won't fix itself.
The good news? Replacing the W10599356 water inlet valve is one of those repairs that looks intimidating but isn't. You're basically dealing with some hose connections and a few screws. Most people finish this in under 45 minutes, even if it's their first time.
What You Need Before Starting
Tools required:
- Nut drivers (1/4" and 5/16" most common)
- Pliers
- Socket set
- Adjustable wrench
- Screwdrivers (Phillips and flathead)
- Towels or shallow pan for water spillage
- Bucket
Repair time: 30-60 minutes
Difficulty: Easy
Compatible models include: WFW70HEBW0, WFW70HEBW1, WFW72HEDW0, WFW75HEFW0, WFW80HEBC1, WFW80HEBW2, WFW81HEDW0, and dozens more Whirlpool, Maytag, and Amana front-load washers.
Safety First
Before you touch anything, unplug the washer from the wall outlet. Don't just turn it off — physically disconnect it. You're working with both water and electrical connections, so this isn't optional. Turn off both hot and cold water supply valves behind the washer. Expect water to drain from the hoses when you disconnect them, so keep those towels handy.
Step 1: Access the Back Panel
Pull your washer away from the wall so you can work comfortably behind it. You'll see the water inlet valve mounted on the back panel where the fill hoses connect. On most Whirlpool models, the valve is accessible without removing any panels, but you might need to take off the top or back panel depending on your specific model. Use your nut driver to remove the screws securing any panels that block your access.
Step 2: Disconnect the Water Supply Hoses
Here's where you'll appreciate that adjustable wrench. Disconnect the hot and cold water supply hoses from the inlet valve. As one user put it: "As with all hoses that have been connected for a long time not easy to remove them from water inlet." If they're stubborn, use penetrating oil and let it sit for a few minutes. Have your bucket ready — water will drain out. Inside the valve, you'll see small mesh screens. Check them for debris or sediment while you're here.
Step 3: Remove Internal Hose Connections
Now look at the interior side of the valve where hoses connect to the dispenser and tub. Use your pliers to squeeze the hose clamps and slide them back along the hoses. Gently twist and pull the hoses off the valve ports. Keep a towel underneath because residual water will spill out. Take a quick photo with your phone showing which hose goes where — it'll save you guessing later.
Step 4: Disconnect the Wire Harness and Remove the Valve
Locate the wire harness plugged into the inlet valve. Press the locking tab and pull the connector straight off. Don't yank on the wires themselves. Now remove the mounting screws holding the valve to the back panel — typically two or three screws. The old valve should lift right out. This is when you'll see exactly why it failed — corrosion, mineral buildup, or a cracked solenoid housing are the usual culprits.
Step 5: Install the New W10599356 Valve
Position your new W10599356 valve in the mounting bracket and secure it with the screws you removed earlier. Don't overtighten — you're threading into plastic. Reconnect the wire harness until you hear it click. Attach the internal hoses to the correct ports (this is where that photo helps) and slide the clamps back into position. Finally, thread the water supply hoses back onto the external ports. Hand-tighten first, then give them a quarter turn with the wrench.
Testing After Installation
Turn the water supply valves back on slowly and check for leaks at all connection points. Tighten anything that's dripping. Plug the washer back in and run a quick rinse cycle without clothes. Watch the valve during filling — it should open smoothly and shut off completely when the tub reaches the correct level. No more F8 E1 errors, no more continuous filling, and definitely no more water sneaking into the tub when the machine is off.
Frequently Asked Questions
Why does my washer keep filling even when it's turned off?
That's a classic sign of a failed water inlet valve. The solenoids inside the valve are supposed to close completely when the washer isn't calling for water. When they fail, water pressure forces its way past the valve seats and continuously fills the tub. This part controls water flow mechanically, so when it wears out, gravity and water pressure take over.
Can I clean the old valve instead of replacing it?
If you're seeing the continuous filling or F8 E1 error, the valve's internal solenoids have failed mechanically. You can clean the mesh screens at the inlet, and you should, but that won't fix worn solenoid seals or cracked valve bodies. Once the valve starts allowing water through when it shouldn't, replacement is the only real fix.
Will this valve work on my Maytag or Amana washer?
Yes. The W10599356 is a direct replacement for multiple brands because Whirlpool owns Maytag and Amana. It replaces older part numbers like AP5692067, PS8689091, and W10509710. Check your model number against the compatibility list, but if your washer is a front-load model from any of these brands manufactured in the last decade, chances are excellent this valve fits.
Pro Tip
Before you button everything back up, turn off the water supply and disconnect one of the inlet hoses. Blow through the hose into the valve — you shouldn't be able to push air through easily. If air passes freely, the valve isn't sealing properly and you might have a defective part. Test it now, not after you've moved the washer back into place.
Take photos of hose connections before removal and test the new valve's seal by attempting to blow air through it before final installation.
Need the part for this repair?
W10599356 · In Stock · Ships next business day