
How to Replace 4317943 Ice Maker Assembly on Whirlpool Refrigerators — Step-by-Step
Always disconnect power and shut off water supply before removing the ice maker assembly. Water and electricity don't mix.
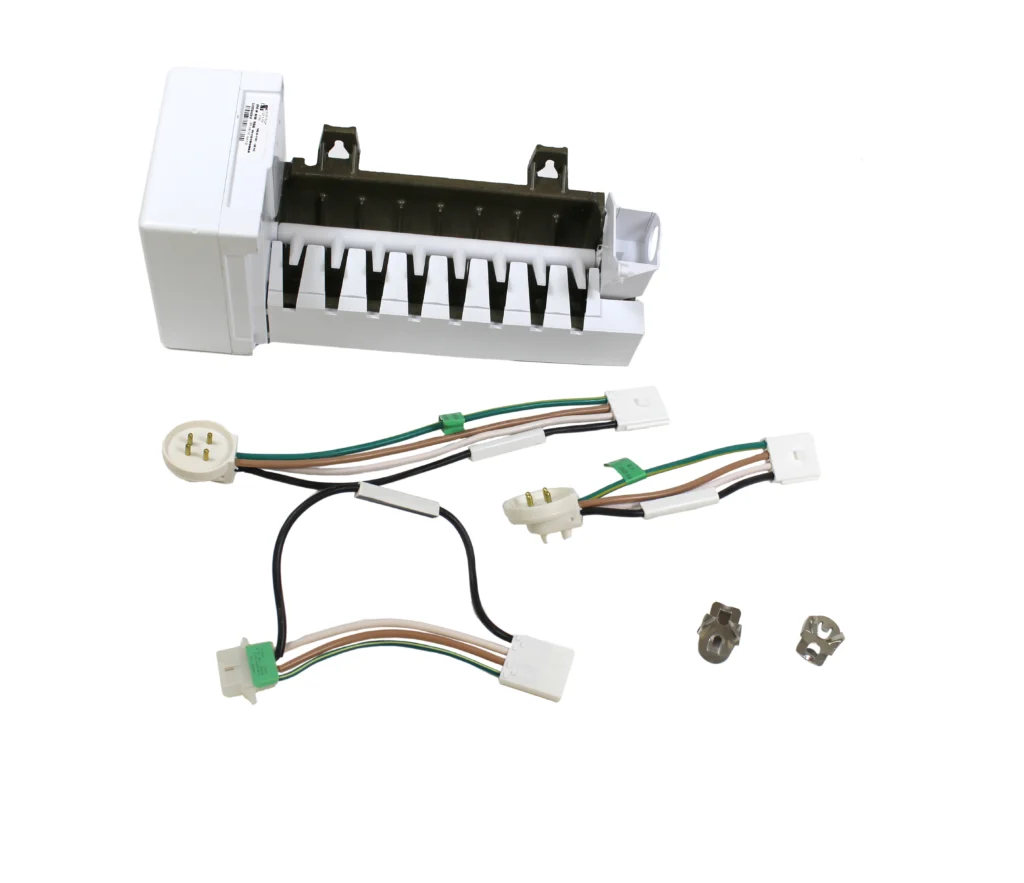
Your ice maker stopped working three days before your daughter's graduation party. The bin's empty, the mechanism isn't cycling, and you're staring at a completely dead unit. This is exactly when the 4317943 ice maker assembly fails — the entire module goes silent, no water fills, no cubes drop. I've replaced dozens of these units in Whirlpool, Kenmore, and KitchenAid refrigerators, and it's one of the most straightforward repairs you can tackle yourself.
This complete ice maker assembly (replaces AP2984633, W10122496, W10281545, W10190952, W10632400) works in over 100 models including the WRT318FMDB02, WRF560SEHZ, KSCS25FKSS series, and many ET1FHTXMQ and ED22LFXHB models. You're replacing the entire mechanism as one unit, which means you don't need to troubleshoot individual components.
What You Need Before Starting
- Phillips screwdriver
- Flathead screwdriver
- Needle-nose pliers
- Towel (for any residual water)
- Small bowl or bucket
- Flashlight or phone light
Repair Time: 20-30 minutes
Difficulty: EASY
Safety First
Unplug your refrigerator completely or shut off the circuit breaker. Ice makers connect to both water and electrical lines, so you're working with live connections if you skip this step. Turn off the water supply valve behind or beneath the fridge — it's usually a quarter-turn saddle valve or a push-connect shutoff. Give the line a minute to depressurize, and keep that towel handy because there's always a bit of water trapped in the fill tube.
Step 1: Remove the Ice Bin and Locate Mounting Screws
Pull out the ice storage bin completely. You'll see the ice maker assembly mounted to the left freezer wall on most Whirlpool models. Look for two Phillips-head screws at the top of the ice maker housing — sometimes there's a third screw at the bottom. On KSCS25FKSS KitchenAid models, the screws are behind small plastic caps you'll need to pop off with a flathead screwdriver.
Step 2: Disconnect the Wire Harness
Before removing the mounting screws, locate the wire harness plug on the left side of the ice maker. It's a rectangular white connector that plugs into the freezer wall. Press the release tab and pull straight out — don't yank on the wires themselves. Some models have the connector tucked behind the ice maker body, so you might need to loosen the mounting screws first to access it. Take a quick photo with your phone before disconnecting anything.
Step 3: Remove the Water Fill Tube
The water fill tube connects at the back of the ice maker assembly. On most units, it's a simple friction fit — grasp the white plastic tube and pull straight back while supporting the ice maker. Some WRF560SEYM and M1TXEGMYW models use a clip that you squeeze to release. Water will drip out, so have your towel positioned underneath. If the tube is frozen to the ice maker (common in units that leaked before failing), use a hairdryer on low heat for 30 seconds to loosen it.
Step 4: Install the New Ice Maker Assembly
Position your new 4317943 assembly exactly where the old one sat. Push the water fill tube into the rear connection first — you'll feel it seat with a slight click or firm resistance. Align the mounting holes and start the screws by hand to avoid cross-threading. Connect the wire harness by pushing until you hear the tab click into place. Tighten the mounting screws snugly but don't overtighten — you're threading into plastic, and stripped holes mean you're drilling new ones or using larger screws.
Step 5: Test the Installation and Check for Leaks
Turn the water supply back on slowly and watch the fill tube connection for any drips. Restore power to the refrigerator. The new ice maker should begin its initial cycle within 10-15 minutes — you'll hear the motor hum and see the bail arm move. It takes 2-3 hours to produce the first batch of ice cubes. Check underneath the ice maker after the first cycle to confirm no water is leaking from the fill tube connection. If you see moisture, push the fill tube in more firmly.
Testing After Installation
Let the ice maker run through three complete cycles before considering the repair successful. The first batch might produce slightly undersized cubes as air purges from the water line. Check that the bail arm (the wire shutoff arm) moves freely and that cubes drop cleanly into the bin. If the ice maker runs continuously without shutting off, verify the bail arm isn't bent or obstructed — it should rise naturally when the bin fills with ice.
Frequently Asked Questions
Will this ice maker work in my Kenmore refrigerator?
Yes, the 4317943 assembly is compatible with Kenmore Elite and standard Kenmore models that originally used Whirlpool-manufactured ice makers. Check your model number against the compatibility list — Kenmore models typically start with 795, 106, or 253. The mounting holes and wire harness are identical across Whirlpool, Kenmore, KitchenAid, and Maytag brands that use this assembly.
Why does my new ice maker make noise but not produce ice?
The water supply isn't reaching the ice maker. Check three things: the household water supply valve is fully open, the fill tube isn't kinked or frozen, and the water inlet valve screen isn't clogged. You can test water flow by removing the fill tube from the ice maker and turning on the water — it should spray into your bowl. If nothing comes out, the problem is upstream from the ice maker itself.
How long should this ice maker assembly last?
Expect 5-8 years of reliable operation with typical residential use. The most common failure point is the motor gear assembly that rotates the ejector blades — it wears from constant cycling and eventually stops mid-rotation. Water valve issues and cracked fill tubes account for most other failures. Using a whole-house water filter extends the lifespan by preventing mineral buildup in the mechanism.
Take a photo of the wire harness connection before disconnecting — the plug only fits one way, but having a reference photo saves troubleshooting time if something doesn't work after installation.
Need the part for this repair?
4317943 · In Stock · Ships next business day