
How to Replace AGM76149901 Door Latch Assembly on LG Dishwasher — Step-by-Step
Disconnect power before starting — live voltage runs to the door latch assembly
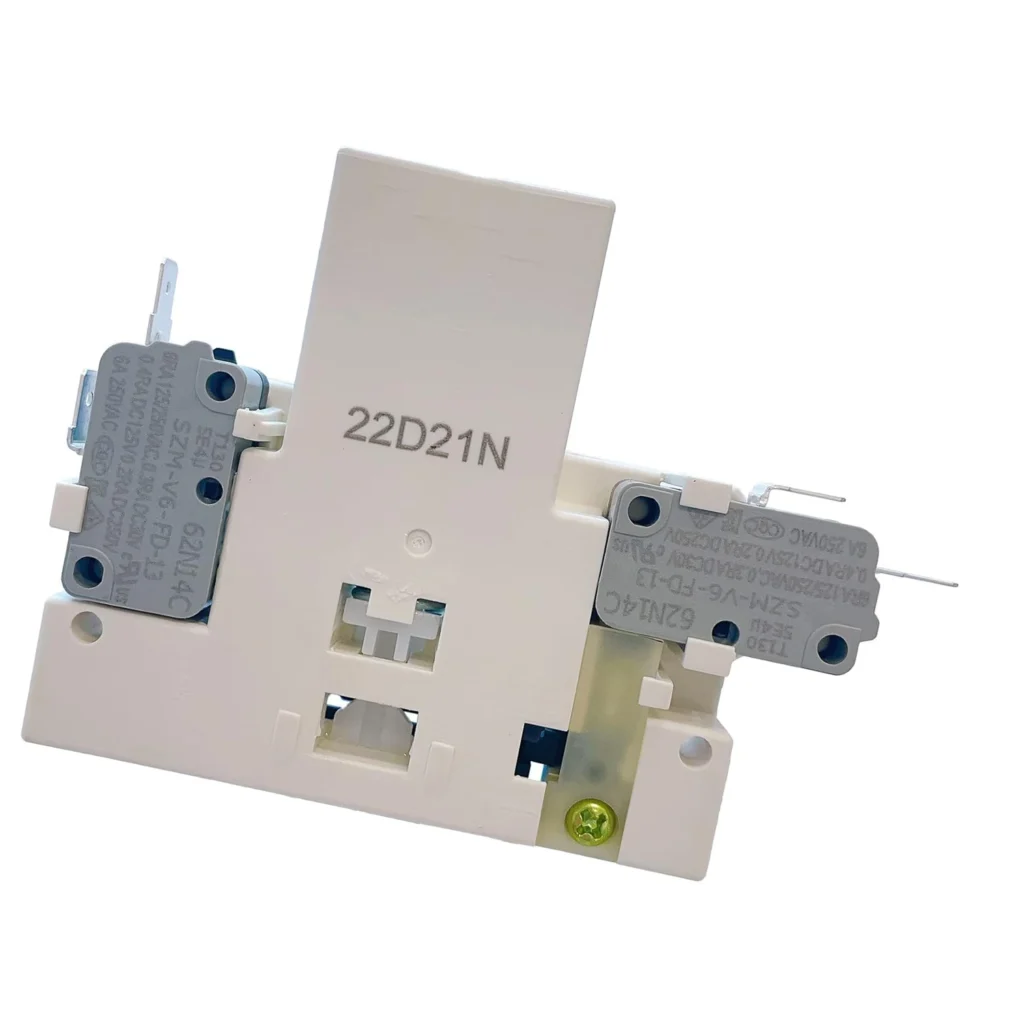
Your LG dishwasher door won't latch, or maybe it latches but the cycle won't start. You press the door firmly, hear a click, but the lights just blink at you. Nine times out of ten, it's the door latch assembly — specifically the AGM76149901 that controls both the mechanical lock and electrical connection to your control board.
This repair works on dozens of LG and Kenmore Elite models including the LDF5545ST, LDF5678SS, LDT5678SS, and LDF8764ST series. The latch assembly sits inside the door panel and handles the physical lock mechanism plus the safety switch that tells your dishwasher it's safe to run.
What You Need Before Starting
This is a straightforward repair that most people complete in under an hour. Here's what you'll need:
- Phillips head screwdriver
- Torx T20 screwdriver (some models use Torx screws)
- Needle-nose pliers
- Towel or blanket to protect your floor
- Replacement AGM76149901 latch assembly
Estimated Time: 45-60 minutes
Difficulty: MODERATE
Safety First
Disconnect power to your dishwasher before you start. Either unplug it from the wall outlet under your sink, or flip the breaker that controls your dishwasher circuit. There's live voltage running to the door latch, and you don't want to find out the hard way when you're reaching into the door panel with metal tools.
Step 1: Remove the Inner Door Panel
Open your dishwasher door so it's horizontal. You'll see a row of screws around the inside perimeter of the door — typically 8-12 screws depending on your model. Remove all these screws and set them aside. Some LG models use Torx screws instead of Phillips, so check before you start stripping them.
Once the screws are out, carefully lift the inner door panel straight up and away. It's not heavy, but it's awkward. Set it down gently — the control panel is still attached by wires at the top.
Step 2: Locate and Disconnect the Old Latch
The door latch assembly is mounted on the right side of the door frame (when you're facing the open dishwasher). You'll see a white or black plastic housing with a wire harness connected to it. Press the release tab on the wire connector and pull it straight off. Don't yank on the wires themselves — always pull from the connector body.
The latch is held in place by two or three screws. Remove these screws and the entire latch assembly will come free. Check the strike plate on the tub side too — if it's bent or damaged, that could be contributing to your latching problems.
Step 3: Install the New AGM76149901 Assembly
Position your new latch assembly exactly where the old one sat. The mounting holes should align perfectly. Thread in the mounting screws but don't fully tighten them yet — you want a little wiggle room for alignment.
Close the door most of the way and test the latch action. The striker should engage smoothly with the latch mechanism. If it's binding or feels forced, loosen the screws and adjust the position slightly. Once it operates smoothly, tighten the screws completely.
Step 4: Reconnect the Wiring
Plug the wire harness back into the new latch assembly. You should hear a definite click when it seats properly. Give it a gentle tug to confirm it's locked in place. This connector carries both the door switch signal and the lock solenoid power, so a loose connection here means your dishwasher won't start.
Step 5: Reassemble the Door Panel
Align the inner door panel with the outer door, making sure all the tabs and edges line up correctly. The top edge usually hooks in first, then the panel drops down into place. Replace all the perimeter screws, working in a cross pattern to ensure even pressure. Don't overtighten — these screws go into plastic and they'll strip if you get aggressive.
Testing After Installation
Restore power to your dishwasher. Close the door firmly — you should hear and feel a solid click as the latch engages. The door should stay closed without you holding it. Press Start and select any cycle. If the latch is working correctly, the dishwasher will begin filling within 5-10 seconds.
If the lights still blink or nothing happens, open the door and check that wire connection one more time. A partially seated connector is the most common installation mistake.
Frequently Asked Questions
Will this latch work on my Kenmore dishwasher?
Yes, if your Kenmore dishwasher starts with model number 795 (which indicates it's made by LG). The AGM76149901 replaces several Kenmore part numbers including AFK73909601 and AFK73909602. Check your model number against the compatibility list on the product page to confirm.
Why does my door latch but the dishwasher won't start?
The latch assembly contains both a mechanical lock and an electrical switch. The mechanical part can work fine while the electrical switch fails. This means the door closes and feels normal, but the control board never receives the "door closed" signal. Replacing the entire assembly solves both issues.
Can I just replace the striker instead of the whole latch?
The striker on the tub is a separate part, but if your dishwasher won't start even with a closed door, the problem is almost always in the latch assembly itself. The striker is just a piece of plastic or metal — it doesn't have the electrical components that fail. Save yourself a second repair trip and replace the latch assembly when you're having door issues.
Test latch alignment before fully tightening screws — it should engage smoothly without forcing
Need the part for this repair?
AGM76149901 · In Stock · Ships next business day