
How to Replace 4434ER0002D Washer Rear Drum Spider on LG Front Load Washers — Step-by-Step
Unplug washer and shut off water supply before beginning. Tub components are heavy — use proper lifting technique or get help.
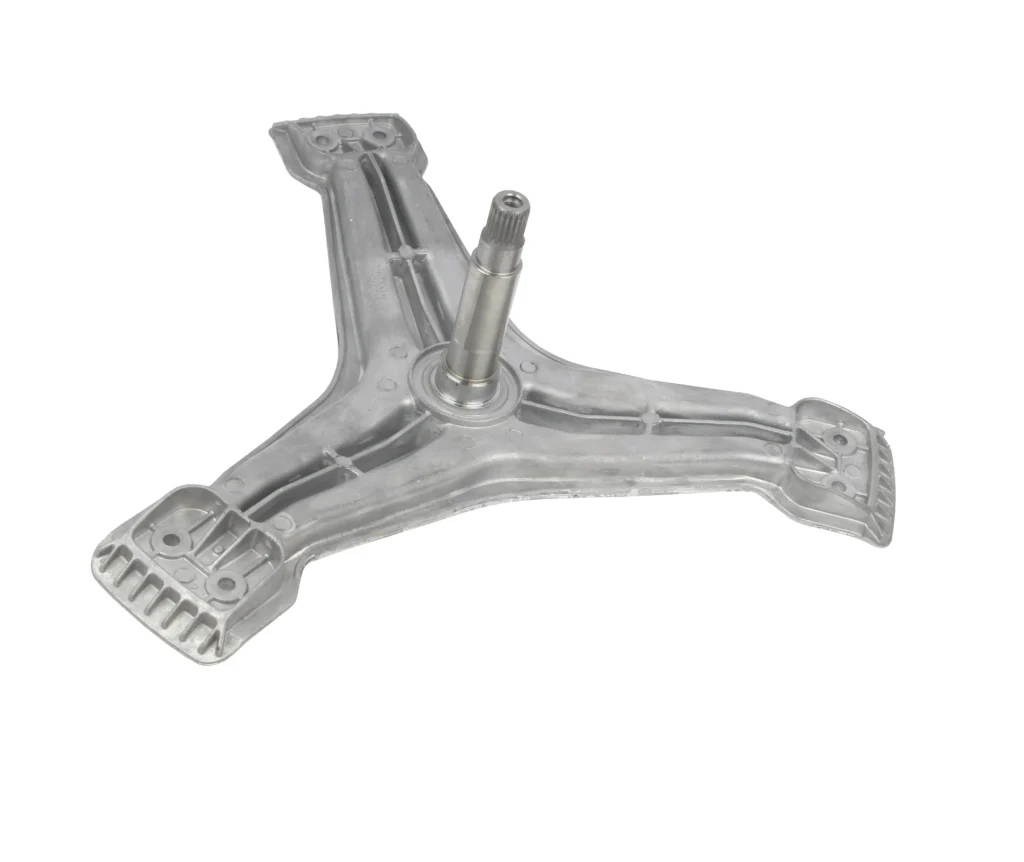
Your LG front-load washer sounds like it's tearing itself apart during the spin cycle. There's a burning smell, the whole machine shakes across the floor, and maybe the drum won't spin at all even though you hear the motor running. If you've got a WM2050CW, WM2077CW, WM2233HD, or any similar LG front-loader from that era, chances are excellent your drum spider has corroded and failed. This aluminum support piece literally holds your drum together, and when it goes, everything falls apart.
What You Need Before Starting
This isn't a quick fix. You're essentially disassembling the entire washer from the front, so clear your afternoon and make sure you've got these tools ready:
- Socket set (8mm, 10mm, 12mm sockets most critical)
- Torx driver set (T20, T25)
- Needle-nose pliers
- Flathead screwdriver for prying clips
- Rubber mallet
- Spanner wrench or large channel locks
- Towels (you'll drain water)
- Small container for bolts and screws
Repair Time: 3-4 hours for first-timers, 2 hours if you've done it before
Difficulty: Advanced — this requires patience and organization, not just strength
Safety First
Unplug the washer completely and shut off both hot and cold water supply valves. You'll be working with the drum assembly and tub bearings, which means dealing with standing water and heavy components. The outer tub half weighs about 40 pounds by itself, so have someone help you or use proper lifting technique. Wear safety glasses when working around the spider — corroded aluminum can flake off into your eyes.
Step 1: Access the Front Panel and Remove the Door Boot
Pull the detergent drawer completely out, then remove the screws behind it securing the control panel. Tilt the panel back carefully — it's still connected by wires. Don't disconnect anything yet. Remove the two screws at the bottom front corners of the washer, then lift and pull the entire front panel off. Now you're staring at the door boot gasket. Use your flathead screwdriver to pry off the wire clamp holding the boot to the outer tub. Work slowly around the circumference, then tuck the boot into the drum.
Step 2: Disconnect and Remove the Front Tub Half
Locate all the bolts holding the front and rear tub halves together — there are typically 24-28 bolts around the perimeter. Use your socket set to remove every single one, keeping them organized. You'll also need to disconnect the pressure switch hose and any wire harnesses attached to the front tub. Once all fasteners are out, the front tub half should pull away. It's heavy and awkward, so don't drop it. Set it aside on a blanket.
Step 3: Remove the Old Drum Spider
Here's where you'll see the damage. The spider is the three-armed aluminum piece connecting the stainless drum to the shaft. If it's failed, you'll see white corrosion, cracks, or complete separation of the arms. Remove the central bolt holding the spider to the drum shaft — this is usually a 12mm or 14mm bolt and it's tight. Use your socket and possibly a breaker bar. Once the bolt is out, the spider should slide off the shaft. If it's corroded in place, tap it gently with your rubber mallet while pulling. The bearing assembly comes out with it.
Step 4: Install the New 4434ER0002D Spider Assembly
Clean the drum shaft thoroughly with a wire brush and wipe it down. The new 4434ER0002D spider should slide onto the shaft easily. Align it properly so the mounting holes line up with the drum. Thread the central bolt back in and tighten it firmly — you want it snug but not gorilla-tight, around 30-35 ft-lbs if you have a torque wrench. Check that the spider arms are seated flush against the drum backing. This is also your chance to replace the tub bearings if they're rough or noisy when you spin them by hand.
Step 5: Reassemble the Tub Halves
Position the front tub half back onto the rear half, making sure the drum rotates freely and nothing is binding. Start threading in all those perimeter bolts you removed earlier. Work in a star pattern, tightening gradually so the halves mate evenly. Don't fully tighten one bolt before starting the others or you'll never get them all aligned. Once all bolts are snug, reconnect your wire harnesses and pressure switch hose. Reinstall the door boot gasket with its wire clamp, then bolt the front panel back on.
Testing After Installation
Reconnect water supply lines and plug the washer back in. Run a spin-only cycle with no clothes to verify everything is balanced and quiet. Listen for grinding, scraping, or unusual vibration. If the drum spins smoothly and the machine stays put instead of walking across the floor, you've succeeded. Run a full wash cycle with a small load to confirm normal operation. That burning smell should be completely gone, and the violent shaking eliminated.
Frequently Asked Questions
My drum won't run at all but the motor sounds like it's running — is it definitely the spider?
When the motor runs but the drum doesn't move, you're looking at either a failed spider, stripped rotor, or bad stator. Pull the washer apart far enough to inspect the spider arms. If they're cracked or separated from the drum, that's your problem. If the spider looks intact, check the rotor for damage and verify the stator windings aren't burned.
Can I just replace the spider without replacing the bearings?
Technically yes, but it's foolish. You've already got the entire washer torn down to the tub halves — the bearings are right there. If they're more than 5 years old, replace them now. Otherwise you'll be doing this entire job again in six months when the bearings fail. The labor is the hard part, not the parts cost.
Will this spider work on Kenmore washers with LG tub assemblies?
Yes, many Kenmore front-loaders from the 2000s-2010s used LG tub assemblies and this exact spider design. Check your model number against the compatibility list — if you see WM-series LG models and 796-series Kenmore models listed, you're good. The 4434ER0002D replaces older versions 4434ER0002A and 4434ER0002B, so it's backward compatible with those machines too.
How do I prevent the spider from corroding again?
Spider failure happens from water and detergent residue sitting in the tub between washes. Always leave your washer door open after use so moisture evaporates. Use HE detergent only, and use less than the recommended amount — excess suds accelerate corrosion. Run a cleaning cycle monthly with washer cleaner or white vinegar. These habits won't make the spider immortal, but they'll extend its life from 7-8 years to potentially 12-15.
Work in a star pattern when tightening tub bolts to ensure even mating of the halves. Keep all hardware organized in labeled containers.
Need the part for this repair?
4434ER0002D · In Stock · Ships next business day