
How to Replace 694089 Dryer Blower Wheel on Whirlpool, Maytag & Kenmore — Step-by-Step
Unplug dryer completely before starting repair. For gas dryers, shut off gas supply valve. Allow unit to cool for 15 minutes if recently used.
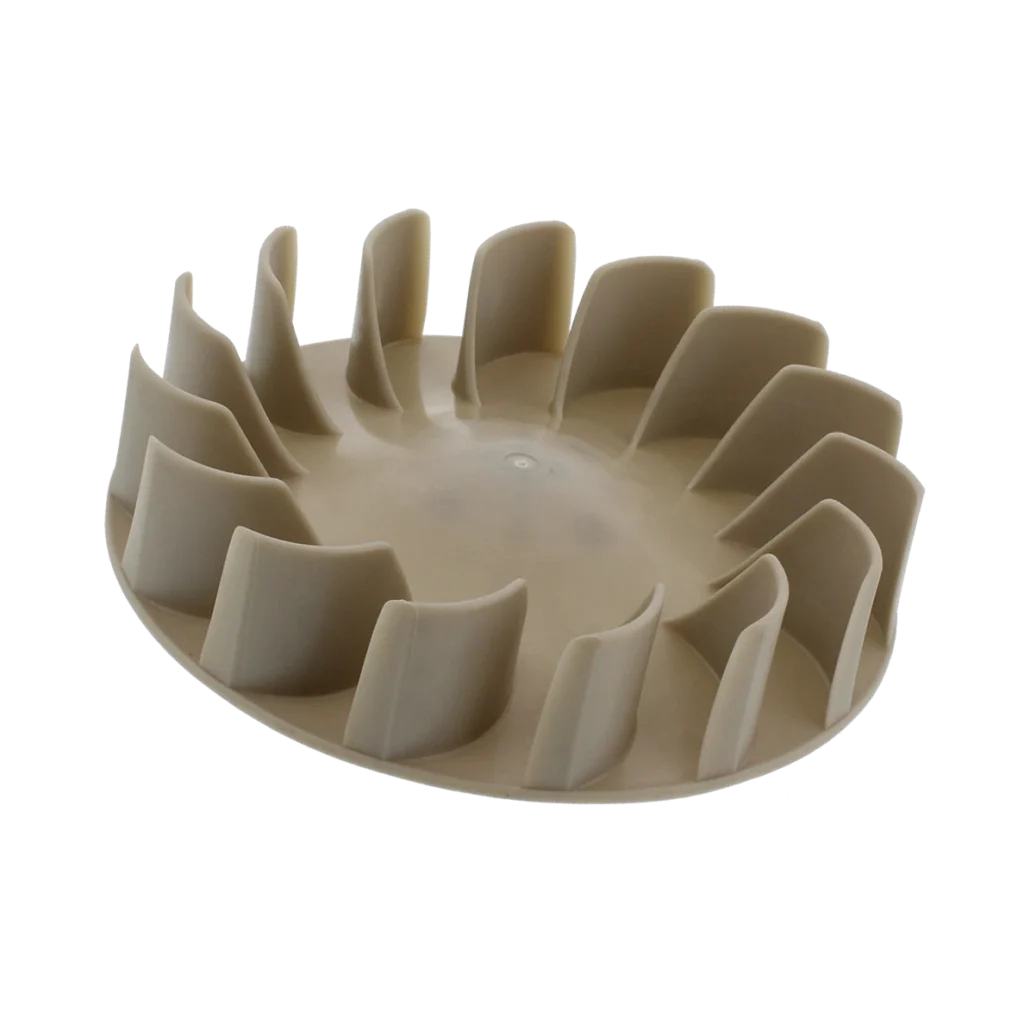
Your Whirlpool dryer sounds like a jet engine preparing for takeoff. Or maybe it won't start at all, just sits there humming. Sometimes the drum refuses to spin, or the clothes come out scorching hot because airflow is nonexistent. All these symptoms point to one culprit: a worn-out blower wheel. The 694089 blower wheel is the plastic fan at the back of your dryer that pulls air through the drum and vents it outside. When it cracks, warps, or gets clogged with lint buildup, everything goes sideways.
What You Need Before Starting
This repair takes about 45-60 minutes if you're methodical. It's moderately challenging because you'll need to access the back of your dryer, but there's no electrical wizardry involved.
- 1/4" nut driver or socket
- Phillips screwdriver
- Flathead screwdriver
- Work gloves (blower housing gets sharp)
- Shop vacuum (you'll find lint everywhere)
- Flashlight or headlamp
Difficulty: Moderate | Time: 45-60 minutes
Safety First
Unplug the dryer completely. Don't just turn off the switch—pull the actual plug from the wall. If you've got a gas dryer, shut off the gas supply valve as well. The blower wheel is located near the heating element and motor, so there's potential for electrical shock if you skip this step. Let the dryer sit for 15 minutes to cool down if you've recently used it.
Step 1: Access the Rear Panel
Move your dryer away from the wall so you can work comfortably. Most Whirlpool, Maytag, and Kenmore models like the WED4850BW0 or MEDC465HW0 have the blower wheel accessible from the back panel. Remove the 1/4" screws securing the rear panel—usually 4-6 screws around the perimeter. Lift the panel off and set it aside. You'll immediately see the blower housing, which looks like a large plastic snail shell.
Step 2: Disconnect the Blower Housing
The blower housing connects to the dryer drum with a large metal clamp. Use your flathead screwdriver to release the spring clamp—it'll pop off with some force, so don't stand directly in front of it. Disconnect the housing from the ductwork. Now look for the wiring harness connected to the motor; unplug it by pressing the release tab. You might need to remove 2-3 screws holding the entire blower assembly to the dryer frame. Once free, pull the housing out carefully.
Step 3: Remove the Old Blower Wheel
Here's where it gets interesting. The blower wheel is pressed onto the motor shaft with a metal clip or clamp. You'll see either a spring clip or a flat metal clip holding it in place. Use your flathead screwdriver to carefully pry off the clip—it's going to fight you. Once the clip is off, grip the blower wheel firmly and pull it straight off the shaft. If it's stuck from years of lint and moisture, wiggle it gently while pulling. Don't use a hammer; you'll crack the new one when you install it. This is also the perfect time to vacuum out the blower housing—you'll find a disgusting amount of lint packed in there.
Step 4: Install the New 694089 Blower Wheel
Slide your new 694089 blower wheel onto the motor shaft. Make sure it seats completely—there should be no gap between the wheel hub and the motor. The wheel should spin freely without wobbling. Reinstall the metal retaining clip, making sure it snaps firmly into the groove on the shaft. Give the wheel a spin by hand; it should rotate smoothly without scraping against the housing. If you hear any rubbing, the wheel isn't seated properly—pull it off and try again.
Step 5: Reassemble and Test
Reconnect the wiring harness to the motor. Position the blower housing back onto the dryer frame and secure it with the mounting screws. Reattach the ductwork connection and secure it with the spring clamp—you'll hear it click into place. Before you put the back panel on, plug in the dryer and run a test cycle. Listen for that distinctive whooshing sound of proper airflow. No grinding, no squealing, just smooth operation. If everything sounds good, power off the dryer, reinstall the rear panel, and push the unit back into position.
Testing After Installation
Run a full heat cycle with damp towels. Check that hot air is flowing strongly from your exterior vent. The drum should spin freely, clothes should dry in normal time (30-40 minutes for a typical load), and there shouldn't be any unusual noise. If your dryer is still noisy after replacing the blower wheel, you might have additional issues with the drum rollers or idler pulley—but the blower wheel fixes the airflow and overheating problems.
Frequently Asked Questions
Will this 694089 blower wheel work on my Kenmore dryer?
Yes, this is the exact replacement for most Kenmore 110-series dryers like the 110.60022010 and 110.61202011. It also replaces older part numbers WP694089, 279711, 279500, and 299678. If your Kenmore model starts with 110.6, you're good to go.
Why did my blower wheel fail in the first place?
Lint buildup is the main killer. When lint accumulates in the blower housing, it creates resistance that makes the plastic wheel work harder. Over time, the wheel cracks or warps from the stress and heat. Clean your lint trap after every load and vacuum out the blower housing annually to prevent premature failure.
Can I just clean the old blower wheel instead of replacing it?
If it's cracked, warped, or missing fins, no amount of cleaning will help. A damaged blower wheel can't create proper airflow pressure. But if your wheel looks intact and you're just dealing with noise, try cleaning it first—sometimes lint buildup between the fins causes vibration. If cleaning doesn't solve it, the wheel has internal cracks you can't see and needs replacement.
Vacuum out the entire blower housing while you have it apart—lint buildup is what killed your old wheel and will destroy the new one if you don't clean it out thoroughly.
Need the part for this repair?
694089 · In Stock · Ships next business day