
How to Replace W10482836 Washer Door Latch Assembly on Whirlpool & Maytag — Step-by-Step
Unplug washer completely before repair — door latch carries electrical current and working on live circuits risks shock
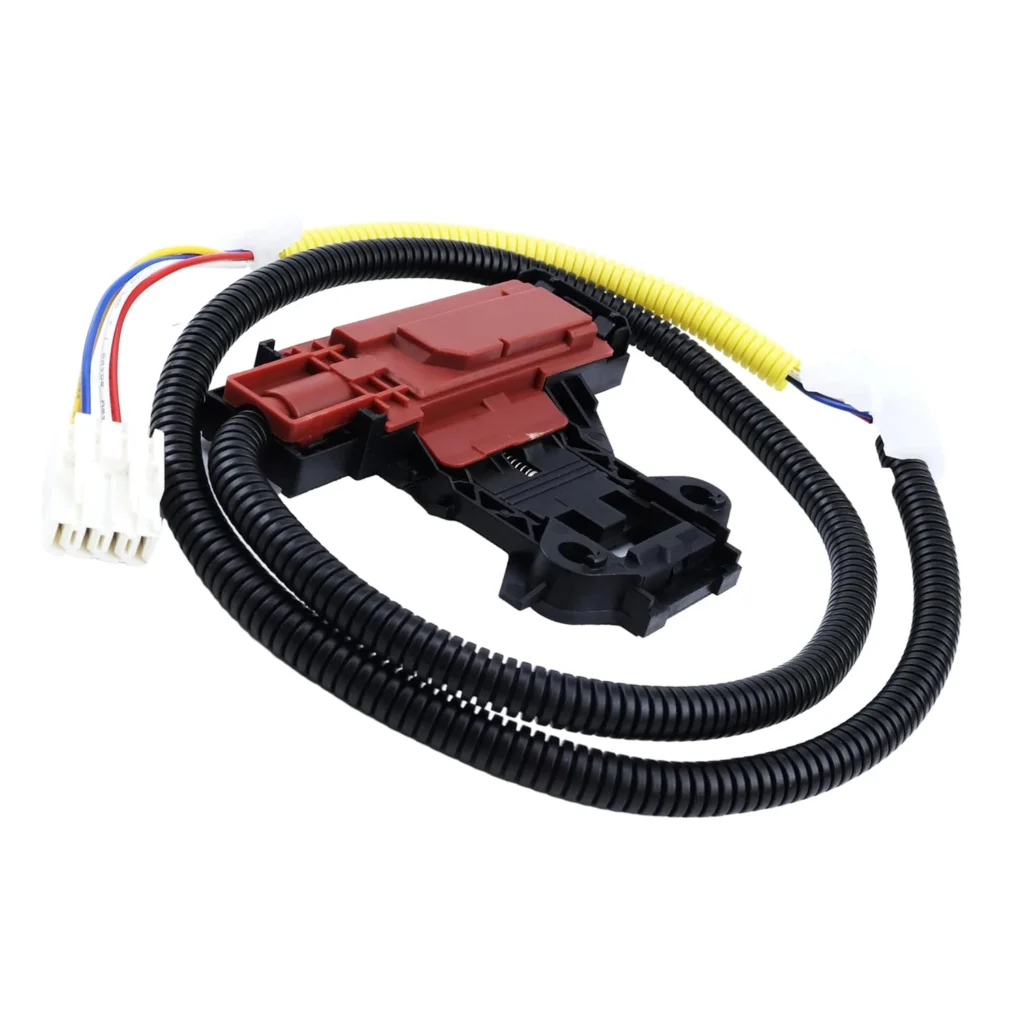
Your washer won't start, and you hear that telltale clicking sound when you close the door — but the lid lock light keeps flashing. The door latch assembly on your Whirlpool or Maytag washer has failed, and it's stopping your machine from running any cycle. This W10482836 door latch replacement takes about 30 minutes and solves the most common door lock failure on models like the MVWP575GW, CAE2795FQ, and hundreds of similar machines.
What You Need Before Starting
This is a straightforward repair that most DIYers can handle with basic tools. Here's what you'll need:
- Phillips screwdriver (for control panel screws)
- Flathead screwdriver (for prying clips)
- Towel or soft cloth (to protect the washer top)
- Needle-nose pliers (optional, for wire harness)
Estimated repair time: 25-35 minutes
Difficulty level: Moderate — requires removing the console
Safety First
Unplug your washer completely before starting this repair. The door latch assembly carries electrical current to signal the control board when the door is closed. Working on a plugged-in machine risks electrical shock and can trigger error codes if connections short out during removal. If your washer is hardwired, flip the breaker. Wait 5 minutes after unplugging to allow capacitors to discharge.
Step 1: Remove the Console Control Panel
Open the washer lid fully. Locate the three Phillips screws at the back edge of the console control panel — there's typically one on each side and one in the center. Remove these screws and set them aside. Gently tilt the console forward and up, rotating it toward you. The console is still connected by wire harnesses, so don't pull it away completely. Rest it carefully on a towel on top of the washer to protect the finish.
Step 2: Disconnect the Old Door Latch Wiring
You'll see the door latch assembly mounted to the underside of the console. It's the white or gray plastic housing where the door strike engages. Locate the wire harness connector — it's usually a white 6-pin plug. Press the release tab on the connector and pull it straight out. If it's stuck, gently wiggle it side to side while pulling. Don't yank on the wires themselves.
Step 3: Remove the Failed Latch Assembly
The W10482836 latch is held in place by plastic mounting clips on both sides. Using a flathead screwdriver, carefully pry the clips inward to release the latch from its mounting bracket. The assembly should pop out toward you. If it's stubborn, check for a small retaining screw on some models — though most use only the clip system. Inspect the old latch for burn marks around the electrical contacts or cracked plastic housing, which are the most common failure points.
Step 4: Install the New W10482836 Latch
Position the new latch assembly in the mounting bracket, aligning the clips on both sides. Push firmly until you hear both clips snap into place. The latch should sit flush and not wiggle. Reconnect the wire harness by pushing the connector straight in until it clicks. Give it a gentle tug to confirm it's seated properly — a loose connection here will cause intermittent lid lock errors.
Step 5: Reassemble and Test
Rotate the console back down into position, making sure no wires are pinched between the console and the washer top. Reinstall the three Phillips screws at the back of the console, tightening them snugly but not overtight (you can crack the plastic). Close the washer lid and verify the door strike engages smoothly with the new latch.
Testing After Installation
Plug the washer back in or turn the breaker on. Close the lid and listen for the latch to engage — you should hear a solid click and see the lid lock light come on steady (not flashing). Select any wash cycle and press Start. The washer should begin filling within 3-5 seconds if the latch is functioning correctly. If the lid lock light flashes or the washer beeps without starting, unplug the machine, open the console, and verify the wire harness is fully seated. On rare occasions, you may need to run a quick reset by unplugging for 60 seconds.
Frequently Asked Questions
Will this W10482836 latch work on my Kenmore washer?
Yes, if your Kenmore washer uses the original part numbers WPW10482836, AP6022148, or PS11755478. Many Kenmore Elite and 500 series washers manufactured by Whirlpool use this exact latch. Check your model number against the compatibility list — models like the CAE2795FQ series and MVWP575GW series are confirmed fits.
Why does my washer click but not lock anymore?
That clicking sound without the lock engaging means the latch motor is trying to activate, but the mechanical lock mechanism inside has failed. The plastic pawl that extends to lock the door wears down over time, or the motor itself burns out from repeated cycles. This is the most common failure mode for this latch assembly, and replacing the entire unit is the only fix — individual internal components aren't serviceable.
Can I bypass the door latch to test if that's really the problem?
No, and attempting to bypass it is dangerous. The door latch serves as a safety interlock to prevent the washer from spinning with the lid open, which can cause serious injury. If you want to confirm the latch is the issue, unplug the washer, disconnect the latch wire harness, and use a multimeter to test for continuity across the lock switch terminals when manually engaging the latch mechanism. No continuity when engaged means the latch has failed and needs replacement.
After installing the new latch, test it 3-4 times by opening and closing the lid before running a full cycle — confirms the clips are fully engaged
Need the part for this repair?
W10482836 · In Stock · Ships next business day