
How to Replace 6501EA1001R Water Level Pressure Switch on LG Washers — Step-by-Step
Always unplug the washer before accessing the control console. Turn off water supply valves to prevent accidental flooding during repair.
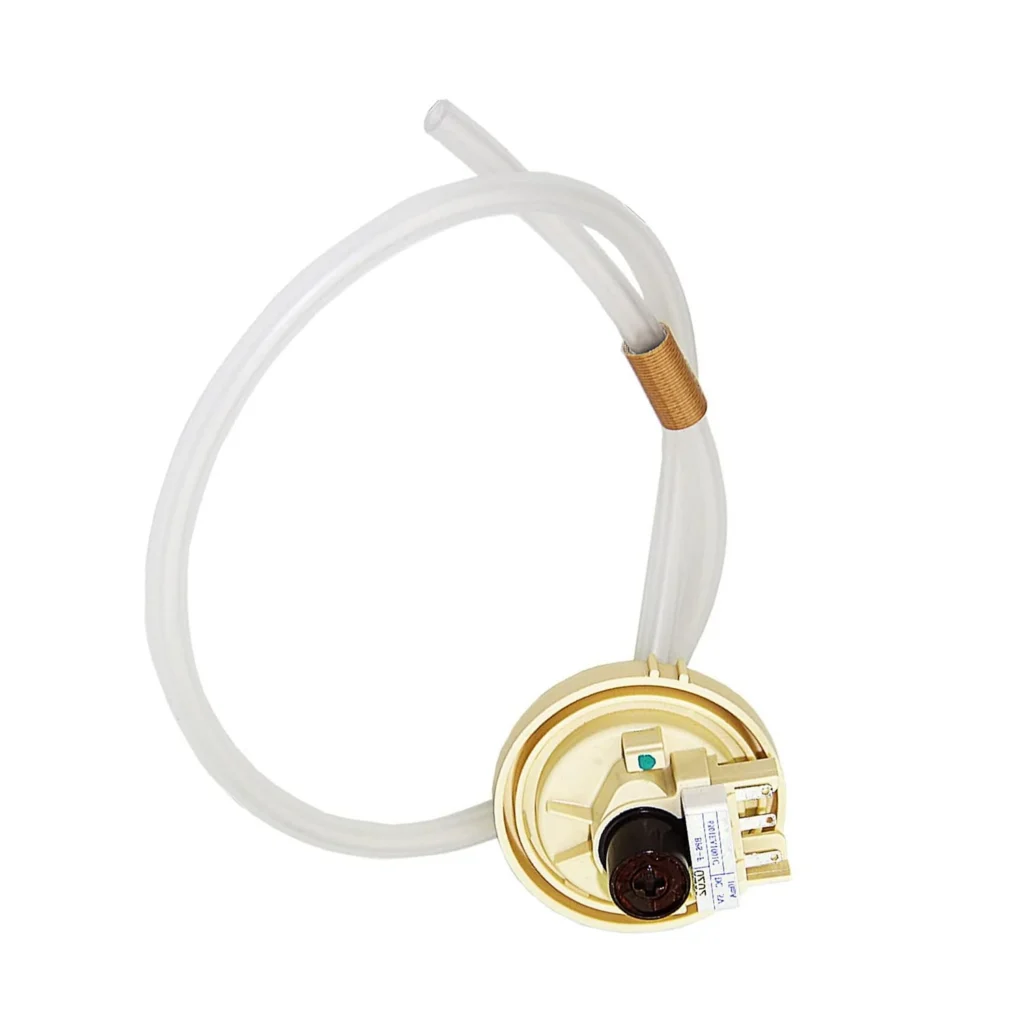
Your LG washer won't fill with water, or it overfills and floods your laundry room floor. You've checked the hoses, cleaned the drain, but the problem keeps happening. Nine times out of ten, it's the water level pressure switch sending incorrect signals to the control board. This little component — part number 6501EA1001R — tells your washer how much water is inside the tub. When it fails, your machine can't make proper decisions about filling or draining.
The good news? Replacing this switch is straightforward once you access it. It's located behind the control console on models like the WT5001CW, WT1101CW, and WT7200CW. You won't need to tip the washer or pull the drum — just remove a few screws and swap the part.
What You Need Before Starting
This repair takes about 30 minutes for most people, even if you've never worked on a washer before. Here's what to grab:
- Phillips screwdriver
- Flathead screwdriver (for prying console clips)
- Needlenose pliers (for hose clamp)
- Towel or small container (for water in pressure tube)
- Replacement switch 6501EA1001R
Difficulty: Easy to Moderate
Estimated Time: 25-35 minutes
Safety First
Unplug your washer completely before starting. Don't just turn off the cycle — pull the plug from the wall outlet. If your washer is hardwired, flip the breaker. Water and electricity don't mix, and even though you're working on a pressure switch (not electrical wiring), you'll be near the control board. Better safe than sorry. Also, turn off the water supply valves behind the machine so you don't accidentally flood the area.
Step 1: Access the Control Console
The pressure switch hides behind your washer's control panel at the top. Look for screws along the back edge of the console — most LG top-loaders have two or three Phillips screws securing it. Remove these screws and set them aside. Once the screws are out, gently lift the front of the console up and toward you. Some models have plastic clips, so you might need to use a flathead screwdriver to release them. Don't force it. The console should tilt up about 90 degrees and rest against the wall behind your washer.
Step 2: Locate and Disconnect the Pressure Switch
With the console tilted up, you'll see the back of the control board and wiring. The pressure switch is a round or oval component mounted near the center, usually with a clear or white plastic tube connected to it. That tube runs down to the tub and measures air pressure as water fills. First, disconnect the wire harness by pressing the release tab and pulling it straight off. Then use your needlenose pliers to squeeze the hose clamp on the pressure tube and slide it back. Pull the tube off the switch — expect a few drops of water to come out, which is why you brought that towel.
Step 3: Remove the Old Switch
The switch itself is held in place by a mounting bracket or a simple clip mechanism. On most LG models compatible with 6501EA1001R (like the WT5101HW or WT1701CW), you'll see either a screw holding the bracket or a twist-lock design. If it's screwed in, remove the screw. If it's a twist-lock, rotate the switch counterclockwise about a quarter turn and it'll pop right out. Keep track of how it was oriented — the new switch needs to go back the same way.
Step 4: Install the New 6501EA1001R Switch
Take your new switch out of the package and position it exactly how the old one sat. If your model uses a screw bracket, secure it with the screw you removed. If it's twist-lock, insert the switch and rotate it clockwise until it clicks into place. Now reconnect that pressure tube — slide it onto the nipple on the switch until it's snug, then reposition the hose clamp over the connection point and squeeze it tight with your pliers. Finally, plug the wire harness back in. You should hear or feel a click when it's fully seated.
Step 5: Reassemble and Test
Lower the control console back into position. Make sure all the clips engage properly, then reinstall the screws you removed at the beginning. Give the console a gentle tug to confirm it's secure. Plug your washer back in, turn the water supply back on, and run a test cycle. Start with a small load setting and watch the initial fill. The washer should fill to the correct level and stop — no overfilling, no underfilling. If it fills properly and advances through the cycle normally, you've nailed it.
Testing After Installation
Run a complete wash cycle with a few towels to verify everything works. Pay attention during the fill stage — the water should reach the appropriate level for your load size selection and then stop. Listen for the pressure switch to click as the tub fills. If your washer still overfills or won't fill at all, double-check that the pressure tube is securely attached and not kinked. A kinked tube will give false pressure readings even with a brand-new switch.
Frequently Asked Questions
Will 6501EA1001R work if my washer has part number 6501EA1001C?
Yes, absolutely. The 6501EA1001R is the updated replacement that supersedes 6501EA1001C, AP5204365, and EBF62754506. LG changed the part number during a manufacturing revision, but the switches are functionally identical and mount the same way. If your original switch has any of those numbers, the 6501EA1001R will fit your machine.
How do I know if my pressure switch is actually bad?
The most common signs are overfilling (water coming out the detergent dispenser), underfilling (not enough water for the load), or the washer not filling at all. Sometimes you'll get an OE error code because the switch isn't detecting water level changes. You can test the switch with a multimeter, but honestly, if you're experiencing these symptoms and the pressure tube looks clean and undamaged, replacing the switch fixes it 90% of the time.
Can I clean the old switch instead of replacing it?
You can try, but it rarely works long-term. Pressure switches fail internally — the diaphragm gets stiff or the contacts corrode. If you blow through the pressure tube and don't feel much resistance, and the tube itself is clear of debris, the switch internals are likely shot. At $59.99 for a genuine replacement part, it's worth installing a new one rather than gambling on a cleaning attempt that might only last another month.
Check the pressure tube for kinks or clogs before assuming the switch is bad. A blocked tube will cause the same symptoms as a failed switch.
Need the part for this repair?
6501EA1001R · In Stock · Ships next business day