
How to Replace EAU63503709 DC Motor Assembly on LG Refrigerators — Step-by-Step
Unplug refrigerator before beginning repair. Allow ice maker area to warm slightly if frozen to prevent cracking plastic components during removal.
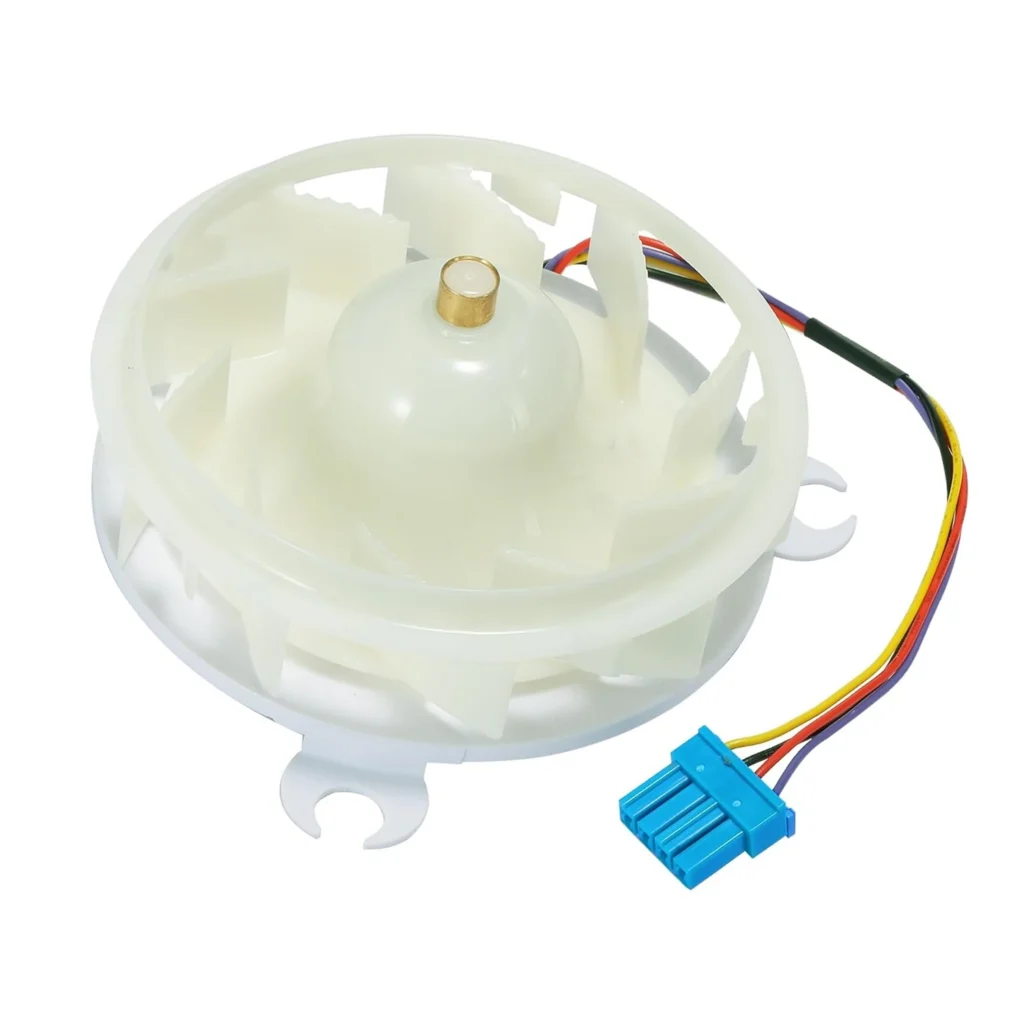
Your LG refrigerator's making a grinding noise from the freezer section, or maybe the ice maker stopped working entirely. If you've got models like the LFXS32736D or LFXS30796S, there's a good chance the DC motor assembly has failed. This small but critical motor drives the ice maker mechanism, and when it goes, you'll know it — either from the noise or from the lack of ice.
What You Need Before Starting
This isn't a complicated repair, but you'll need the right setup:
- Phillips head screwdriver
- Flat head screwdriver (for wire harness clips)
- Work gloves (ice maker area gets sharp)
- Towel or small container (to catch any residual water)
- Socket wrench set (optional, depending on your model)
Estimated Time: 25-35 minutes
Difficulty: MODERATE
Safety First
Before touching anything, unplug your refrigerator or flip the circuit breaker. The DC motor assembly is low voltage, but you're working near other electrical components in the ice maker housing. If your fridge has been running, give the ice maker area 10 minutes to warm up slightly — frozen components are harder to work with and easier to crack.
Step 1: Access the Ice Maker Assembly
Open your freezer door and locate the ice maker housing. On most LG French-door models like the LFXS32766S or LSFXC2496D, you'll see the ice bucket at the top. Pull the ice bucket straight out — it should slide free. Behind it, you'll see the ice maker mechanism and the motor housing on the left side. Some models have a small cover plate secured with two Phillips screws; remove these and set them aside.
Step 2: Disconnect the Wire Harness
The DC motor has a wire harness connector, usually white or gray, plugged into the back of the motor assembly. Press the release tab with your thumb and pull straight back. Don't yank on the wires themselves — grab the connector body. If it's stubborn after years of freezer humidity, a gentle wiggle while pressing the tab usually does it.
Step 3: Remove the Old Motor Assembly
The motor is held in place by two or three Phillips head screws threaded directly into the ice maker housing. Remove these screws completely — they're short, so keep track of them. Once the screws are out, the motor assembly should lift straight up and away from the mounting bracket. If it's stuck, check for a small plastic tab at the bottom that might need to be pressed in.
Step 4: Install the New EAU63503709 Motor
Take your new EAU63503709 motor assembly and align it with the mounting holes. The motor shaft should point toward the gear mechanism — there's only one correct orientation, so don't force it. Thread the screws back in and tighten them snugly, but don't overtighten. These are going into plastic housings, and stripped threads mean replacing the entire ice maker assembly.
Step 5: Reconnect and Test
Plug the wire harness back into the new motor until you hear a distinct click. Give it a gentle tug to make sure it's seated. Reinstall any cover plates you removed, then slide the ice bucket back into position. Plug your refrigerator back in or flip the breaker. Within 24 hours, the ice maker should complete a harvest cycle. You can manually test it by pressing the test button on the ice maker (usually a small square button or a paddle) — you should hear the motor engage and turn the mechanism.
Testing After Installation
After power is restored, listen for the motor during the first ice-making cycle. It should run smoothly without grinding or clicking sounds. The first batch might be smaller than usual — that's normal after any ice maker service. If the motor runs but ice doesn't eject, check that the ice bucket is fully seated and that the metal wire feeler arm can move freely. On models like the LFXC24796D, this arm tells the system when the bucket is full.
Frequently Asked Questions
Will this motor work with Kenmore Elite refrigerators that have LG compressors?
Yes, if your Kenmore model number starts with 795.7 (like 79574027610 or 79575043610), it's actually an LG-manufactured unit. The EAU63503709 is the correct motor assembly for these models. Check the model tag inside your fridge to confirm — if it says "LG Electronics" anywhere, you're good to go.
How do I know if the motor is bad versus another ice maker component?
If you hear grinding or humming from the ice maker but it doesn't turn, the motor's likely seized. If the ice maker is completely silent and won't respond to the test button, check the control board first. You can test the motor with a multimeter — it should show continuity across the motor terminals. No continuity means the motor's definitely dead.
Can I use this motor as a replacement for EAU62863005 or EAU65089706?
Absolutely — the EAU63503709 directly replaces both of those part numbers. LG updated the design slightly over the years, but the mounting points, wire harness, and gear interface are identical. This is the current superseding part that covers multiple older versions.
Test the new motor immediately after installation using the ice maker's test button. A successful test cycle confirms proper installation before waiting 24 hours for automatic operation.
Need the part for this repair?
EAU63503709 · In Stock · Ships next business day