
How to Replace LA-1053 Dryer Thermal Fuse & High Limit Thermostat Kit on Whirlpool Maytag — Step-by-Step
Unplug dryer completely and turn off gas supply before starting this repair. Work gloves recommended when handling sharp metal edges inside cabinet.
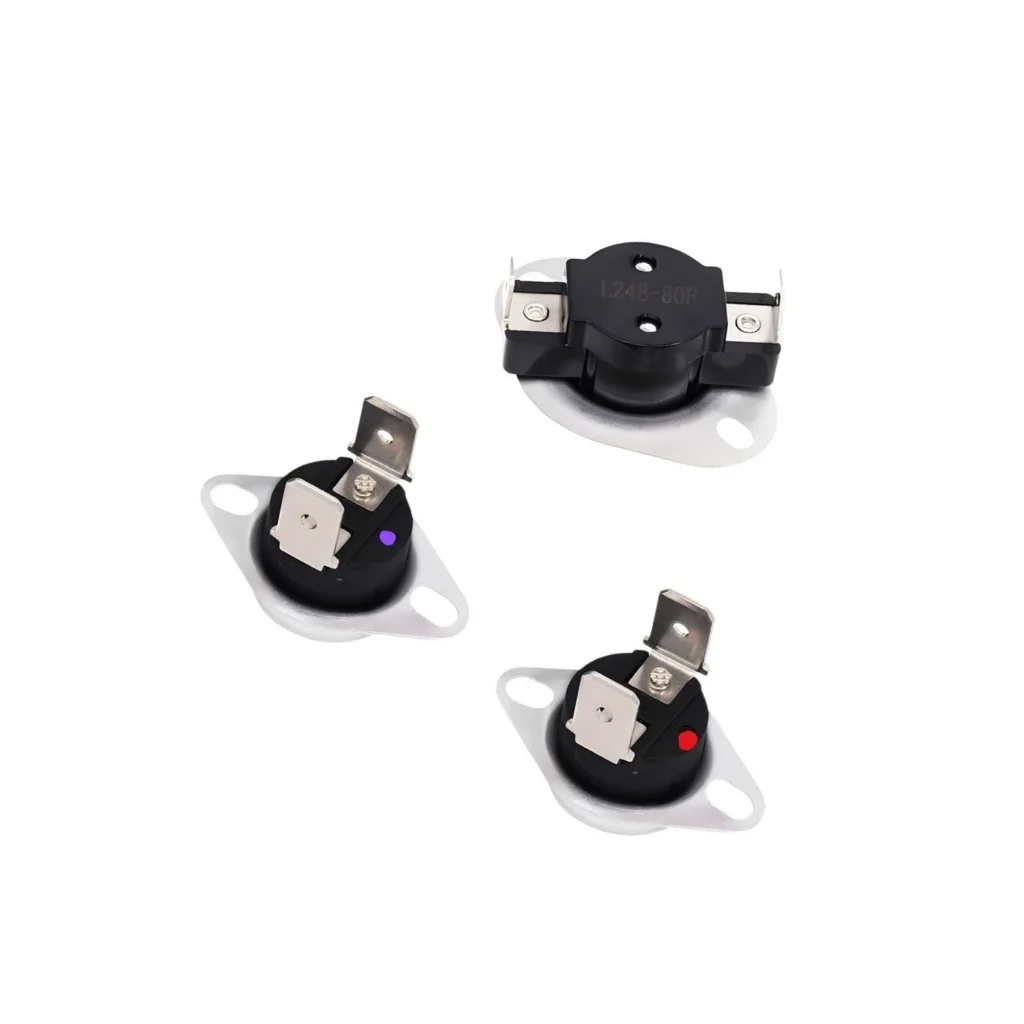
Your Maytag PYE2300AYW dryer runs, the drum spins normally, but your clothes come out cold and damp after an hour-long cycle. That's the classic sign of a blown thermal fuse — a safety device that cuts power to the heating element when your dryer overheats. The LA-1053 kit replaces both the thermal fuse and high limit thermostat, the two most common thermal failures in Whirlpool, Maytag, Admiral, and Norge dryers.
This repair works for dozens of models including the HYE2460AYW, HYG3460AWW, PYET344AYW, and ADE20K3CKDW. It's one of the most common dryer repairs you'll face, and it's completely doable in under an hour with basic tools.
What You Need Before Starting
Gather these tools before you begin:
- 1/4-inch nut driver or socket set
- Flathead screwdriver
- Putty knife (for popping the top panel)
- Multimeter for testing continuity (optional but recommended)
- Work gloves
Estimated Time: 30-45 minutes
Difficulty: Moderate
Safety First
Unplug your dryer completely from the wall outlet. If it's hardwired, flip the breaker. For gas dryers, turn off the gas supply valve behind the unit. Never attempt this repair with power still connected — you'll be working near wiring and heating elements. Pull the dryer away from the wall to access the back panel.
Step 1: Remove the Back Panel or Front Panel
Most Whirlpool and Maytag dryers give you access from the back. Remove 6-8 screws around the perimeter of the back panel with your nut driver. Some models like the HYG series require front access instead — you'll pop the top with a putty knife, remove two screws inside, then drop the front panel forward. Check your specific model number from the list above to determine which approach you need.
Step 2: Locate the Thermal Fuse and High Limit Thermostat
Once inside, find your heating element housing — it's the large metal canister at the bottom rear of the drum. The thermal fuse is a small white or cream-colored component with two wires attached, mounted directly on the housing. Right next to it, you'll see the high limit thermostat, which looks similar but slightly larger. Both components in the LA-1053 kit mount with a single screw each.
Step 3: Disconnect and Remove the Old Components
Pull the wire terminals straight off each component. They're friction-fit, so wiggle gently if they're stuck. Remove the mounting screw holding the thermal fuse, then do the same for the thermostat. Before you toss the old parts, test them with a multimeter set to continuity — a blown fuse will show infinite resistance (no beep). This confirms your diagnosis.
Step 4: Install the New LA-1053 Thermal Fuse and Thermostat
Position the new thermal fuse in the exact mounting hole where the old one sat. Thread the screw in finger-tight, then snug it down — don't overtighten or you'll crack the ceramic body. Repeat for the high limit thermostat. Push the wire terminals onto the metal tabs until they click into place. Make sure each connection is firm; loose terminals cause overheating.
Step 5: Clean Your Dryer Vent System
Here's the critical part most people skip: the thermal fuse blows when your exhaust vent gets clogged with lint, causing back pressure and overheating. If you don't clean the vent now, your new fuse will blow again in weeks. Disconnect the vent hose from the back of the dryer. Use a vent brush or shop vac to clear lint from the hose and the external vent opening. If your vent run is longer than 15 feet or has multiple 90-degree bends, clean it annually to prevent repeat failures.
Step 6: Reassemble and Test
Replace the back panel (or front panel if that's how you entered) and secure all screws. Reconnect the vent hose with a metal clamp — don't use cheap plastic or foil-style hoses that collapse. Push the dryer back into position, plug it in or flip the breaker, and turn on the gas if applicable. Run a test cycle on high heat with damp towels. Within 5-10 minutes, you should feel hot air from the vent and the drum should be warm to the touch.
Testing After Installation
Run a full dry cycle to verify proper operation. Check that hot air flows freely from your external vent. If the dryer still doesn't heat, double-check your wire connections and confirm both components are properly mounted. On gas models, verify the gas valve is open and the igniter glows during the heat cycle.
Frequently Asked Questions
Why did my thermal fuse blow in the first place?
The most common cause is a clogged exhaust vent. When lint blocks airflow, heat builds up inside the dryer cabinet until the thermal fuse reaches its trip point (usually around 185-190°F) and blows open permanently. Other causes include a failing blower wheel, a crimped vent hose, or too many 90-degree bends in your vent run. Always address the root cause or the new fuse will fail again.
Can I just replace the thermal fuse without replacing the thermostat?
You can, but it's not recommended. The high limit thermostat cycles on and off during normal operation and wears out over time. Since you're already inside the dryer with the heating assembly exposed, replacing both components together (as the LA-1053 kit provides) prevents a return trip in six months when the thermostat fails. It's cheap insurance.
Will this kit work on my older Whirlpool dryer from 2005?
The LA-1053 kit replaces part numbers AP4242472, PS2162282, 53-1133, and 53-1526 across multiple decades of production. It's compatible with Whirlpool, Maytag, Admiral, and Norge models manufactured from the late 1990s through current production. Check the compatible models list — if your model number appears (like HYG2460AWW, PYET444AYW, or ADG20L2A), you're good to go. When in doubt, match your old part numbers to the ones this kit replaces.
Clean your dryer vent annually if the run is longer than 15 feet — clogged vents are the #1 reason thermal fuses blow repeatedly.
Need the part for this repair?
LA-1053 · In Stock · Ships next business day