
How to Replace 2198202 Cold Control Thermostat on Whirlpool Refrigerator — Step-by-Step
Always unplug the refrigerator before replacing the cold control thermostat. The capillary tube is fragile — avoid kinking or bending sharply during installation.
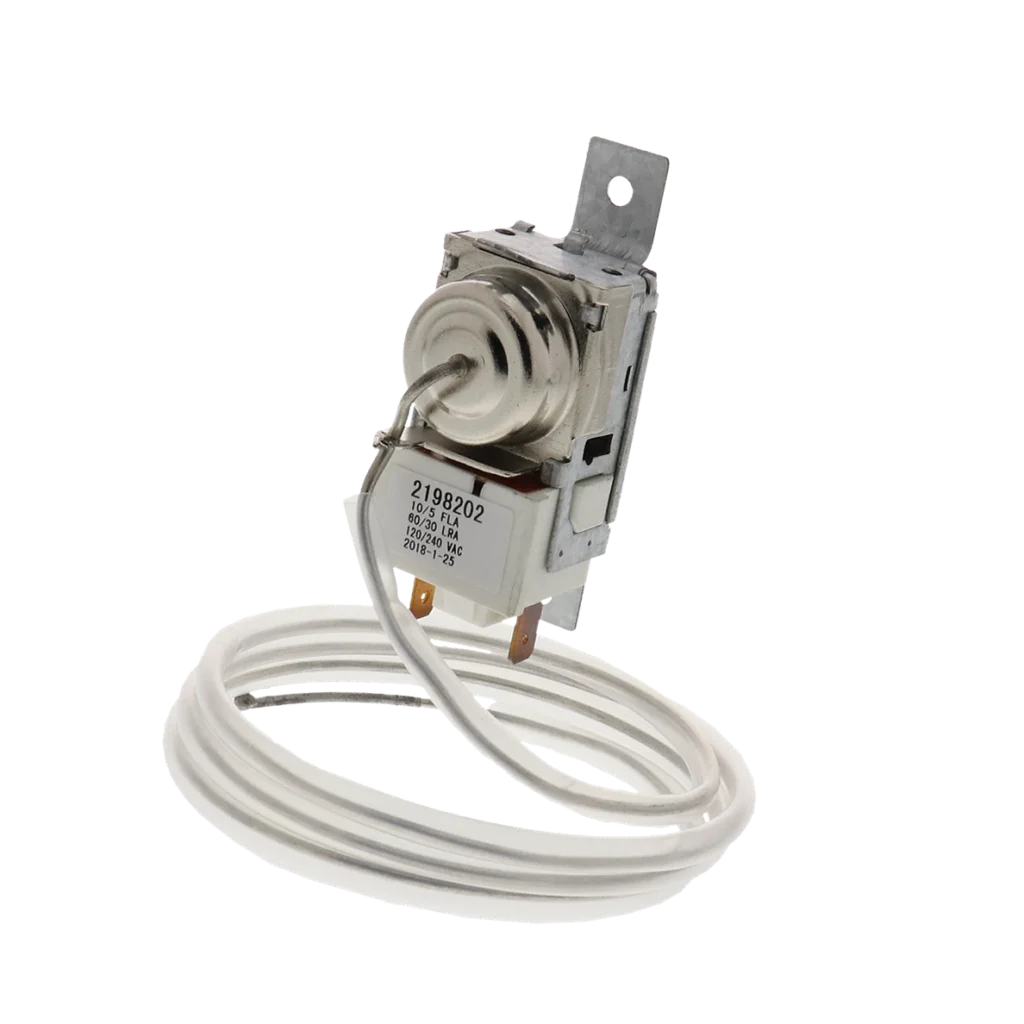
Your Whirlpool refrigerator is running constantly but everything's still too warm. Or maybe it's the opposite — your milk is freezing solid on the top shelf. Both scenarios point to the same culprit: a failed cold control thermostat. The 2198202 thermostat is the brain that tells your compressor when to kick on and off, and when it goes bad, temperature regulation goes out the window.
This part fits dozens of Whirlpool, Kenmore, Maytag, and KitchenAid models including the ED5KVEXVQ00, 3ED25DQXDN00, and ED2SHEXMQ00. If your fridge won't start at all, cycles endlessly, or can't maintain proper temperatures in either compartment, you're likely looking at a thermostat replacement.
What You Need Before Starting
- Phillips head screwdriver
- Flathead screwdriver
- Needle-nose pliers
- Work gloves (metal edges can be sharp)
- Flashlight or headlamp
- Cooler with ice (for storing food during repair)
Estimated Repair Time: 45-60 minutes
Difficulty Level: Intermediate
Safety First
Unplug your refrigerator completely before starting this repair. Don't just rely on turning off a circuit breaker — physically disconnect the power cord from the wall outlet. The thermostat connects directly to electrical components, and you'll be working inside the fridge compartment where moisture is present. You'll also need to remove food from the fresh food section since you'll need clear access to the back wall. Transfer everything to a cooler to keep it cold during the repair.
Step 1: Access the Thermostat Housing
The cold control thermostat on most Whirlpool models sits behind the temperature control dial inside the fresh food compartment. Remove all the shelves and bins that might block your access to the upper back area. You'll see a plastic control panel or housing near the top — this is held in place by plastic clips or screws. On models like the ED5HVEXVB02, there are usually two screws at the top edge. Remove these and gently pull the housing forward. The control dial should come with it, still attached to the thermostat.
Step 2: Disconnect the Old Thermostat
Once you've pulled the housing forward, you'll see the thermostat body with a wire harness plugged into it and a capillary tube snaking into the back wall. Take a photo of the wire connections before disconnecting anything — this'll save you headaches during reassembly. Unplug the wire harness by pressing the release tab and pulling straight out. Don't yank on the wires themselves. Next, you'll need to carefully pull the sensing bulb and capillary tube out from where it's routed behind the interior wall liner. This tube is delicate — if you kink or break it, the thermostat is garbage.
Step 3: Remove Mounting Hardware
The thermostat itself is held to the plastic housing by a metal mounting bracket. On the 2198202, there's typically one screw holding this bracket in place. Remove it and slide the old thermostat out of its bracket. The control dial shaft goes through the front panel — you may need to rotate it or wiggle it slightly to get everything separated. Some models use a friction-fit dial that just pulls off, while others have a small set screw on the side of the knob.
Step 4: Install the New 2198202 Thermostat
Thread the capillary tube of your new thermostat through the same path where the old one was routed. This tube needs to make contact with the evaporator coils or cooling plate behind the wall liner — that's how it senses temperature. Push it in gently until it reaches the same depth as before (usually 3-4 inches). Mount the new thermostat body into the bracket and secure it with the screw you removed earlier. Slide the control dial onto the shaft, making sure it's seated properly. If your dial has a set screw, don't overtighten it — just snug enough that the dial doesn't slip when you turn it.
Step 5: Reconnect and Reassemble
Plug the wire harness back into the new thermostat until you hear or feel it click into place. Double-check your photo to make sure the wires are on the correct terminals. Carefully push the control housing back into position, making sure you're not pinching any wires behind it. Replace the mounting screws. Put your shelves and bins back in, reload your food, and plug the refrigerator back in.
Testing After Installation
Set your temperature control to the middle setting (usually "5" on models with 1-9 dials). You should hear the compressor kick on within a few minutes. Place a refrigerator thermometer on the middle shelf and check it after 4-6 hours — it should read between 35-38°F. The compressor should cycle off once the temperature is reached, then kick back on when it warms up a few degrees. If your fridge was running constantly before, you'll notice it actually shuts off now. If it wasn't running at all, you'll hear it fire up and feel cool air circulation.
Frequently Asked Questions
Why is my fridge too warm even after replacing the thermostat?
If you're still seeing "fridge too warm" symptoms after installing the new 2198202, check that the capillary tube is fully inserted and making proper contact with the evaporator. Also verify the wire harness is completely seated — a loose connection can prevent the thermostat from signaling the compressor to run. Finally, make sure your condenser coils underneath or behind the fridge are clean. Dirty coils can cause temperature issues that mimic a bad thermostat.
Can a bad cold control thermostat cause both compartments to be warm?
Absolutely. The cold control thermostat controls the compressor for the entire cooling system. When it fails in the "open" position, the compressor won't run at all, causing both the fridge and freezer sections to warm up. This is one of the most common symptoms reported for models like the 3VED23DQEW00 and ED5FVGXWS01.
How do I know if the problem is the thermostat or the compressor?
If your compressor is completely silent and the fridge is warm, try turning the temperature dial to the coldest setting. If you still hear nothing — no click, no hum — disconnect power and check the wire connections to the thermostat. A failed thermostat won't send power to the compressor. You can also carefully bypass the thermostat temporarily with a jumper wire (with power off) to test if the compressor runs. If it does, your thermostat is definitely the problem. If it doesn't, you may have a compressor or relay issue.
Take a clear photo of the wire harness connections before disconnecting anything. This makes reassembly foolproof and prevents crossed wires.
Need the part for this repair?
2198202 · In Stock · Ships next business day