
How to Replace W10349492 Dryer Blower Wheel on Whirlpool Maytag Dryer — Step-by-Step
Unplug dryer completely before repair. Gas dryers require shutting off gas supply. Blower housing edges are sharp—wear gloves.
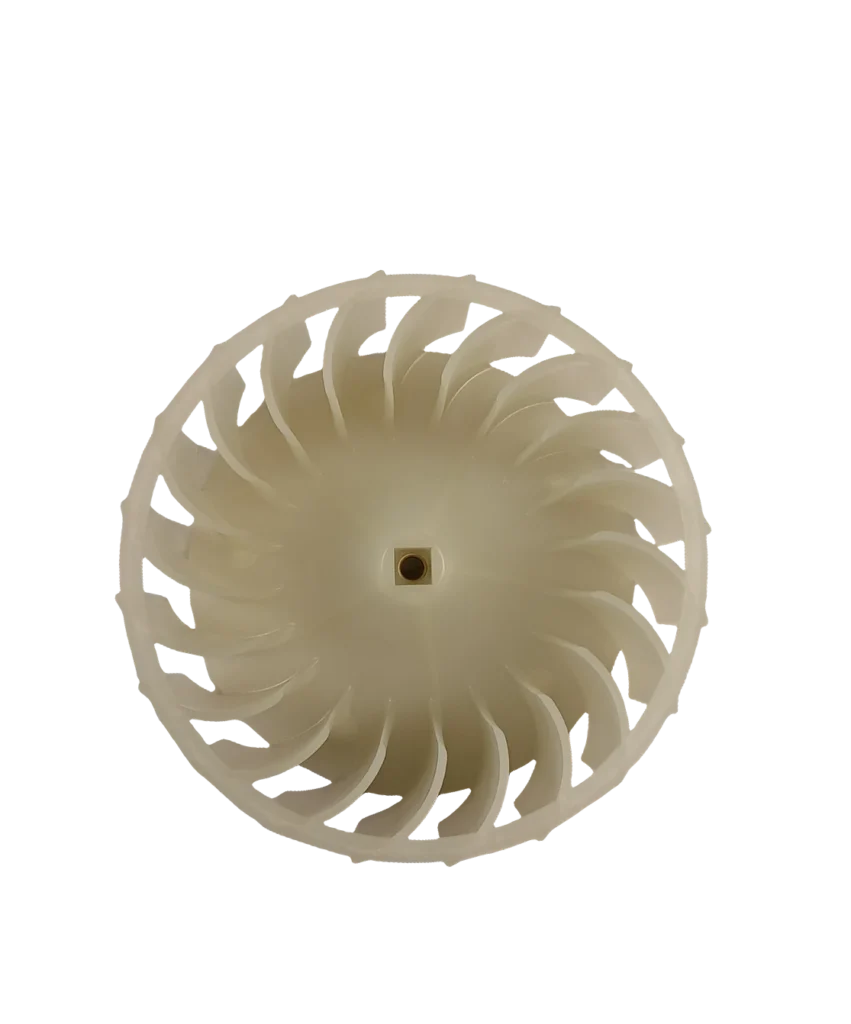
Your Maytag 7MMEDX550XW1 starts making an odd rattling sound—like something stuck in a bicycle spoke, as one homeowner described it. Or worse, no air's coming from the vents and your dryer's overheating until it trips the breaker. Nine times out of ten, it's the blower wheel. Either it's separated from the motor shaft, or it's so caked with lint it can't spin properly. The good news? Replacing the W10349492 blower wheel is straightforward once you know the critical trick: it's reverse threaded.
What You Need Before Starting
This repair takes 30-60 minutes and rates as Easy difficulty. Gather these tools:
- Adjustable wrench
- Flathead and Phillips screwdrivers
- Work gloves (the blower housing edges are sharp)
- Shop vacuum (you'll find lint everywhere)
Repair Time: 30-60 minutes
Difficulty: Easy
Safety First
Unplug the dryer completely—not just turning off the breaker, physically disconnect it. Gas dryers require shutting off the gas supply valve and disconnecting the supply line. You'll be working near the motor and heating elements, so double-check power is off before removing any panels. Wear gloves when handling the blower housing; those metal edges will slice your hands without warning.
Step 1: Access the Blower Assembly
Remove the front panel of your dryer. On most Whirlpool and Maytag models like the 7MMGDX700BG0 or 3LCED9100WQ0, you'll need to pop off the top, remove two screws holding the front, then lift and tilt the panel forward. The drum will stay in place—don't panic when you see it sitting there unsupported. Locate the blower housing on the lower right side of the cabinet.
Step 2: Remove the Blower Housing
Disconnect the wire harness from the motor. Remove the screws securing the blower housing to the cabinet—typically three or four. Pull the entire housing assembly out. You'll immediately see why your dryer wasn't working: lint packed around the wheel, or the wheel itself wobbling loose on the shaft. One user noted, "Since the wheel had separated from the nut, it wasn't quite as easy... I had to remove (destroy) the wheel first."
Step 3: Remove the Old Blower Wheel (Remember: Reverse Thread!)
Here's where people mess up. The W10349492 wheel is reverse threaded. Turn it clockwise to loosen, counterclockwise to tighten. Look for the arrows molded into the wheel—they show you which direction to turn. Hold the motor shaft with one hand (or needle-nose pliers) while turning the wheel with your adjustable wrench. If the wheel's already separated from the nut, you may need more force than expected. The nut seats tightly on the shaft, so don't be gentle.
Step 4: Install the New Blower Wheel
Clean the motor shaft with a rag—remove any lint or residue. Slide the new W10349492 wheel onto the shaft, threading it counterclockwise (opposite of normal). Hand-tighten first, then use your wrench to snug it down firmly. Don't overtighten or you'll strip the plastic threads. The wheel should spin freely without wobbling. If it rubs against the housing when you test-spin it by hand, it's not threaded correctly.
Step 5: Reassemble and Test
Vacuum out the blower housing and cabinet interior—seriously, get all that lint. Reattach the housing to the cabinet, reconnect the motor wire harness, and replace the front panel. Plug in the dryer (or reconnect gas), then run a 10-minute air-dry cycle. Listen for smooth, quiet operation. Check the vent outside—you should feel strong airflow immediately. No rattling, no grinding, just the normal whoosh of air moving through the system.
Testing After Installation
Run a full cycle with a load of towels. Monitor the temperature—it should reach normal heat without tripping any breakers. Check the exhaust vent after 15 minutes; strong airflow means the wheel's spinning properly. If you still hear noise only when the housing is attached (as one customer reported), the wheel might be slightly off-center. Remove and reinstall it, ensuring it threads straight onto the shaft.
Frequently Asked Questions
Why does my blower wheel sound fine until I attach the housing?
This usually means the wheel isn't threaded straight on the motor shaft, causing it to wobble slightly and contact the housing during operation. Remove it and reinstall, making sure it goes on perpendicular to the shaft. The reverse threading can cause cross-threading if you're not careful during installation.
Can a bad blower wheel cause my dryer to overheat and trip the breaker?
Absolutely. If the wheel's not spinning (separated from the shaft or jammed with lint), airflow stops completely. Heat builds up in the drum, the high-limit thermostat can't keep up, and you'll trip breakers or blow thermal fuses. Always check that the wheel's securely attached and debris-free before assuming it's an electrical issue.
Will the W10349492 fit my Kenmore dryer?
This wheel replaces WPW10349492, W10168564, 697772, and AP6020100, so it fits dozens of Whirlpool-manufactured dryers sold under Kenmore, Amana, and KitchenAid brands. Check your model number against the compatibility list—models like 7EWED5550YW1, 7MWED5600BW0, and the entire 3LCED9100WQ series are confirmed compatible.
The wheel is REVERSE threaded—turn clockwise to loosen, counterclockwise to tighten. Follow the arrows molded into the wheel.
Need the part for this repair?
W10349492 · In Stock · Ships next business day