
How to Replace DC97-04973B Door Boot Spring Clamp on Samsung Front-Load Washer — Step-by-Step
Unplug washer before starting. Spring wire ends are sharp—wear gloves during removal and installation.
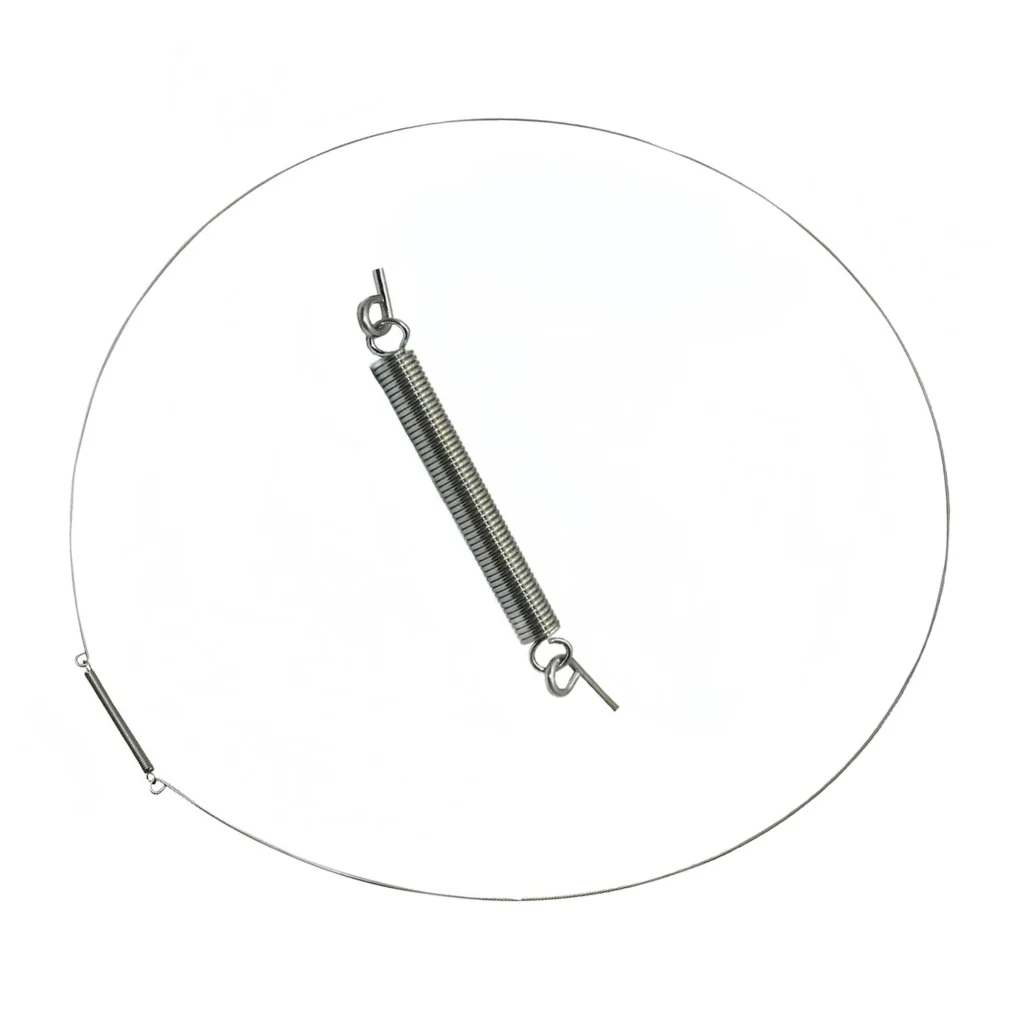
You're pulling clothes out of your Samsung front-loader and notice water pooling on the floor. Not a puddle from a previous load—this is fresh, happening right now. You peek inside the door seal and spot it: that metal spring clamp holding your door boot has either loosened or broken entirely. The rubber seal is sagging away from the front panel, and water's escaping during the wash cycle. This DC97-04973B door boot spring clamp is what keeps that seal tight against the machine, and when it fails, you get leaks. Here's how to swap it out without calling a tech.
What You Need Before Starting
- Flathead screwdriver
- Needle-nose pliers
- Towel (to catch any residual water)
- Work gloves (that spring wire has sharp ends)
Repair Time: 15-20 minutes
Difficulty: Easy
Safety First
Unplug your washer completely before you touch anything. Front-loaders hold water in the boot seal even after a cycle finishes, so have that towel ready when you start working with the clamp. Those spring wire ends are sharp—they'll catch skin if you're not careful, so gloves aren't optional here.
Step 1: Open the Door and Locate the Clamp
Open your washer door wide. Look at the outer edge of the rubber door boot where it folds over the front panel. You'll see a wire spring clamp running around the entire circumference—it's thick wire bent into a continuous loop with a spring mechanism. On Samsung models like the WF419AAW or WF448AAW, this clamp sits in a groove on the outer edge of the boot. Find where the spring ends meet—that's your starting point for removal.
Step 2: Release the Old Spring Clamp
Use your flathead screwdriver to pry up one end of the spring wire from its groove. Once you've got a section lifted, grab it with needle-nose pliers and work your way around the door boot, pulling the entire clamp out of the rubber groove. The spring tension will release as you go—don't let it snap back on your fingers. Pull the old clamp completely free and set it aside.
Step 3: Peel Back the Door Boot
With the clamp removed, you can fold the outer lip of the door boot into the washer drum. This gives you a clear view of how the boot sits in the front panel channel. Check for any tears or mold while you're here—if the rubber itself is damaged, you'll need a new boot, not just the clamp. Wipe away any water or detergent residue in the channel.
Step 4: Install the New DC97-04973B Clamp
Pull the door boot back up over the front panel edge, making sure it's seated evenly all the way around. Start at the top center and work the rubber lip into its channel. Now take your new spring clamp and begin hooking it into the groove, starting at the 12 o'clock position. Work your way around in one direction, using your screwdriver to push the wire into the groove as you go. The spring tension increases as you get close to completing the loop—use the pliers to stretch that last section into place. When it clicks in fully, you'll feel the entire boot seal pull tight against the panel.
Step 5: Check the Seal and Test
Run your hand around the entire door boot perimeter. It should be uniformly tight with no gaps or loose sections. Close the door and look at the seal from outside—the rubber should compress evenly against the door glass. Plug your washer back in and run a rinse cycle on high spin. Stand there and watch for leaks at the door seal. If water stays inside where it belongs, you're done.
Testing After Installation
Run a small load with towels and use the highest water level setting your machine allows. Watch the door seal during the fill and agitation cycles—leaking usually shows up when the drum is full and moving. Check the floor under the washer after the cycle completes. No water? Your clamp is doing its job. If you still see moisture, double-check that the boot is seated properly in the front panel groove before assuming you've got other issues.
Frequently Asked Questions
Can I reuse the old clamp if it looks okay?
Don't. These wire spring clamps lose tension over time, and that's usually why your boot seal started leaking in the first place. A new clamp costs fifteen bucks and guarantees proper tension. Reusing a weakened clamp means you'll be back inside this seal in a few months when it starts leaking again.
Which Samsung models use this DC97-04973B clamp?
This clamp fits a wide range of Samsung front-loaders including WF338AAW, WF419AAW, WF209ANW, WF210ANW, WF331ANW, WF409ANW, WF431ABW, WF448AAW, WF511ABW, WF520ABW, and dozens more from Samsung's 2010-2015 front-load lineup. Check your model number against the compatibility list, but if you've got a Samsung front-loader from that era with a wire spring clamp on the boot, this is likely your part.
Do I need to replace the entire door boot or just the clamp?
Just the clamp, assuming your rubber boot isn't torn or severely deteriorated. If you see cracks, holes, or chunks of rubber missing, you need a new boot assembly. But if the rubber looks fine and you're only dealing with leaks caused by a loose seal, replacing this spring clamp restores the original factory tension and stops the leak. Pull the old clamp off and inspect the boot carefully before ordering parts.
Start installing the new clamp at the top center of the door boot and work in one direction around the entire seal for even tension.
Need the part for this repair?
DC97-04973B · In Stock · Ships next business day