
How to Replace DD94-01062A Dishwasher Leak Sensor Assembly on Samsung Dishwasher — Step-by-Step
Always unplug the dishwasher or turn off the circuit breaker before working on the leak sensor — you'll be working near electrical connections in the base of the unit.
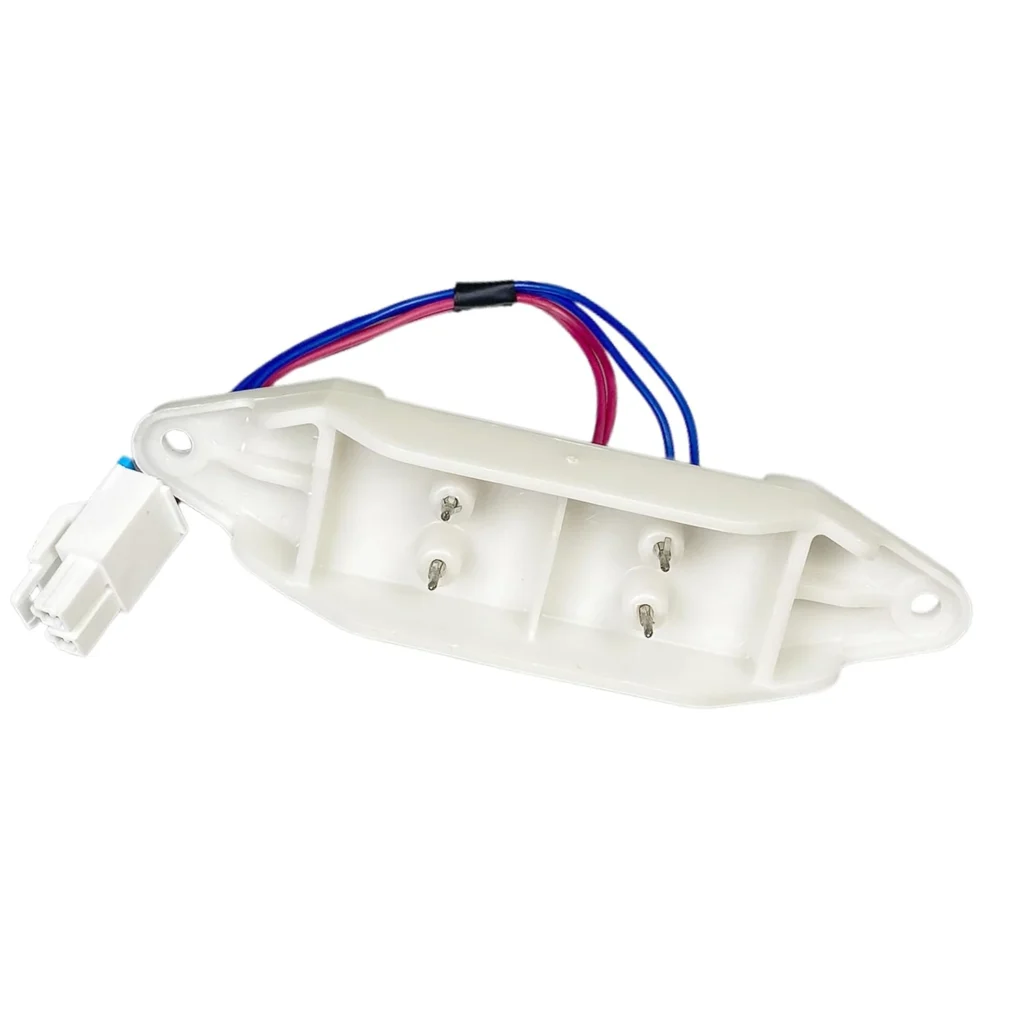
Your Samsung dishwasher stopped mid-cycle with an LE or LC error code flashing on the display. The machine won't run, and you might even notice a small puddle underneath. That's your leak sensor doing its job — except now it's stuck thinking there's always a leak, even when everything's bone dry.
The DD94-01062A leak sensor assembly sits in the base pan of your Samsung dishwasher, watching for any water that shouldn't be there. When it malfunctions, it'll trigger false alarms and shut down your entire machine. I've replaced dozens of these on models like the DW80F600UTS and DMT800RHS, and it's actually one of the easier Samsung dishwasher repairs you can tackle yourself.
What You Need Before Starting
- Phillips screwdriver
- Towels or shop rags
- Flashlight or work light
- Small container for screws
- Putty knife or plastic pry tool (optional)
Repair Time: 20-30 minutes
Difficulty: Easy
Safety First
Unplug your dishwasher completely before starting this repair. If it's hardwired, flip the breaker at your electrical panel. You'll be working in the base of the machine where water might've collected, so keep towels handy. The sensor itself is low-voltage, but the dishwasher's main power connections are definitely not — don't skip this step.
Step 1: Access the Dishwasher Base
Remove the lower access panel (kick plate) at the bottom front of your dishwasher. On most Samsung models, you'll find two screws at the top corners of this panel. Some units use clips instead — just pull firmly at the bottom if yours doesn't have visible screws. Set the panel aside and grab your flashlight.
Step 2: Locate and Inspect the Leak Sensor
The leak sensor sits in the right side of the base pan, usually toward the front. It looks like a small white or gray plastic box about 2 inches square with wires coming out the top. Check for standing water in the base pan first — if there's actual water, soak it up with towels before proceeding. That water might be what triggered the original error, but a faulty sensor can also create false readings.
Step 3: Disconnect the Old Sensor
Follow the wires from the sensor up to the wire harness connector. Press the release tab and pull the connector apart — don't yank on the wires themselves. The sensor usually sits in a mounting bracket or clips directly to the base pan. On the DW80F600 series, you'll twist it counterclockwise about a quarter turn to release it. On DMT models, it typically just lifts out of a plastic holder.
Step 4: Install the New DD94-01062A Sensor
Position your new sensor in the same spot where the old one sat. Make sure it's seated flat against the base pan — the float mechanism inside needs to move freely. If your model requires it, twist clockwise to lock it in place. Connect the wire harness until you hear a solid click. Give the wires a gentle tug to confirm the connection is secure.
Step 5: Reinstall the Access Panel and Test
Replace the kick plate and secure it with the screws. Restore power to your dishwasher and run a rinse cycle without any dishes. Watch for error codes during the first few minutes. The machine should fill, wash, and drain normally without triggering any leak alerts. If you still get an LE or LC code, check that the wire connector is fully seated and that no water remains in the base pan.
Testing After Installation
After your first test cycle completes successfully, run a full wash cycle with dishes. Monitor the first 10 minutes closely — that's when most leak detection happens. Open the kick plate after the cycle and shine your light into the base pan. It should be completely dry. If you see water, you've got an actual leak somewhere else that needs addressing before the sensor will stay happy.
Frequently Asked Questions
Will this sensor work on my DW80F600UTB model?
Yes, the DD94-01062A is the correct sensor for the entire DW80F600 series, including UTB, UTS, and UTW variants. It also fits DMT series models like the DMT800RHS and DMT400RHW. Check your dishwasher's model number plate inside the door frame to confirm compatibility.
Can I just dry out the old sensor instead of replacing it?
Sometimes, but it's risky. If the sensor triggered because of actual water in the base pan, drying everything out might work temporarily. However, if the sensor's float mechanism is stuck or the internal contacts are corroded, it'll keep failing. At $32.99, replacing it gives you peace of mind and usually solves the problem permanently.
Why does my Samsung dishwasher keep saying there's a leak when there isn't?
The leak sensor uses a simple float mechanism. When water enters the base pan, the float rises and triggers a switch. Over time, detergent residue, hard water minerals, or corrosion can cause the float to stick in the "up" position, making your dishwasher think there's always a leak. This creates the false LE or LC error code even when the base pan is completely dry.
Before installing the new sensor, thoroughly dry the base pan and check for the source of any water — fixing an actual leak is just as important as replacing a faulty sensor.
Need the part for this repair?
DD94-01062A · In Stock · Ships next business day