
How to Replace W10350375 Upper Rack Adjuster Kit on Whirlpool Dishwasher — Step-by-Step
Wear gloves when working with spring-loaded clips — they can snap and pinch fingers during removal.
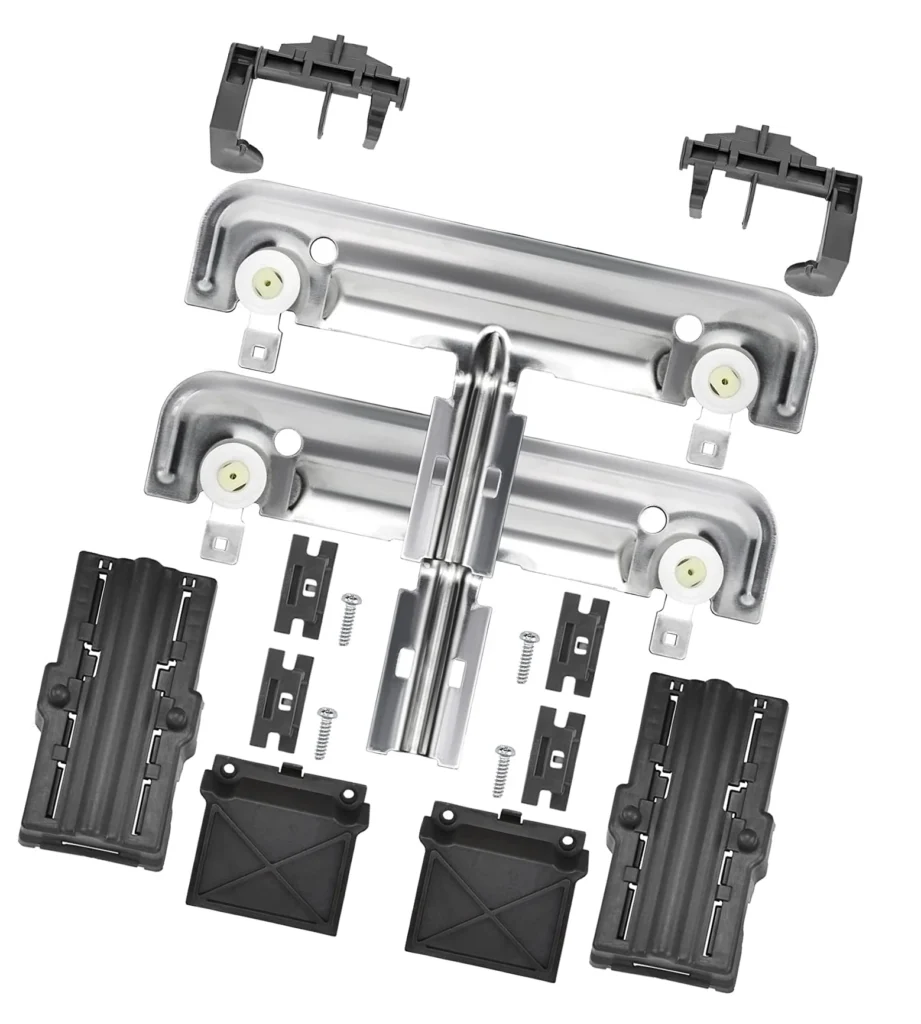
You load the dishwasher, push the top rack in, and hear that sickening crack. Now the rack won't slide smoothly, or worse — the door won't even latch because the rack's sitting crooked. That broken plastic spoke on the roller assembly isn't something you can fix with glue. You need the W10350375 adjuster kit, which replaces the entire mechanism on both sides.
This kit works across dozens of Whirlpool, KitchenAid, and Kenmore dishwashers, including the WDT750SAHZ0, KDFE454CSS4, and KUDC10IBSS0. It's an updated design that's more durable than the original parts, and you'll be replacing both left and right adjusters at once.
What You Need Before Starting
- Phillips screwdriver
- Flathead screwdriver (for prying clips)
- Needle-nose pliers
- Work gloves (those plastic clips can be sharp)
Time required: 30-45 minutes
Difficulty: Moderate — you'll need to remove the rack and work with small clips
Safety First
Unplug the dishwasher or flip the breaker before starting. You're not working with electrical components here, but it's good practice. The real hazard is those spring-loaded clips that can snap and pinch your fingers. Wear gloves and keep your face back when releasing tension clips.
Step 1: Remove the Upper Rack Completely
Pull the upper rack all the way out until it stops. Look at both sides where the rack meets the rails — you'll see the adjuster assemblies. Lift the rack up and angle it toward you to unhook it from the rail system. Some models have a release lever you press; others just lift straight up once fully extended.
Step 2: Detach the Old Adjuster Assemblies
Flip the rack upside down on a towel. The adjusters are clipped onto the rack frame with plastic tabs. Use your flathead screwdriver to carefully pry the clips loose — there's usually one on top and one on the bottom of each adjuster. The broken spoke you're seeing is part of the roller wheel assembly that's integrated into this adjuster. Once the clips release, slide the old adjuster off the rack rail.
Step 3: Assemble the New Adjuster Components
Your W10350375 kit includes four main pieces: two adjuster bodies (left and right) and two actuator mechanisms. The actuators are the parts that let you raise or lower the rack. Snap the actuator into the adjuster body — you'll hear a click when it seats properly. The new design looks different from the original, but it's engineered to be stronger where the old plastic spokes failed.
Step 4: Install Adjusters onto the Rack Frame
Slide each assembled adjuster onto the rack rail, making sure the roller wheels face outward. Push firmly until the clips snap into place on both top and bottom. Give each one a tug to confirm it's locked in. The wheels should spin freely, and the adjuster should slide smoothly along the rack rail.
Step 5: Reinstall the Rack and Test Adjustment
Lift the rack back into the dishwasher, aligning the new adjusters with the rail tracks on both sides. Slide it in about halfway, then test the height adjustment mechanism. Press the actuator levers and try raising and lowering the rack — it should move smoothly with no binding. Push the rack all the way in and close the door to make sure it latches properly.
Testing After Installation
Run an empty cycle on a quick wash setting. Listen for any unusual noises — rattling or clicking means an adjuster isn't fully seated. Open the door mid-cycle and pull the rack out to verify water's reaching the spray arm and nothing's obstructing movement. If the door latch was your original problem, it should close and seal correctly now that the rack's properly aligned.
Frequently Asked Questions
Can I replace just one side, or do I need to do both?
The kit includes parts for both left and right sides, and you should replace both even if only one is broken. Mismatched adjusters can cause the rack to sit crooked, leading to poor cleaning performance and potential door latch issues. Plus, if one side failed, the other isn't far behind.
Why does my new adjuster look different from the original?
Whirlpool updated this design to address the common failure point where the plastic spoke breaks. The W10350375 is the improved version — it's bulkier but significantly more durable. It's fully compatible with your original rail system and will function exactly the same way once installed.
Will this fix my dishwasher if it's leaking or not cleaning properly?
If your leak or cleaning issue is caused by a misaligned upper rack (which happens when adjusters fail), then yes. A crooked rack can prevent the door from sealing correctly or block the spray arm from rotating. However, if the rack alignment looks fine, you've got a different problem — likely a door gasket, pump, or spray arm issue unrelated to these adjusters.
Replace both left and right adjusters even if only one is broken — mismatched parts cause the rack to sit crooked.
Need the part for this repair?
W10350375 · In Stock · Ships next business day