
Whirlpool Dishwasher Not Drying Dishes — 5 Causes & How to Fix
You open your Whirlpool dishwasher after the cycle finishes, and the dishes are still wet. Not just damp — completely soaked, like they never went through a dry cycle at all. One owner of a WDF520PADM3 described it perfectly: "My dishwasher started leaving food on dishes and not drying dishes as well as it used to." If this sounds familiar, you're dealing with one of the most common dishwasher complaints, and the heating element is usually the culprit.
The heating element does double duty in your dishwasher — it heats water during the wash cycle for better cleaning and sanitizing, then it dries your dishes at the end. When it fails, you'll notice both problems: dishes don't come out as clean, and they're definitely not dry.
Quick Symptom Check
Before you pull the dishwasher out, check these telltale signs:
- Dishes are wet after complete cycle — the most obvious symptom
- Food residue remains on dishes — water isn't hot enough to clean properly
- No steam during or after wash cycle — element isn't heating water
- Dishwasher runs but nothing seems to happen — could indicate electrical failure
- Visible break in the element coil — you can sometimes see this through the bottom rack
One 69-year-old DIYer noticed exactly this: "The element broke in our Whirlpool dishwasher. Our dishwasher did not dry and I noticed the element broke." If you can see a physical break, you've found your problem.
Cause #1: Failed Heating Element (70% probability)
The heating element burns out over time. It's a high-resistance wire that heats up when electricity flows through it, and eventually those heating and cooling cycles cause metal fatigue. The element can develop a break in the coil, or the internal resistance can increase to the point where it doesn't heat effectively.
How to diagnose:
- Remove the bottom dish rack and look at the element along the bottom of the tub
- Look for visible breaks, cracks, or blistering in the element coil
- Use a multimeter to test for continuity — a working element should read 15-30 ohms
- If you get infinite resistance or see physical damage, the element is done
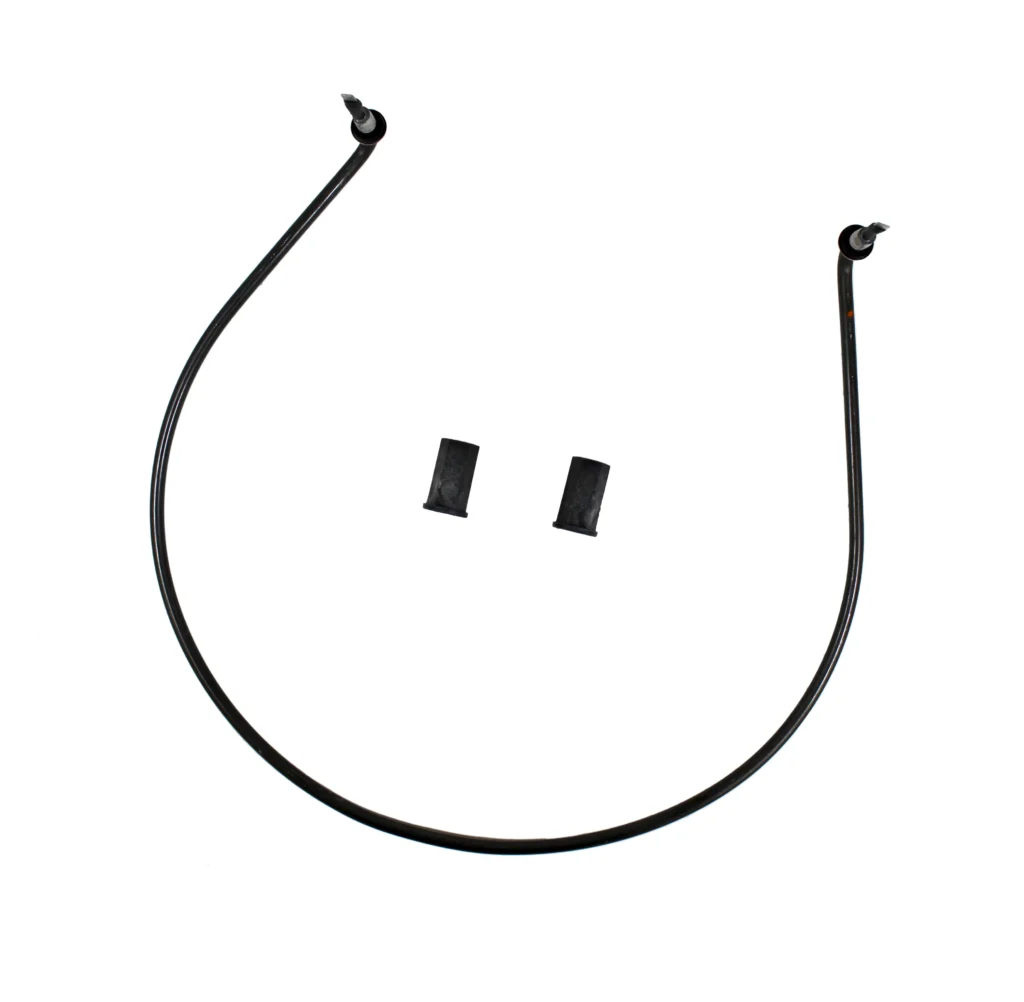
The W10518394 heating element fits dozens of Whirlpool, Maytag, Kenmore, and Amana models including WDF520PADM7, WDF520PADM5, WDF540PADM3, and WDF320PADW2. It's a direct replacement for older part numbers like W10134009 and 8194250.
Repair difficulty: Moderate. The actual element replacement takes 10 minutes — it's held in place by two nuts. But getting to it requires pulling the dishwasher out from under the counter, which adds time and effort.
Cost: The element itself costs around $30-50. You'll need about an hour if you've never pulled a dishwasher before.
Cause #2: Faulty High Limit Thermostat (15% probability)
The high limit thermostat is a safety device that cuts power to the heating element if it gets too hot. When this thermostat fails in the open position, the element never gets power. When it fails closed, the element can overheat and burn out.
How to diagnose:
- The thermostat is usually attached to the heating element itself
- Test for continuity with a multimeter — it should show continuity at room temperature
- If there's no continuity, the thermostat has failed open
- Many people replace both the element and thermostat at the same time as preventive maintenance
As one owner mentioned: "I decided to replace both the heating element and the high limit thermostat" after experiencing drying problems. It's not a bad strategy if you've already got the dishwasher pulled out.
Cause #3: Defective Heating Element Relay on Control Board (8% probability)
The control board sends power to the heating element through a relay. If that relay fails, the element never gets electricity even though it's perfectly fine.
How to diagnose:
- This one's trickier — you need to test for voltage at the element terminals during the heat cycle
- If you have 120V at the element but it's not heating, the element is bad
- If you have no voltage at the element, but the element tests good, suspect the control board relay
- Control board issues are less common than simple element failure
Cost consideration: A control board runs $150-300, so make absolutely sure the element itself is bad before going down this path.
Cause #4: Wiring Connection Issues (5% probability)
The connections to the heating element can corrode, come loose, or burn out at the terminal. This is especially common in humid environments or if there's been a leak.
How to diagnose:
- Inspect the wire connections at the element terminals
- Look for corrosion, burn marks, or loose connections
- Check the wire connectors themselves — they can get brittle and crack
- Take pictures before disconnecting anything (seriously, do this)
One experienced DIYer emphasized: "Take pictures of electrical wiring before disconnecting to ensure correct reconnection." You'll thank yourself when you're putting it back together.
Cause #5: Blocked Vent (2% probability)
Some dishwashers have a vent that releases steam during the dry cycle. If it's blocked, moisture can't escape and dishes stay wet even if the element is working fine.
How to diagnose:
- Look for a vent on the front of the door or the top of the tub
- Check if it's blocked by debris or mineral buildup
- During a cycle, you should feel warm, moist air coming from the vent
- Clean any obstructions with a brush or compressed air
This is the easiest fix but also the least likely cause if you're experiencing both cleaning and drying issues.
The Actual Repair: Replacing the Heating Element
If you've determined the element is bad, here's what you're in for. A 69-year-old first-timer summed it up perfectly: "I am not a repairman and it really is a simple repair that was done with only a pair of pliers."
Tools you'll need:
- Adjustable wrench or pliers
- Screwdrivers (for access panels)
- Towels (for water spillage)
- Camera phone (for reference photos)
Steps:
- Disconnect power at the breaker — not just the switch
- Turn off water supply under the sink
- Remove lower access panel at the front
- Disconnect water supply line — have towels ready
- Disconnect drain hose
- Disconnect electrical — take pictures first
- Pull dishwasher forward carefully
- Access the element from inside the tub — remove bottom rack
- Disconnect element wires — note which wire goes where
- Remove the two mounting nuts from underneath
- Pull out old element — it may take some wiggling
- Install new element — note that the W10518394 comes with new rubber washers already installed
- Hand-tighten the new plastic nuts that come with the element (threads are larger than original)
- Reconnect wires using your reference photos
- Push dishwasher back and reconnect everything in reverse order
- Run a service diagnostic cycle to reset the dishwasher to default settings
Time requirement: First-timers report 60-90 minutes. If you've done it before, 20-30 minutes.
One owner who'd never worked on dishwashers before noted: "I have 0 experience working on dishwashers, and it took me about an hour to disconnect all the water/drain pipes, electrical, and actually get the dishwasher out of the cabinet." The actual element swap was quick — getting access was the time-consuming part.
Important Installation Notes
A few things that confused even experienced DIYers:
The rubber washers: The W10518394 element comes with rubber washers already installed. One owner complained this wasn't mentioned in the product listing and caused confusion. You may need additional larger washers for a proper seal depending on your specific model — have extras on hand.
The plastic nuts: The new element uses larger threads than the original, which is why it comes with new plastic nuts. Don't try to reuse your old ones.
The diagnostic cycle: After replacement, run the service diagnostic cycle (instructions in your owner's manual). This resets the dishwasher to factory defaults and clears any error codes.
When to Call a Pro
This is a straightforward repair if you're comfortable with basic tools and can safely disconnect a dishwasher. Call a pro if:
- Your dishwasher is hardwired (not plug-in) and you're not comfortable with electrical
- You've replaced the element but still have drying issues — could indicate control board problems
- Your dishwasher is still under warranty
- You can't physically pull the dishwasher out (built-in installations can be tricky)
- You've diagnosed the problem as the control board rather than the element
Professional repair typically costs $200-350 including parts and labor. The element itself is only $30-50, so you're saving $150-300 by doing it yourself.
Frequently Asked Questions
How long does a dishwasher heating element typically last?
Most heating elements last 8-12 years with normal use. Heavy use, hard water, and power surges can shorten this. If your dishwasher is over 10 years old and the element fails, it's not surprising — it's just normal wear and tear.
Can I run the dishwasher without a heating element?
Technically yes, but you shouldn't. The dishes won't get sanitized (water won't reach proper temperature), they won't dry, and you'll likely have cleaning issues. It's also not energy efficient since the dishwasher will run longer cycles trying to compensate. Replace the element.
Will the W10518394 element fit my dishwasher model?
This element fits Whirlpool models WDF520PADM7, WDF520PADM5, WDF520PADM3, WDF520PADM0, WDF520PADW0, WDF520PADW7, WDF520PADB0, WDF540PADM3, WDF110PABW2, WDF320PADW1, WDF320PADW2, WDF310PAAS3, WDF510PAYS6, and many others. It replaces part numbers AP5690151, W10134009, W10441445, 8194250, 8563007, and PS8260087. Check your model number against the compatibility list or look up your current element's part number.
Diagnosed the problem?
W10518394 · In Stock · Fast shipping