
Whirlpool Oven Running Too Hot or Not Heating Right — 5 Causes & Fixes
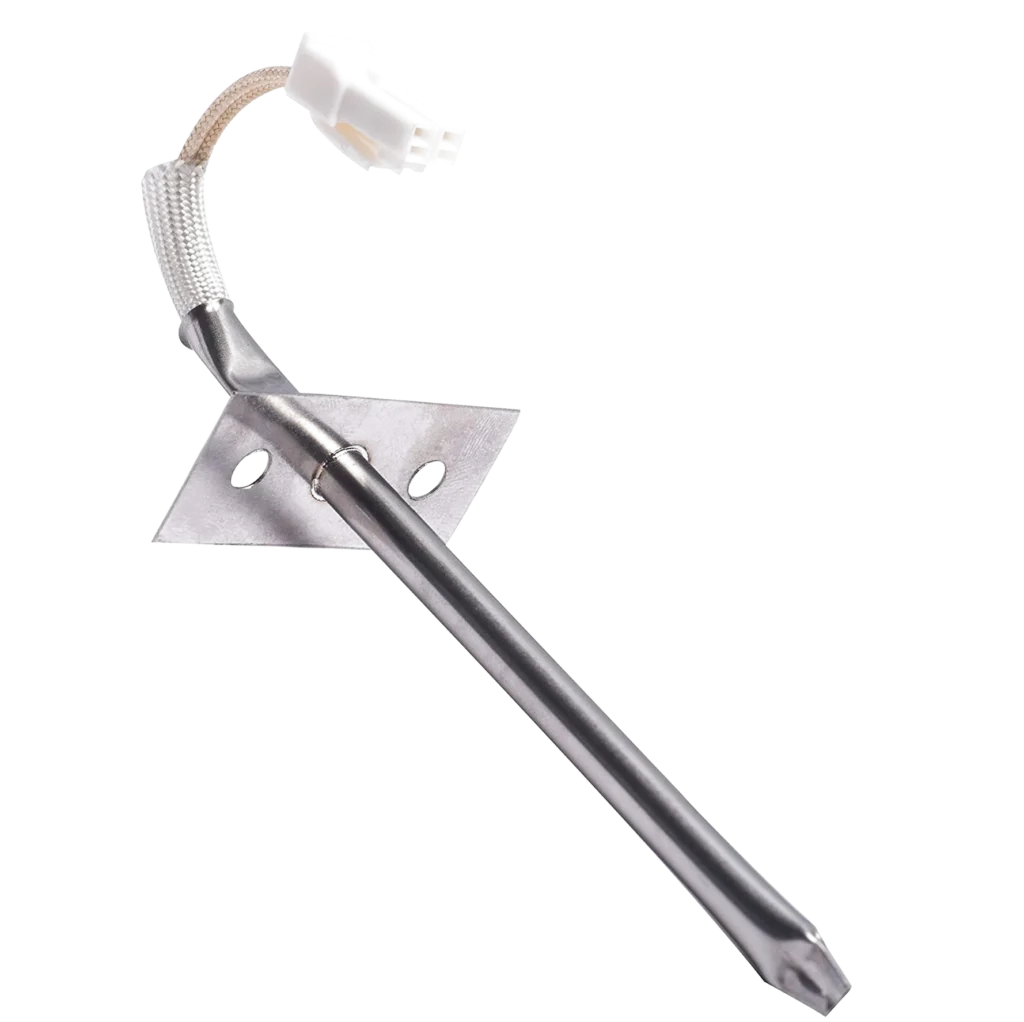
You set your KitchenAid double oven to 350°F for cookies, but they come out burnt on the edges and raw in the middle after just 8 minutes. Or maybe you're dealing with the opposite problem — your KDRP467KSS0 dual-fuel range takes 20 minutes longer than the recipe calls for, and chicken breasts are still pink inside. When your oven's temperature sensor (W10131825) fails, your appliance loses its ability to regulate heat accurately.
The temperature sensor is a slim probe that extends into the oven cavity, constantly measuring internal temperature and sending resistance readings to the control board. On Whirlpool, KitchenAid, Maytag, and Jenn-Air models using part W10131825, this sensor should read approximately 1,080-1,100 ohms at room temperature (around 70°F). When it drifts out of spec or fails completely, your oven can't maintain proper heat.
Quick Symptom Check
- Oven runs significantly hotter than set temperature — cookies burn, casseroles bubble over
- Little to no heat when baking — oven feels lukewarm even after preheating
- Oven not heating evenly — hot spots in some areas, cool zones in others
- Oven won't start or element won't heat — control thinks oven is already at temperature
- Temperature swings wildly — cycles between too hot and too cold
- Error codes like F3, F4, or sensor fault messages
Cause #1: Sensor Resistance Drift (Most Common — 60% of Cases)
The RTD (resistance temperature detector) element inside the sensor degrades over time, especially after years of heat cycling. When resistance drifts below 900 ohms or above 1,200 ohms at room temp, the control board receives incorrect temperature data.
How to diagnose: Disconnect power at the breaker. Remove the sensor (usually two screws at the back wall of the oven). Set your multimeter to ohms and test across the two terminals. At 70°F room temperature, you should see 1,080-1,100 ohms. If it reads significantly higher or lower, replace it.
Why it happens: Constant heating to 500°F+ and cooling to room temperature causes the internal element to oxidize and change resistance properties. This is normal wear after 5-8 years of regular use, particularly on models like the KEBC208KSS04 and KEMS308SSS05 that see heavy daily use.
Fix complexity: Easy DIY repair. Takes 15 minutes with just a screwdriver and multimeter.
Cause #2: Physical Sensor Damage (20% of Cases)
The sensor probe extends into the oven cavity where it's vulnerable to impact from oven racks, large roasting pans, or aggressive cleaning. I've seen sensors bent at 45-degree angles after someone jammed a turkey roaster in without looking.
How to diagnose: Visually inspect the sensor probe. It should extend straight into the oven, not bent or touching the back wall. Even slight bending can cause the sheath to crack internally, allowing moisture to corrode the sensing element.
Common on models: KEBS208SSS04, KEBS107SSS04, and other KitchenAid built-in wall ovens where the sensor is positioned low on the back wall near rack level.
Warning sign: If your oven was heating fine, then suddenly went haywire after you reorganized racks or cleaned aggressively, physical damage is likely.
Cause #3: Corroded Wire Connections (12% of Cases)
The sensor connects to the control board through a wire harness at the back of the oven. These connections can corrode from steam exposure, especially if you frequently use the self-clean cycle or cook high-moisture foods.
How to diagnose: Pull the oven out and access the connection point where the sensor wires plug into the main harness (usually behind the control panel). Look for green corrosion, blackened terminals, or loose connections. Wiggle the connector — if temperature readings change, you've found your problem.
Intermittent symptoms: Oven works fine some days, acts crazy others. Temperature seems to fix itself when you bump the oven or slam the door.
Prevention tip: After running self-clean, leave the oven door cracked open for 30 minutes to let moisture escape instead of condensing on electrical connections.
Cause #4: Control Board Misreading Good Sensor (5% of Cases)
Sometimes the sensor is perfectly fine (tests at correct ohms), but the control board's sensor input circuit has failed. This is less common but happens on older KESS907SSS02 and KERS807SSS00 models with 10+ years of service.
How to diagnose: Test your sensor — if it reads correct resistance but your oven still shows temperature errors, the board's sensor circuit is suspect. You can verify by installing a known-good sensor (borrow from another identical oven if possible). If the new sensor also doesn't work, it's the board.
Cost reality: Control boards for these models run $250-400 plus labor. If your oven is 12+ years old, this might be repair-or-replace decision time.
Cause #5: Wrong Sensor Installed (3% of Cases)
Not all oven sensors are created equal. The W10131825 is specific to certain Whirlpool, KitchenAid, Maytag, and Jenn-Air models. Installing a generic or wrong-model sensor with different resistance specs will cause immediate temperature problems.
How to diagnose: If temperature issues started right after sensor replacement, verify you installed the correct part. Check that your model number (like KESK901SSS06 or GBS307PRS00) appears on the compatibility list for W10131825.
Common mistake: Using a cheaper aftermarket sensor with 900-ohm specs when your oven needs 1,100-ohm specs. The control board calibration is model-specific.
Step-by-Step Testing Protocol
- Verify symptom with oven thermometer: Place accurate oven thermometer on center rack, set oven to 350°F, wait 20 minutes. If thermometer reads more than 25°F off, you've got a sensor issue.
- Test sensor resistance: Disconnect power, remove sensor, test with multimeter at room temp (should be 1,080-1,100 ohms).
- Inspect for physical damage: Look for bends, cracks, or corrosion on the probe.
- Check wire connections: Access rear connections, look for corrosion or looseness.
- Test at operating temperature (advanced): With sensor removed, heat in pot of water with thermometer. Resistance should increase predictably with temperature (approximately 10 ohms per degree F).
When to Call a Pro
Sensor replacement is genuinely DIY-friendly — two screws, unplug old sensor, plug in new one. But call a tech if:
- Your oven uses 240V and you're not comfortable working around high voltage (even with breaker off, capacitors can hold charge)
- You've replaced the sensor but problems persist — this points to control board issues requiring diagnostics equipment
- Your model has the sensor buried behind panels requiring disassembly (some KDRP407HSS10 dual-fuel ranges)
- You're seeing multiple error codes beyond just temperature sensor faults
Expect to pay $150-250 for professional sensor replacement including the service call. The part itself is $68.99, so you're mostly paying for the tech's time and warranty on labor.
Frequently Asked Questions
How long does a Whirlpool oven temperature sensor last?
Typical lifespan is 7-10 years with regular use. Heavy-use households (cooking daily, frequent self-cleaning) may see failure around 5-6 years. The constant heat cycling from room temperature to 500°F+ gradually degrades the RTD element inside. Models like the KEMS308SSS04 that see commercial-level use in serious home kitchens tend to wear sensors faster.
Can I recalibrate my oven instead of replacing the sensor?
Oven calibration adjusts the control board's offset by ±35°F, but it can't fix a failed sensor. If your sensor is reading incorrect resistance values, calibration won't help — the board is receiving wrong data from the sensor itself. Calibration works when the sensor is fine but your oven runs consistently 15-20 degrees hot or cold. Test the sensor with a multimeter first before trying calibration adjustments.
Why does my oven temperature fluctuate wildly during cooking?
This is the classic sign of a dying temperature sensor. As the sensor's resistance becomes unstable, it sends erratic readings to the control board. The board thinks the oven is too hot, shuts off the element, then thinks it's too cold and fires the element at full power. You'll see swings of 50-75°F instead of the normal ±15°F cycling. This usually means the sensor's internal element has developed micro-cracks and needs replacement.
Diagnosed the problem?
W10131825 · In Stock · Fast shipping