
LG Washer Won't Spin or Agitate — 5 Causes & How to Fix
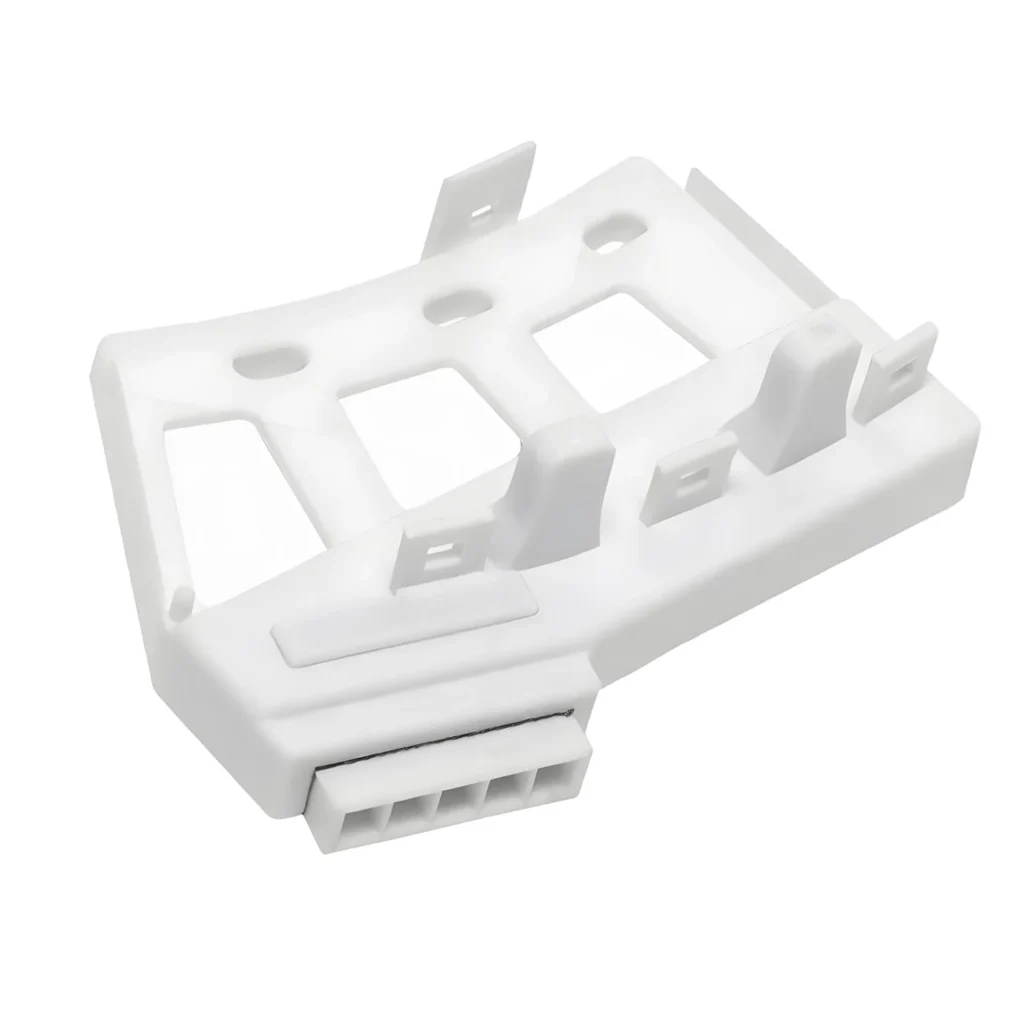
You load the washer, start the cycle, and come back to a drum full of soaking wet clothes that barely moved. The motor hums, the control panel lights up, but the drum just sits there like it forgot its job. Before you assume the worst, you're likely dealing with a rotor position sensor failure — one of the most common issues in LG front-loaders from 2005-2012.
The rotor position sensor (also called a Hall sensor) tells your washer's control board exactly where the drum is positioned so it knows when to spin, reverse, and change speeds. When this $39 part fails, your washer loses its sense of direction. Models like the WM2010CW, WM3455HW, and WM1812CW are particularly prone to this issue after 5-7 years of use.
Quick Symptom Check
Your washer likely has a bad rotor position sensor if you notice:
- Drum won't spin during any cycle — motor runs but drum stays still
- Washer stops mid-cycle with an LE or UE error code — control board can't detect drum movement
- Agitation works but spin cycle fails — sensor reads inconsistently at higher speeds
- Clothes come out dripping wet — no spin means no water extraction
- Washer makes clicking sounds but won't start — control board repeatedly tries to detect rotor position
Cause #1: Failed Hall Sensor (Rotor Position Sensor) — 60% Probability
This is the most likely culprit. The Hall sensor (part 6501KW2001A) sits on the back of the stator assembly and uses magnetic fields to detect the rotor's position. After years of exposure to heat, vibration, and moisture, the sensor's internal components degrade.
How to diagnose: Unplug the washer and access the back panel. Locate the Hall sensor — it's a small black component with three wires (usually red, white, and black) mounted near the center of the outer drum. Check for visible burn marks, corroded connections, or loose wiring. Using a multimeter, test continuity between the sensor terminals while manually rotating the drum. You should see resistance values change smoothly. Erratic readings or no change means the sensor's dead.
The fix: Replace the rotor position sensor. It's held by two screws and a wire harness connector. This repair takes about 45 minutes and requires removing the rear access panel. Cost: $38.99 for OEM-quality replacement.
Cause #2: Damaged Stator Assembly — 20% Probability
The stator is the stationary part of your washer's direct-drive motor system. It contains copper windings that create the magnetic field needed to spin the rotor. If these windings short out or if the stator develops cracks, it can't generate consistent magnetic signals for the Hall sensor to read.
How to diagnose: With the rear panel off, inspect the stator for burn marks, melted insulation, or a burnt smell. Test the stator windings with a multimeter — you should see consistent resistance (usually 4-6 ohms) between terminals. Infinite resistance or drastically different readings between windings indicate failure.
The fix: Stator replacement is more involved and costs $150-250 in parts. You'll need to remove the rotor, which requires a special spanner wrench. If you're already replacing the Hall sensor and notice stator damage, address both at once.
Cause #3: Faulty Control Board (Main PCB) — 10% Probability
The main control board interprets signals from the Hall sensor. If the board's sensor input circuit fails, it won't recognize valid sensor data even when the sensor works perfectly. This is less common but happens in washers that experienced power surges.
How to diagnose: If you've confirmed the Hall sensor outputs proper voltage changes (use a multimeter set to DC voltage while rotating the drum manually) but the washer still won't spin, the control board may not be processing the signal. Look for burnt components or capacitor bulges on the board.
The fix: Control board replacement runs $200-350. Before buying one, verify the Hall sensor and all wiring connections are actually good — boards are expensive to replace unnecessarily.
Cause #4: Corroded or Loose Wire Harness — 8% Probability
The three-wire harness connecting the Hall sensor to the control board runs through areas exposed to moisture and vibration. Over time, connections can corrode (especially the white neutral wire) or work loose from constant movement.
How to diagnose: Trace the wiring from the Hall sensor to the control board. Wiggle connections while watching for intermittent contact. Look for green corrosion at connector pins or frayed insulation. A loose connection often causes intermittent failures — the washer works sometimes but not others.
The fix: Clean corroded connections with electrical contact cleaner and ensure all connectors snap firmly into place. Replace any wiring with damaged insulation. This costs almost nothing but can save you from replacing good parts.
Cause #5: Mechanical Rotor Obstruction — 2% Probability
Foreign objects (coins, bra wires, small socks) can wedge between the rotor and stator, preventing the drum from turning. This doesn't damage the Hall sensor directly, but it makes diagnosis confusing because the motor tries to spin but can't.
How to diagnose: Manually rotate the drum with the washer unplugged. It should turn smoothly with slight magnetic resistance. If it's locked up or makes grinding sounds, something's blocking rotation. Remove the rotor (requires spanner wrench) and inspect the gap between rotor and stator.
The fix: Remove the obstruction. While you're in there with the rotor off, inspect the Hall sensor and replace it if it's original to a 7+ year old machine — you're already doing 90% of the work anyway.
When to Call a Pro
This repair is DIY-friendly if you're comfortable working with basic tools and can safely access the back of your washer. The Hall sensor itself is simple to replace — two screws and a connector.
Call a technician if:
- You're not comfortable diagnosing electrical components with a multimeter
- The rotor won't come off (it can seize on the shaft over time)
- You've replaced the Hall sensor but symptoms persist — you may need stator or control board work
- Your washer is still under warranty (DIY repair may void coverage)
Professional diagnosis typically runs $100-150. Repair with parts and labor: $200-350 depending on your location.
Frequently Asked Questions
Can I test the Hall sensor without removing it from the washer?
Yes, but you'll need multimeter access to the sensor's wire harness. Set your multimeter to DC voltage (usually 0-20V range), backprobe the sensor wires at the connector, and manually rotate the drum. You should see voltage fluctuate between approximately 0.5V and 4.5V as the rotor passes the sensor. No voltage change means the sensor's dead or not receiving power. This test works on models like the WM2016CW, WM3431HW, and WM3477HS.
Will replacing just the Hall sensor fix an LE error code?
Usually, yes — LE codes indicate the control board can't detect motor rotation, which is exactly what a failed Hall sensor causes. However, LE codes can also mean a locked rotor (mechanical obstruction) or failed stator. Start with the $39 Hall sensor replacement since it's the most common cause and easiest fix. If the LE code persists after sensor replacement, then investigate mechanical issues or stator failure.
Do I need to replace both the Hall sensor and the sensor holder bracket?
The replacement Hall sensor (6501KW2001A) includes the sensor and its mounting bracket as one assembly, so you're replacing both automatically. Some aftermarket versions separate these parts, but the OEM replacement and quality aftermarket options like the one compatible with WM1812CW and WD-3243RHD models include everything needed. You just unbolt the old assembly and bolt in the new one — no mixing and matching required.
Diagnosed the problem?
6501KW2001A · In Stock · Fast shipping