
Samsung Washer Leaking From Bottom During Spin — 5 Causes & How to Fix
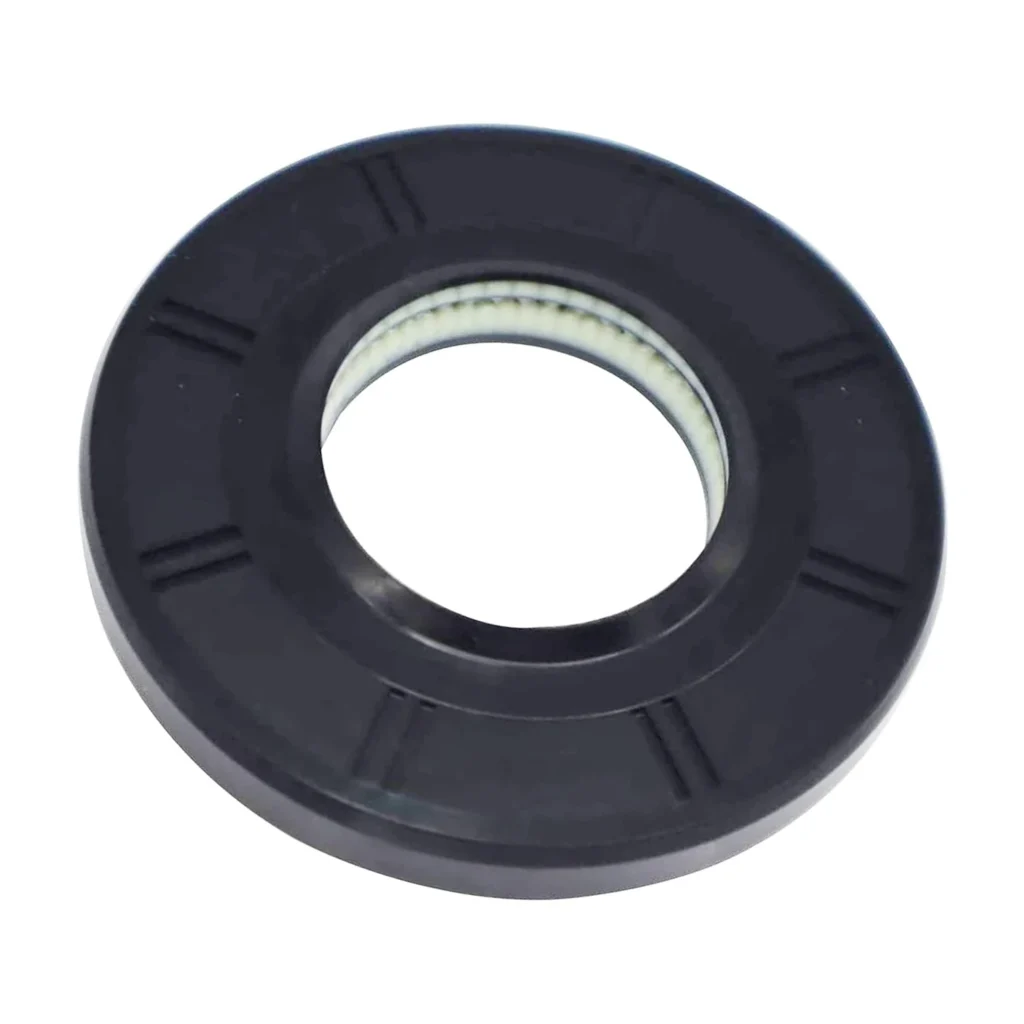
You've just loaded a full wash, pressed start, and fifteen minutes later there's a puddle spreading across your laundry room floor. The leak only shows up during the spin cycle — barely a drip during fill or wash, but once that drum starts spinning fast, water streams out from underneath. If you've got a Samsung or Kenmore front-loader (models like 592-49032, 40249032012, or WF42H5000AW), this is one of the most common failure patterns, and the center tub seal is usually your culprit.
Quick Symptom Check
Before you tear into the machine, confirm you're dealing with a tub seal issue:
- Water only appears during high-speed spin — not during fill or agitation
- Leak originates from dead center underneath — trace it back and it's coming from the drum area, not hoses
- Rust-colored or grayish water — bearing contamination mixing with leaked water
- Grinding or rumbling noise during spin — often accompanies seal failure
- No obvious connection leaks — you've already checked inlet hoses, drain hose, and door boot
Cause #1: Failed Center Tub Oil Seal (Most Likely — 65%)
The DC62-00223A center tub seal sits between the outer tub and the bearing housing, preventing water from reaching the main bearing assembly. After 5-8 years of regular use, the rubber hardens, cracks, or tears — especially if you've been using high-efficiency detergent incorrectly (too much creates excessive suds that deteriorate seals faster).
How to diagnose: If water only leaks during spin and you can see rusty residue around the rear of the drum when you pull the machine forward, the seal has failed. Once water gets past this seal, it contaminates the bearing and you'll usually hear noise within weeks. Catch it early and you might save the bearing.
Fix difficulty: Advanced. You'll need to disassemble the entire tub — front panel, top, door boot, weights, and split the tub housing. Budget 3-4 hours if it's your first time. Wear work gloves throughout; those tub springs and clamps will bite you.
Cost: DC62-00223A seal runs $38.99. If the bearing is already damaged (rough spinning or grinding), add another $60-80 for the bearing assembly.
Cause #2: Worn Main Tub Bearing (30%)
The bearing and seal work as a team. If the bearing wears first (from overloading or unbalanced loads), it creates excessive play in the drum shaft. That movement tears up the seal prematurely, and suddenly you've got both problems at once.
Test: With the machine empty and unplugged, manually spin the drum. Does it feel notchy or rough? Grab the drum at 3 and 9 o'clock and push/pull — more than 1/8 inch of play means the bearing is shot. If you're replacing the seal, always inspect the bearing. They usually fail together on Samsung front-loaders.
Cause #3: Cracked Outer Tub (3%)
Rare, but I've seen it: someone overloaded a machine with heavy wet comforters repeatedly, and the plastic outer tub cracked right near the seal mounting surface. Water bypasses the seal entirely through the crack.
Check: When you've got the machine apart to replace the seal, inspect the entire outer tub for stress cracks, especially around mounting points and the bearing housing. A cracked tub means replacement — you can't reliably seal plastic that's fractured under stress.
Cause #4: Improperly Seated Seal from Previous Repair (1.5%)
If someone already replaced this seal and the leak persists, they either didn't clean the mating surfaces properly (old seal residue prevents proper seating) or damaged the new seal during installation. The seal must sit absolutely flush — any debris or misalignment creates a leak path.
Cause #5: Loose or Damaged Tub Bolts (0.5%)
The bolts that hold the tub halves together can loosen over time from vibration. When the tub housing separates slightly, water escapes past the seal even if the seal itself is still good. Check bolt torque — they should be snug but not overtightened (plastic threads strip easily).
Step-by-Step Repair Process
Before you start: Unplug the appliance completely. Shut off hot and cold water supply. Have a shallow pan ready — there will be residual water in the tub.
- Remove front panel and top — two screws at the back of the top panel, then slide forward and lift. Front panel has clips at the bottom; lift up to release.
- Disconnect door boot clamp — use a flathead to release the spring clamp, tuck boot into drum opening.
- Remove counterweights — three concrete weights (front, top, rear). Heavy. Wear work gloves and get help if needed.
- Disconnect all electrical and water connections — take photos first. Drain pump, pressure switch, water inlet valve, and main harness.
- Split the tub — usually 10-12 bolts around the perimeter. Carefully pry apart; watch for residual water spillage.
- Remove old seal — it's pressed into a groove. Carefully pry out without gouging the seating surface.
- Clean thoroughly — any old seal material, rust, or debris will ruin your new seal. Use fine sandpaper if needed, then wipe with denatured alcohol.
- Install DC62-00223A seal — press evenly around the entire circumference. Some techs use a thin coat of dish soap as lubricant to help it seat.
- Inspect bearing while you're here — spin the shaft by hand. Any roughness or play means replace the bearing too.
- Reassemble in reverse order — torque tub bolts evenly in a star pattern to prevent warping.
When to Call a Pro
Be honest with yourself: this isn't a beginner repair. If you've never split a washer tub before, the first attempt will take 5+ hours and there are multiple points where you can damage components (door boot, pressure switch, wiring harnesses). Professional repair costs $300-450 including parts, which isn't unreasonable given the labor involved. If the bearing is also bad, you're looking at similar pricing whether DIY or pro — the part cost dominates.
Call a tech if: you don't have 4+ hours of uninterrupted time, your back can't handle lifting 40-pound concrete weights, or you're uncomfortable with complete disassembly. A mobile tech can often do this in your home in 2-3 hours.
Prevention Tips
- Use HE detergent correctly — 2 tablespoons max per load. Excess suds are the #1 accelerator of seal deterioration.
- Balance your loads — unbalanced spinning creates excessive shaft movement that wears bearings and seals.
- Leave the door open between loads — moisture trapped in the drum area accelerates rubber degradation.
- Run a cleaning cycle monthly — reduces buildup that can affect seal longevity.
Frequently Asked Questions
Can I just replace the seal without replacing the bearing?
Technically yes, but it's poor strategy. If you're already 3 hours into disassembly and the bearing has any play or roughness, replace it now. Coming back in 6 months for the bearing means doing this entire job again. The bearing and seal should be considered a matched set on Samsung front-loaders — one fails, replace both.
How long should a DC62-00223A seal last after replacement?
With proper detergent use and balanced loads, expect 7-10 years. The original equipment seals often fail around year 8-10, so a quality aftermarket replacement should match that lifespan. If your new seal fails within 2-3 years, investigate your washing habits — something is accelerating wear.
Why does the leak only happen during spin cycle?
During fill and wash, water pressure is relatively low and the drum rotates slowly. The seal can handle minor imperfections at low speed. But during spin, centrifugal force pushes water outward with significant pressure — up to 1,200 RPM on final spin. Any seal crack or gap that's marginal at low speed becomes a gusher under high-speed pressure. That's why this symptom is such a reliable indicator of seal failure.
Diagnosed the problem?
DC62-00223A · In Stock · Fast shipping