
GE Café Small Cube Ice Maker Assembly Parts — Models & Compatibility
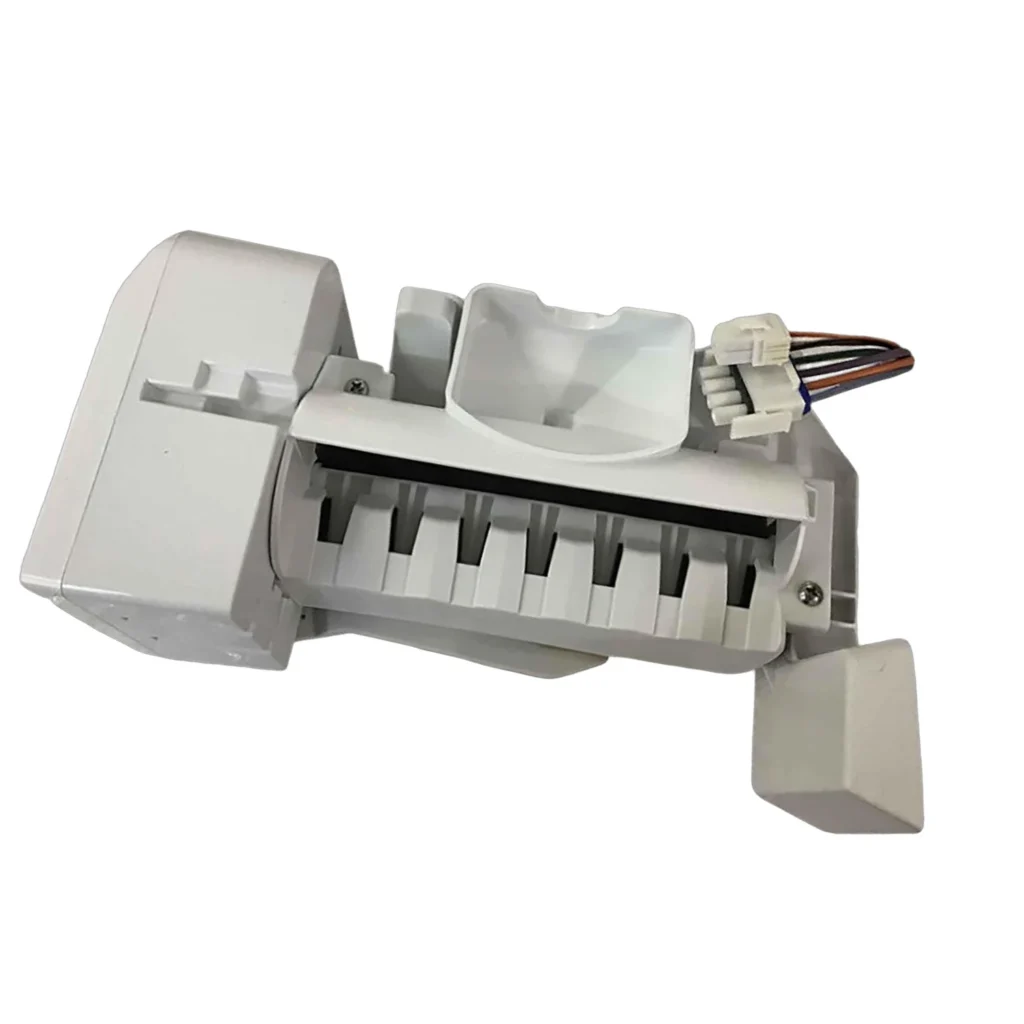
If your GE Café refrigerator stopped making ice or produces hollow, misshapen cubes, the ice maker assembly itself has likely failed. This WR30X39345 small cube ice maker assembly is the direct replacement for CVE28 series models and several other Café, Monogram, and Hotpoint French door refrigerators. It replaces older part numbers WR30X38005, WR30X36235, and WR30X31922.
Is This the Right Part for Your Model?
Check your refrigerator's model number located inside the fresh food compartment — usually on the left sidewall or top right corner. Match it against the compatibility list below. All CVE28DM5N and CVE28DP2N series refrigerators use this exact ice maker assembly. If your model starts with CVE28, CYE22, CZS22, GDE25, GNE25, GYE22, or PYE22, this is your part.
About This Replacement Ice Maker
This is the complete small cube ice maker assembly — the entire module that mounts inside your freezer compartment. Unlike older mechanical ice makers, this electronic assembly includes the mold, ejector blades, control module, and fill system in one pre-assembled unit. GE Café refrigerators use this smaller cube format to maximize ice production in French door freezer compartments. The assembly produces crescent-shaped ice cubes and typically cycles every 90-130 minutes when functioning properly. Installation involves unplugging the wire harness, removing two mounting screws, and snapping the fill tube connector — no special tools required beyond a Phillips screwdriver.
What Models Use This Ice Maker?
Below are GE Café, Monogram, and Hotpoint refrigerator models confirmed compatible with the WR30X39345 ice maker assembly. Most are premium French door models with bottom freezers or side-by-side configurations manufactured between 2016 and 2023.
Common Signs You Need This Part
Ice maker stops producing ice completely, even though water dispenser works fine. Ice cubes come out hollow, thin, or misshapen. Ice production slows to just a few cubes per day instead of filling the bin. You hear the motor humming but ice never ejects. The control arm moves freely but nothing happens during the harvest cycle. In most cases, the electronic control board inside the assembly has failed, or the thermistor (temperature sensor) no longer detects when ice is frozen solid.
Installation Overview
Turn off the ice maker control or power down the refrigerator. Remove the ice bin to access the assembly. Disconnect the wire harness connector — press the tab and pull straight out. Locate the two mounting screws (one top, one bottom) and remove them. Lift the assembly up and forward to release the fill tube connection. Installation is the reverse: press the fill tube connector firmly until it clicks, align the screw holes, tighten both screws, reconnect the wire harness, and restore power. Allow 24 hours for the first batch of ice. The ice maker will automatically begin a harvest cycle once the mold reaches the correct temperature.
Why This Part Fails
Electronic ice makers fail from repeated thermal cycling — constant freezing and thawing stresses solder joints on the control board. Water mineral deposits can also corrode electrical connections inside the assembly. Some units experience heater element failure, preventing the harvest cycle from releasing ice. Once any internal component fails, you replace the entire assembly since individual parts aren't serviceable. This is more cost-effective than troubleshooting individual components and ensures reliable operation with factory-matched parts.
What's Included
Complete ice maker assembly with mounting bracket, wire harness connector, fill tube adapter, and installation hardware. The unit ships pre-assembled and ready to install. No calibration or programming required — it begins normal operation as soon as power is restored and the freezer reaches proper temperature (typically 0°F to 5°F).
Can't find your model?
Enter your model number and we'll confirm the right part.