
GE Washer Agitator Coupling Kit Parts — Models & Compatibility
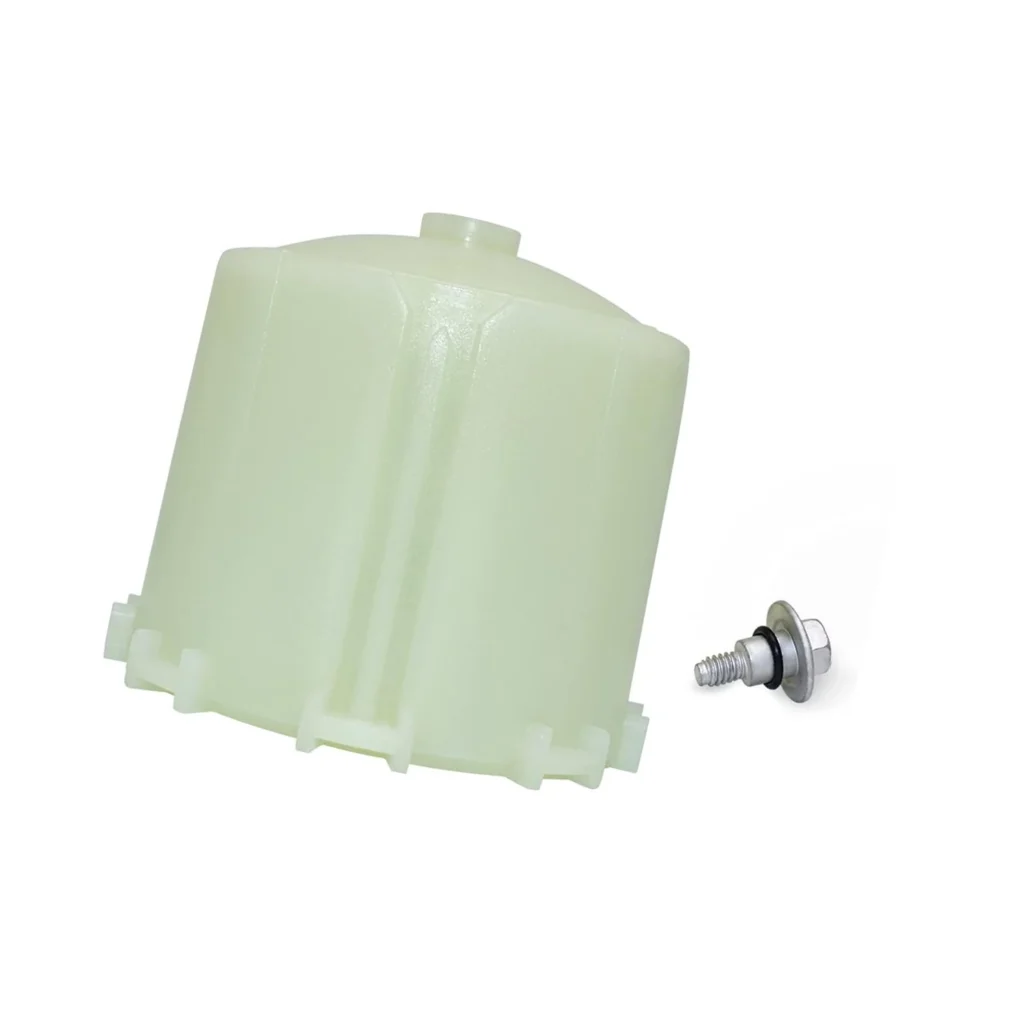
If your GE washer's agitator spins freely when you grab it by hand, or the clothes come out just as dirty as they went in, you're dealing with a stripped agitator coupling. This $20.99 kit (WH49X10042) fixes the mechanical link between your washer's drive system and the agitator — and it's one of the easiest repairs you'll ever do on a washing machine.
This hub covers the WH49X10042 agitator coupling kit, which fits over 100 GE, Hotpoint, RCA, and Kenmore top-load washer models. It replaces AP3964635, PS1517844, WH02X10037, WH43X10009, and 175D2846P001.
Is This the Right Part for Your Model?
Your model number is stamped on a label inside the washer lid or on the back panel near the top. It'll look something like WJSR2080V2WW or WVSR1060A0WW. Cross-reference it with the compatible models list below — if your model's there, this coupling will fit.
The coupling itself sits directly below the agitator, connecting it to the drive shaft. When it strips out (usually from overloading or years of normal wear), the agitator loses its grip and either won't move at all or just wobbles uselessly during the wash cycle.
About This Replacement Part
The agitator coupling is a small plastic component with gear teeth that lock the agitator to the washer's drive mechanism. When it fails, you'll notice the agitator moving weakly or not at all, clothes that don't get clean, or a loud grinding noise during agitation. One customer put it perfectly: "I was able to spin it freely which meant that the agitator coupler was bad."
Causes of failure include regular wear from thousands of wash cycles, oversized loads that put excessive torque on the coupling, and simple material fatigue over time. The plastic teeth gradually wear down until they can't grip anymore.
What Makes This Repair So Easy
You don't need to disassemble the entire washer or even remove panels. Pull the agitator straight up (it's held by friction), use a 7/16" or 11mm socket to remove one bolt, swap the coupling, and snap the agitator back on. Most people finish in under 15 minutes.
One DIYer reported: "I installed the replacement agitator coupler which took about 5 minutes using an 11mm socket/ratchet to take off the old holding bolt and install the new one. This was a very easy fix and saved me a ton of money." Another knocked it out in six minutes and posted her success on Facebook.
Tools You'll Need
- Socket set with 7/16" or 11mm socket
- Ratchet with extension (makes reaching the bolt easier)
- Adjustable wrench or pliers (optional, for stubborn agitators)
If the agitator's stuck, don't yank it with your bare hands — use a strap or rope looped under it for better leverage. One customer used "a flat rope placed under the old agitator and with a stern jerk it popped off."
Common Symptoms This Part Fixes
- Agitator doesn't move during wash cycle, but spin cycle works fine
- Agitator spins freely when you turn it by hand (should feel locked)
- Clothes come out dirty or tangled in the same position you loaded them
- Grinding or clicking noises during agitation
- Agitator feels loose or wobbles excessively
Here's the key diagnostic: if your washer spins clothes dry but won't agitate during the wash, and the belt's intact, it's almost always this coupling. You can verify by unplugging the machine, removing the agitator, and checking if the coupling spins freely on the shaft — it shouldn't.
Compatible GE Washer Models
This coupling fits the following GE, Hotpoint, RCA, and Kenmore washer series:
- WJSR Series: WJSR2080V2WW, WJSR2070B0WW, WJSE3110A0WW
- WVSR Series: WVSR1060A0WW, WVSR1060A2WW, WVSR1060B3WW
- WBSR Series: WBSR3140D0WW, WBSR3140D5WW
- WCSR Series: WCSR2090D0WW, WCSR4170D0WW
- WDSR Series: WDSR2080D5WW
- WHDSR Series: WHDSR209D0WW, WHDSR315D0WW
- WLSR Series: WLSR2000G0WW
- WPSR Series: WPSR3120W0WW
- WPSE Series: WPSE7003A9WW
- WJRR Series: WJRR4170E0WW, WJRR4170E3WW
- MESE Series: MESE1065H0WW
Why This Part Fails (And How to Prevent It)
The coupling takes the full rotational force every time your washer agitates. Over years of use, the plastic teeth wear down — it's not a defect, just physics. Overloading the washer accelerates this wear because the agitator has to work harder to move heavier loads.
To extend the life of your new coupling: don't pack the washer drum beyond 3/4 full, avoid washing heavy items like rugs in loads with lighter clothes, and let the washer complete its full agitation cycle instead of manually advancing it.
Installation Overview
Unplug the washer. Pull the agitator straight up to remove it (wiggle if needed). Use your socket and ratchet to remove the single bolt holding the old coupling. Slide the old coupling off the drive shaft. Install the new coupling with the teeth facing up. Thread in the new bolt and tighten firmly. Push the agitator back down until it clicks into place. Plug in and test.
The entire job takes less time than driving to a repair shop. As one happy customer put it: "I AM WOMAN! HEAR ME ROAR! Or just watch me FIX things, with help from my computer!"
What's Included
The WH49X10042 kit includes the agitator coupling and mounting bolt. You're getting OEM-quality parts that fit exactly like the original — no modifications, no adapters, no guesswork.
Can't find your model?
Enter your model number and we'll confirm the right part.