
Frigidaire Dryer Heating Element Parts — Models & Compatibility
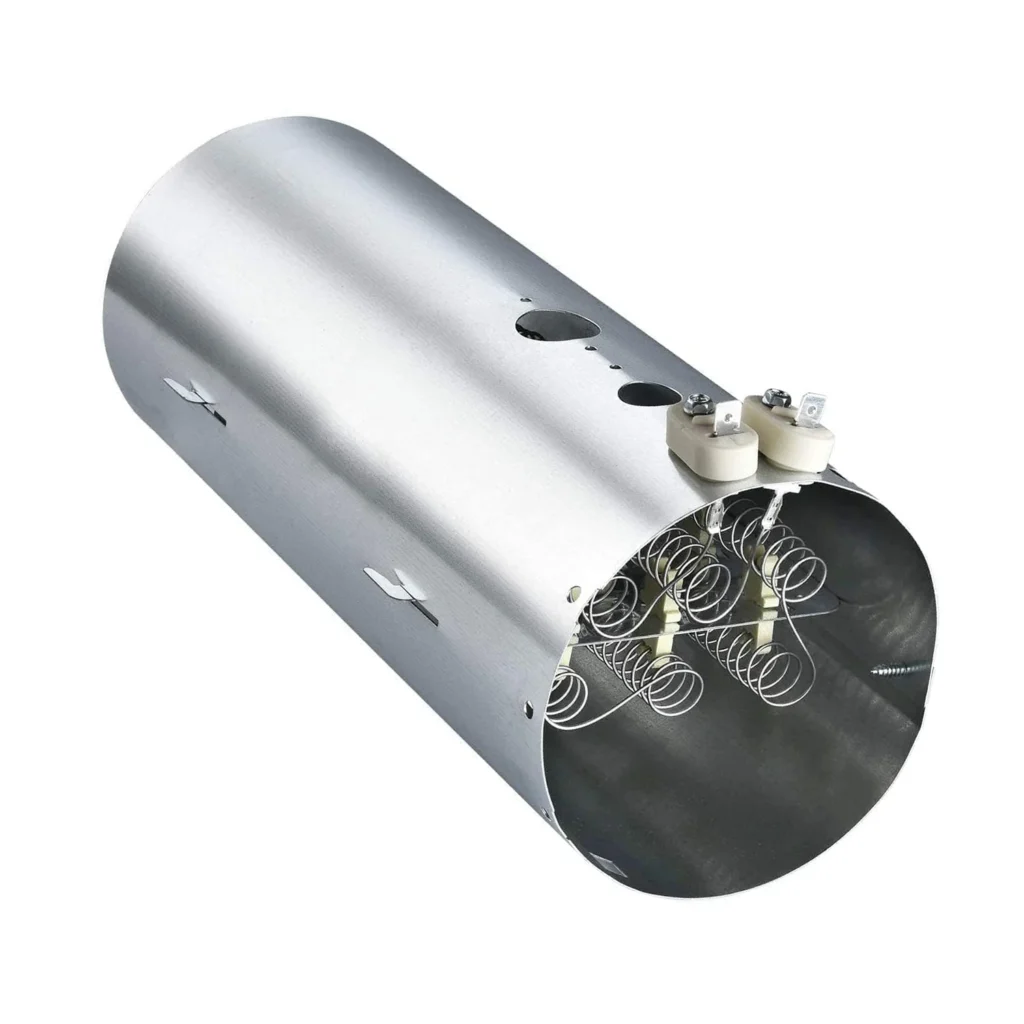
Your Frigidaire dryer's running through cycles but clothes come out cold and damp. Before you haul it to the curb, check the heating element — it's one of the most common failures in electric dryers, and way cheaper to replace than buying new. This hub covers the 137114000 heating element assembly that fits dozens of Frigidaire, Electrolux, Crosley, and Kenmore dryer models.
Is This the Right Part for Your Model?
You'll need your complete model number to verify compatibility. On most Frigidaire dryers, look for a white sticker inside the door opening — either on the frame or just inside the front panel. It'll start with letters like FAQE, GLQE, or LAQE followed by numbers. Cross-reference that against the compatibility list below before ordering.
About This Replacement Heating Element
The 137114000 is the coil assembly that generates heat in your dryer drum. When it fails, your dryer will still tumble clothes and run full cycles, but nothing gets hot. The element itself is a tightly wound coil housed in a metal chamber — over time, the coil breaks from repeated heating and cooling cycles. This part replaces AP4456656, PS2367792, 1531129, and AH2367792 part numbers, so if your old receipt lists any of those, you're looking at the right replacement.
Common Symptoms When This Part Fails
The telltale sign is clothes staying damp after a full cycle. The dryer sounds normal, the drum spins fine, but there's zero heat. Some folks notice their dryer taking twice as long to dry loads before it quits heating entirely. If you've already checked the thermal fuse and it's intact, the heating element is your next suspect.
Compatible Frigidaire Dryer Models
This heating element fits a wide range of Frigidaire electric dryers manufactured between the mid-2000s and early 2010s. Here's a sample of confirmed compatible models — if yours isn't listed, use the model number lookup tool on the product page to verify fit.
What's Included
You're getting the complete heating element assembly — the coil, housing, and mounting bracket. Some versions come with the thermal cutoff fuse pre-installed, but check your specific listing. You won't need the wiring harness since you'll reuse your existing connections.
Installation Overview
Plan on 45 minutes if you're handy with basic tools. You'll need to pull the dryer away from the wall, disconnect power, and remove the lower front panel to access the element housing. The element slides out once you disconnect two wire terminals and remove a couple mounting screws. Reverse the process with the new element, and you're back in business.
Why This Part Fails
Heating elements don't last forever. Every time your dryer heats up and cools down, the metal coil expands and contracts. After thousands of cycles, the coil develops weak spots and eventually snaps. Restricted airflow from clogged lint screens or crushed vent hoses makes the element work harder, shortening its lifespan. Keep your venting clean and you'll get more years out of the replacement.
Verify Your Model Number
Seriously, double-check before you order. The heating element might look identical across different dryer series, but mounting brackets and electrical connections vary. Grab your model number from that door sticker and confirm it's on the compatibility list. Saves you the hassle of returning the wrong part.
Can't find your model?
Enter your model number and we'll confirm the right part.