
GE & Café Refrigerator Inverter Control Board Parts — Models & Compatibility
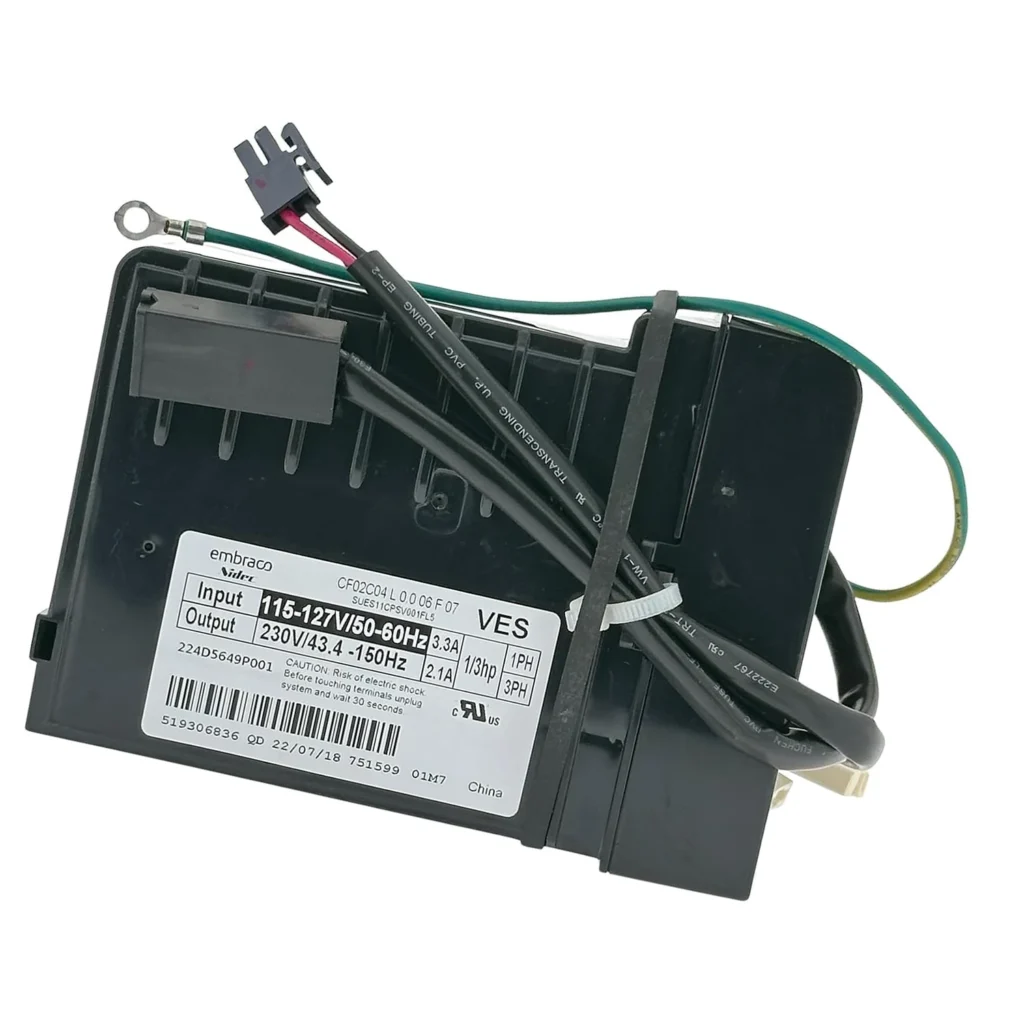
Your GE Café or Monogram refrigerator runs fine for years, then suddenly the compressor cycles erratically or won't start at all. Before you call for service, the inverter control board — the brain that manages compressor speed and energy efficiency — might be the culprit. This hub covers WR55X36435 compatibility across GE, Café, and Monogram French door and side-by-side models.
Is This the Right Part for Your Model?
The inverter control board fits specific CGE, CVE, CXE, CYE, GNE, GYE, PYE, and ZWE series refrigerators manufactured between approximately 2018-2023. You'll find your model number on a sticker inside the fresh food compartment — usually on the left or right wall, or sometimes on the ceiling. Match your complete model number (including letters after the base number) against the compatibility list below.
About This Replacement Part
The WR55X36435 inverter control board replaces AP7176581, PS16660026, and OEM part 224D5649P001. This electronic module controls variable-speed compressor operation in GE's newer inverter-equipped refrigerators, adjusting cooling power based on temperature demand. When it fails, you'll typically see the compressor running constantly without proper cooling, or the unit won't run at all. Unlike older fixed-speed compressors, these inverter systems require this specific board to communicate with the compressor's variable frequency drive. The board mounts inside the machine compartment at the bottom rear of the refrigerator, and replacement involves disconnecting wire harnesses and transferring the thermal sensor if your original board included one.
Compatible Model Series
This inverter control board works across multiple GE premium lines. The CGE series covers counter-depth French door models in stainless steel finishes. CVE models are standard-depth French door configurations available in black slate, stainless, and slate finishes. CXE represents Café-branded French door refrigerators with customizable hardware options. The board also fits select Profile (PYE), Monogram (ZWE), and GE-branded (GNE, GYE) models equipped with inverter compressor technology.
Model Compatibility List
Verify your exact model number before ordering. This part fits:
- CGE Series: CGE29DM5TBS5, CGE29DP2TBS1, CGE29DP3TBD1, CGE29DP4TBW2
- CVE Series: CVE28DM5NBS5, CVE28DM5NCS5, CVE28DM5NS5, CVE28DP2NBS1, CVE28DP2NCS1, CVE28DP2NS1, CVE28DP3NBD1, CVE28DP3NCD1, CVE28DP3ND1, CVE28DP4NBW2, CVE28DP4NCW2, CVE28DP4NW2
- CXE Series (Café): CXE22DM5PBS5, CXE22DP3PBD1, CXE22DP4PBW2
- CYE Series (Café): CYE22TP4MW2
What You're Actually Replacing
The inverter control board is a rectangular PCB assembly roughly 6x4 inches, mounted in a protective housing with multiple wire harness connectors. It receives 120V AC power and converts it to variable DC voltage for the inverter compressor. The board processes temperature sensor inputs from the fresh food and freezer compartments, then adjusts compressor speed from roughly 1,000 to 4,500 RPM. This variable-speed operation is what makes these refrigerators more energy-efficient than older models, but it also means the board handles significant electrical load and generates heat — the two main factors in eventual failure.
Installation Overview
Replacing the inverter control board requires accessing the machine compartment at the refrigerator's lower rear. You'll need to unplug the unit, remove the lower rear access panel, disconnect four to six wire harnesses (depending on model), and unbolt the old board. The new board installs in reverse order, but pay attention to harness routing — any wires touching the compressor or getting pinched will cause problems. Some models include a thermal sensor attached to the compressor that must be transferred to the new board. The entire job typically takes 30-45 minutes if you've done it before, closer to an hour if it's your first time.
Why This Part Fails
Inverter control boards fail primarily from heat stress and power surges. The board sits in the machine compartment where ambient temperature can exceed 100°F during normal operation. Over time, capacitors degrade and solder joints crack from repeated thermal cycling. Power surges from lightning strikes or grid fluctuations can damage the board's input circuitry instantly. You might also see premature failure if the compressor itself is failing — a struggling compressor draws excessive current, overloading the board's output stage. That's why it's worth checking compressor resistance and verifying the start relay is working before assuming the board is bad.
Diagnosing Before You Order
Don't guess — test first. If the compressor won't start, listen carefully at the bottom rear of the refrigerator. You should hear a faint hum or clicking from the inverter board attempting to start the compressor. Nothing at all usually means the board isn't getting power or has completely failed. If you hear clicking but no compressor operation, the board might be sending signals but the compressor or start components are bad. Use a multimeter to verify 120V AC at the board's input connector. Check for error codes in the display panel — some models flash specific codes for inverter failures. No cooling with the compressor running constantly points to a failed board that's stuck in one operating mode.
Pricing & Value
At $319.99, this inverter control board represents about 20-30% of what you'd pay for a service call plus parts from an authorized repair center. Factory-authorized technicians typically charge $450-600 for this repair, including their markup on the part. The board itself is a genuine GE-compatible replacement that meets OEM specifications — not a cheap aftermarket substitute. Given that these refrigerators retail for $2,500-4,500 when new, replacing the control board is almost always more economical than replacing the entire appliance, especially if the unit is less than 10 years old.
Can't find your model?
Enter your model number and we'll confirm the right part.